Category: Tanzu

  • Your First VM and Kubernetes Cluster in VCF Automation — Without Touching the UI

    Your First VM and Kubernetes Cluster in VCF Automation — Without Touching the UI

    If you administer vSphere, you already know how to build a VM. This post shows you how to build the same VM in VMware Cloud Foundation Automation using nothing but a command line — no UI clicks, no cloud template, no prior Kubernetes experience assumed. It takes about less then 10 minutes, and by the end you’ll have a running web server with a load-balanced IP that answers from your browser.

    I’m deliberately keeping this simple. There is a longer, deeper reference post for the full API surface, but this one is the on-ramp: the shortest honest path from “I’ve never used the VCF Automation API” to “I just built something with it.”

    What we’re going to do
    1. Install the CLI and log in to your organization
    2. Create a project (the tenancy boundary for a team)
    3. Create a Supervisor Namespace (where workloads actually live)
    4. Create a VM with cloud-init that installs nginx
    5. Publish it behind a load balancer and browse to it
    6. Build a Kubernetes cluster in the same namespace, and run a workload on it

    Why bother, when the UI works fine?

    Fair question, and I’d give three honest answers.

    Repeatability. A VM you clicked into existence is a VM nobody can rebuild exactly. A VM defined in a YAML file is one you can commit, review, and recreate identically a year later.

    It’s where the platform is going. In VCF 9, the consumption layer is a Kubernetes-style API. The UI is a client of that API, not the other way round. Learning the objects underneath means the UI stops being magic.

    It’s the foundation for automation. Everything you’d want later — GitOps, pipelines, self-service catalogs — is built on these same objects. This is the first rung.

    None of that means you should stop using the UI. I use both. But knowing what’s underneath makes you considerably harder to stump.

    Before you start

    WhatWhere to get it
    VCF CLI (the vcf command)Broadcom Support portal — it replaces the older CCI kubectl plugin
    kubectlAny recent version; the CLI generates a kubeconfig for it
    An API tokenLog into your VCF Automation org portal → your user menu → API Tokens → Generate. Copy it — it’s shown once.
    Org admin rightsNeeded to create projects. If you only have consumer rights, skip to Step 4 and use an existing namespace.

    Everything below is run from PowerShell on Windows. It works identically on Linux and macOS; only the quoting changes.

    Step 1 — Log in

    First, store your token in a variable. Note the quotes — without them PowerShell tries to execute the token as a command, which produces a confusing error.

    $vcfa_token = "your-api-token-here"

    Now create a context. This is the CLI’s word for “a saved connection to an environment.”

    vcf context create org2-ctgw `
      --endpoint https://auto-a.site-a.vcf.lab `
      --type cci `
      --auth-type basic `
      --tenant-name Org2-CTGW `
      --api-token $vcfa_token `
      --insecure-skip-tls-verify

    Substitute your own endpoint and tenant name. The backtick is PowerShell’s line-continuation character — or just put it all on one line. Use --insecure-skip-tls-verify only in a lab; in production supply your CA certificate with --ca-certificate instead.

    VCF CLI context create command output showing successful login and available contexts
    A successful login. Note that the CLI lists every context you now have access to — one for the organization, plus one for each Supervisor Namespace you can reach.

    That output is worth reading carefully, because it explains the whole model. You get an organization context (org2-ctgw) and a namespace context for each namespace you can use (org2-ctgw:org2-ns1-4hm32:default-project).

    The one concept to take away There are two levels. The organization context is where you manage tenancy — projects, namespaces, who gets what. The namespace context is where you build things — VMs, clusters, networks. Almost every “why can’t I see that?” moment is being in the wrong one. If a command returns “the server doesn’t have a resource type”, you’re at the org level asking a workload question.

    Step 2 — Create a project

    A project is the boundary you’d hand to a team. Save this as project.yml:

    apiVersion: project.cci.vmware.com/v1alpha2
    kind: Project
    metadata:
      name: team-phoenix
    spec:
      description: Phoenix dev team
    kubectl --context org2-ctgw create -f project.yml
    # project.project.cci.vmware.com/team-phoenix created
    Use create, not apply This will save you a puzzling ten minutes. kubectl apply stores a tracking annotation on the object, and this API rejects it outright with “Annotation updates are not supported.” Everywhere in this post, use kubectl create.

    Step 3 — Create a namespace

    The project is just a boundary. A Supervisor Namespace is the thing with actual capacity — CPU, memory, storage, a network — where your VMs will live. Think of it as the resource pool plus the network plus the quota, expressed as one object.

    You need four pieces of information, all of which you can read off an existing namespace or get from whoever set up your environment:

    FieldWhat it meansExample
    regionNameWhich region (a vCenter/Supervisor grouping)region-west
    classNameThe T-shirt size defined by your adminsmall
    vpcNameThe NSX VPC providing the networkdefault-region-west
    classConfigOverridesThe zone and storage class, with limitssee below
    apiVersion: infrastructure.cci.vmware.com/v1alpha3
    kind: SupervisorNamespace
    metadata:
      generateName: phoenix-ns-
      namespace: team-phoenix
    spec:
      regionName: region-west
      className: small
      vpcName: default-region-west
      classConfigOverrides:
        storageClasses:
        - name: vsan-default-storage-policy
          limit: 204800Mi
        zones:
        - name: z-wld-a
          cpuLimit: 15000M
          cpuReservation: 0M
          memoryLimit: 15000Mi
          memoryReservation: 0Mi
    kubectl --context org2-ctgw create -f namespace.yml
    kubectl --context org2-ctgw get supervisornamespaces -n team-phoenix

    Wait for STATUS: Created. Then refresh your contexts so the new namespace appears, and switch into it:

    vcf context use org2-ctgw
    kubectl config get-contexts
    kubectl config use-context org2-ctgw:phoenix-ns-kj9g6:team-phoenix
    Two things that catch people here The namespace name is generated with a random suffix (phoenix-ns-kj9g6), so read it from the previous command rather than guessing. And the context name is the full three-part string <org>:<namespace>:<project> — using just the namespace name gives you “no context exists.”

    You can confirm the same thing in the UI, which is a reassuring way to check your work while you’re learning:

    VCF Automation UI showing the newly created namespace phoenix-ns-kj9g6 in project team-phoenix, Active, with CPU, memory and storage quota bars
    The namespace created from the command line, shown in the VCF Automation UI — Active, in the team-phoenix project, with its CPU, memory and storage allocation. The API and the UI are two views of the same object.
    Why the long classConfigOverrides block? When you create a namespace through the portal, it fills these values in for you from the class. Creating one through the API, you have to state them yourself — and the zone entry needs all four CPU and memory fields, not just a name. If you leave them out, the API tells you exactly what’s missing, one field at a time. That’s actually a decent way to learn the object: submit a minimal version and let the error messages guide you.

    Step 4 — Create a VM

    Now the part that will feel familiar. We need three things: a size, an image, and a storage policy. Ask the namespace what it has:

    kubectl get virtualmachineclasses     # the sizes available to you
    kubectl get virtualmachineimages      # images from your content library
    kubectl get clustervirtualmachineimages | Select-String "ubuntu"
    If virtualmachineimages comes back empty, you’re not stuck. That list is empty when no content library is attached to your namespace class. You can still deploy from a cluster-wide image by referencing its vmi- identifier directly, which is what I do below. Getting a content library attached is the better long-term answer — it gives you friendly names instead of hashes — but it isn’t a blocker today.

    Here’s the VM, together with a cloud-init secret that creates a login and installs nginx. Save both in one file:

    apiVersion: v1
    kind: Secret
    metadata:
      name: web01-bootstrap
    stringData:
      user-data: |
        #cloud-config
        users:
        - name: ops
          sudo: ALL=(ALL) NOPASSWD:ALL
          shell: /bin/bash
          ssh_authorized_keys:
          - ssh-ed25519 AAAA...your-key-here
        packages: [nginx]
        runcmd:
        - systemctl enable --now nginx
    ---
    apiVersion: vmoperator.vmware.com/v1alpha5
    kind: VirtualMachine
    metadata:
      name: web01
      labels:
        app: web
    spec:
      className: best-effort-small
      imageName: vmi-5dcfa60c7cc579296
      storageClass: vsan-default-storage-policy
      powerState: PoweredOn
      bootstrap:
        cloudInit:
          rawCloudConfig:
            name: web01-bootstrap
            key: user-data
    kubectl create -f vm.yml
    PowerShell output showing the VirtualMachine manifest and confirmation that the secret and virtual machine were created
    Two objects, one command: the cloud-init secret and the VM itself.

    Watch it come up. The VM will report an IP address once VMware Tools starts reporting:

    kubectl get vm web01
    kubectl get vm web01 -o jsonpath='{.status.network.primaryIP4}'
    # 172.30.0.66

    Notice what you didn’t have to specify: no port group, no IP address, no datastore. The VM picked up an address from the namespace’s default network automatically and landed on storage matching the policy you named. That’s the platform doing the placement work, exactly as it does for a Kubernetes pod.

    Cloud-init only runs on first boot You cannot add a bootstrap section to a VM that already exists. If you forget it, the VM boots fine but has no user account and no way in — you delete and recreate. Decide your bootstrap before you provision.

    Step 5 — Publish it

    A VirtualMachineService puts a load-balanced IP in front of one or more VMs, selected by label. Our VM carries app: web, so the service will find it.

    apiVersion: vmoperator.vmware.com/v1alpha5
    kind: VirtualMachineService
    metadata:
      name: web-lb
    spec:
      type: LoadBalancer
      selector:
        app: web
      ports:
      - name: http
        port: 80
        targetPort: 80
        protocol: TCP
    PowerShell output showing the VirtualMachineService manifest and the service created as type LoadBalancer
    The load balancer service, created. NSX allocates the external address within seconds.
    Reading the external IP kubectl get vmservice prints only name, type and age — the address isn’t in its default columns. Use kubectl get svc instead, or ask for the field directly with -o jsonpath='{.status.loadBalancer.ingress[0].ip}'.

    Step 6 — Confirm it works

    kubectl get svc
    # web-lb   LoadBalancer   172.29.255.24   40.60.0.4   80/TCP   2m31s
    
    kubectl get endpoints
    # web-lb   172.30.0.66:80   2m34s
    
    curl.exe http://40.60.0.4
    PowerShell output showing the service endpoints and a curl request returning the nginx welcome page
    The whole chain proven: external IP 40.60.0.4, backend 172.30.0.66:80, and nginx answering.

    That’s the full path working. The load balancer address is allocated from the NSX VPC, the endpoint is your VM’s own IP, and nginx — installed by cloud-init at first boot — is serving. Nothing in that sequence involved the UI.

    Step 7 — Build a Kubernetes cluster

    Here’s the part that surprises people: a Kubernetes cluster is just another object in the same namespace you’ve been working in. Same context, same kubectl create, same mental model. You describe the cluster you want and the platform builds the nodes.

    You need to know two things first — and both are places where a sensible-looking manifest fails.

    Where the cluster template lives. Clusters are built from a ClusterClass, which is a template your platform team maintains. Crucially, it does not live in your namespace:

    kubectl get clusterclasses
    # NAME                     VARIABLES READY   AGE
    # builtin-generic-v3.1.0   True              164m
    # builtin-generic-v3.2.0   True              164m
    # builtin-generic-v3.3.0   True              164m

    That list is not the whole story. The class you actually want may live in a shared system namespace and won’t appear here at all — you reference it explicitly by name and namespace.

    Which Kubernetes version you can use. Ask the platform rather than guessing:

    kubectl get kubernetesreleases

    You’ll get a long list. Only the rows showing both READY: True and COMPATIBLE: True are usable. Pick one of those.

    Now the cluster itself — one control plane node, one worker, deliberately small:

    apiVersion: cluster.x-k8s.io/v1beta2
    kind: Cluster
    metadata:
      name: phoenix-k8s
    spec:
      clusterNetwork:
        pods:
          cidrBlocks: ["192.168.156.0/20"]
        services:
          cidrBlocks: ["10.96.0.0/12"]
        serviceDomain: cluster.local
      topology:
        classRef:
          name: builtin-generic-v3.6.0
          namespace: vmware-system-vks-public
        version: v1.35.5---vmware.1-vkr.1
        variables:
        - name: vmClass
          value: best-effort-medium
        - name: storageClass
          value: vsan-default-storage-policy
        controlPlane:
          replicas: 1
          metadata:
            annotations:
              run.tanzu.vmware.com/resolve-os-image: os-name=photon, content-library=cl-96cb71ec140d192ad
        workers:
          machineDeployments:
          - class: node-pool
            name: phoenix-k8s-np-1
            replicas: 1
            metadata:
              annotations:
                run.tanzu.vmware.com/resolve-os-image: os-name=photon, content-library=cl-96cb71ec140d192ad
    kubectl create -f cluster.yml
    kubectl get cluster phoenix-k8s -w

    Provisioning takes five to six minutes for this size. PHASE: Provisioned appears early and only means the objects were created — the column to watch is AVAILABLE, which flips to True once the control plane is genuinely up. kubectl get machines gives you the per-node view while you wait.

    Three things in that manifest are not obvious 1. classRef needs a namespace. The ClusterClass lives in a shared system namespace, and without it you’ll get a “not found” even though the class plainly exists.
    2. The version string is the long form — v1.35.5---vmware.1-vkr.1, with three dashes, not the +vmware.1 form shown elsewhere.
    3. The resolve-os-image annotation is often required. If your environment has the same node image registered in more than one content library — common in labs that have been upgraded a few times — the resolver refuses to guess and fails with “Multiple OSImages resolved.” Adding content-library= narrows it to one. You’ll find the library ID in your Content Libraries list.
    The shortcut worth knowing Rather than assembling this by hand, start a cluster creation in the VCF Automation UI and look at the YAML it generates. It will show you the right ClusterClass namespace, the right version format, and any annotations your environment needs — all correct for your specific build. Copy that, then edit it. This is far quicker than reverse-engineering from error messages, and it’s how I arrived at the manifest above.

    Step 8 — Get onto the cluster and run something

    Once AVAILABLE is True, download the cluster’s kubeconfig from the VCF Automation UI (the cluster’s detail page offers it) and point kubectl at it:

    kubectl --kubeconfig .\phoenix-k8s.yaml get nodes
    # NAME                        STATUS   ROLES           AGE   VERSION
    # phoenix-k8s-...             Ready    control-plane   12m   v1.35.5+vmware.1
    # phoenix-k8s-...-np-1-...    Ready    <none>          9m    v1.35.5+vmware.1

    You’re now a cluster administrator on an ordinary, conformant Kubernetes cluster. Everything you know about Kubernetes applies from here.

    With one important exception, which is worth meeting deliberately rather than by accident.

    Your first deployment will probably be rejected — and that’s correct

    Try the obvious thing:

    kubectl --kubeconfig .\phoenix-k8s.yaml create deployment web --image=nginx --replicas=2

    The deployment is created, but no pods ever appear. Looking at the ReplicaSet tells you why:

    pods "web-..." is forbidden: violates PodSecurity "restricted:latest":
      allowPrivilegeEscalation != false
      unrestricted capabilities (must set capabilities.drop=["ALL"])
      runAsNonRoot != true
      seccompProfile (must set seccompProfile.type to "RuntimeDefault")

    This is Pod Security Admission enforcing the restricted profile, and it’s switched on by default. A stock container image that runs as root is refused at creation — not warned about, refused. For a vSphere admin used to “deploy first, harden later,” this is a genuine change of habit, and a welcome one: the cluster will not run a privileged workload just because you forgot.

    The fix is to declare what the workload actually needs. Each field below answers one of the four complaints, and the image is swapped for a non-root variant that listens on 8080 rather than binding port 80 as root:

    apiVersion: apps/v1
    kind: Deployment
    metadata:
      name: web
    spec:
      replicas: 2
      selector:
        matchLabels:
          app: web
      template:
        metadata:
          labels:
            app: web
        spec:
          securityContext:
            runAsNonRoot: true
            seccompProfile:
              type: RuntimeDefault
          containers:
          - name: nginx
            image: nginxinc/nginx-unprivileged:stable
            ports:
            - containerPort: 8080
            securityContext:
              allowPrivilegeEscalation: false
              capabilities:
                drop: ["ALL"]
    kubectl --kubeconfig .\phoenix-k8s.yaml apply -f web.yml
    kubectl --kubeconfig .\phoenix-k8s.yaml expose deployment web --port=80 --target-port=8080 --type=LoadBalancer
    kubectl --kubeconfig .\phoenix-k8s.yaml get svc web

    The external IP is allocated by the same NSX load balancer that served your VM in Step 5 — usually within seconds. Confirm there are backends behind it:

    kubectl --kubeconfig .\phoenix-k8s.yaml get endpointslices -l kubernetes.io/service-name=web
    # ADDRESSTYPE   PORTS   ENDPOINTS
    # IPv4          8080    192.168.147.3,192.168.145.12
    Note that kubectl apply works here. The “use create, not apply” rule applies to the VCF Automation API only. Inside a VKS cluster you’re talking to a normal Kubernetes API server, and all your usual habits — apply, Helm, Kustomize — work exactly as expected.

    The five things that will trip you up

    These cost me time so they don’t have to cost you any.

    1. Use kubectl create, never apply. The API rejects the annotation that apply depends on.
    2. Context names are three parts. <org>:<namespace>:<project>, not just the namespace.
    3. Know which level you’re at. “The server doesn’t have a resource type” almost always means you’re at the org context asking a workload question, or vice versa.
    4. Tokens expire mid-session. A sudden Unauthorized, or a strange complaint about downloading the OpenAPI schema, usually just means your session lapsed. vcf context use <org> re-authenticates.
    5. Check the API version against your build. Published examples lag. On the environment used here, namespaces are served at v1alpha3 and VMs at v1alpha5. The most reliable way to learn the current shape of any object is to dump a working one: kubectl get vm <name> -o yaml. Copy the structure, change the values.

    That last one is worth internalising as a general habit. Rather than hunting for documentation that matches your exact release, clone something that already works in your own environment. It is always correct, by definition.

    Where to go next

    You now have the pattern for everything else on this platform. The same two-level model, the same create workflow, and the same “clone a working object” trick apply to Kubernetes clusters, persistent volumes, NSX security policies, and micro-segmentation rules — all of which are just more objects in the same API.

    A few natural next steps, in the order I’d take them:

    • Delete and rebuild what you just made. Change the VM size in the YAML, recreate, and watch it come back identically. That’s the payoff of declarative infrastructure, and it’s more convincing when you do it than when you read about it.
    • Scale the cluster. Change replicas on the worker pool, re-apply, and watch nodes roll in. Then bump version to a newer compatible release and watch a rolling upgrade — that’s a one-line change doing something that used to be a project.
    • Write a security policy as YAML and watch NSX distributed firewall rules appear.
    • Put it all in Git. Once your infrastructure is files, a GitOps engine can reconcile it. That’s the subject of my next post.

    If you’re a vSphere admin who has been eyeing all this with mild suspicion, I’d encourage you to run through the steps above once in a lab. The concepts are less foreign than the vocabulary suggests — a namespace is a resource pool with a network and a quota, a VM is still a VM, and a load balancer service is the thing you’d have raised a ticket for. The difference is that now it’s a file you own.

    Questions or something that didn’t work in your environment? Leave a comment — I read all of them, and environment-specific quirks are exactly what makes these posts better.
  • Memory Tiering Meets VKS: Denser Kubernetes Without Touching a Single Manifest

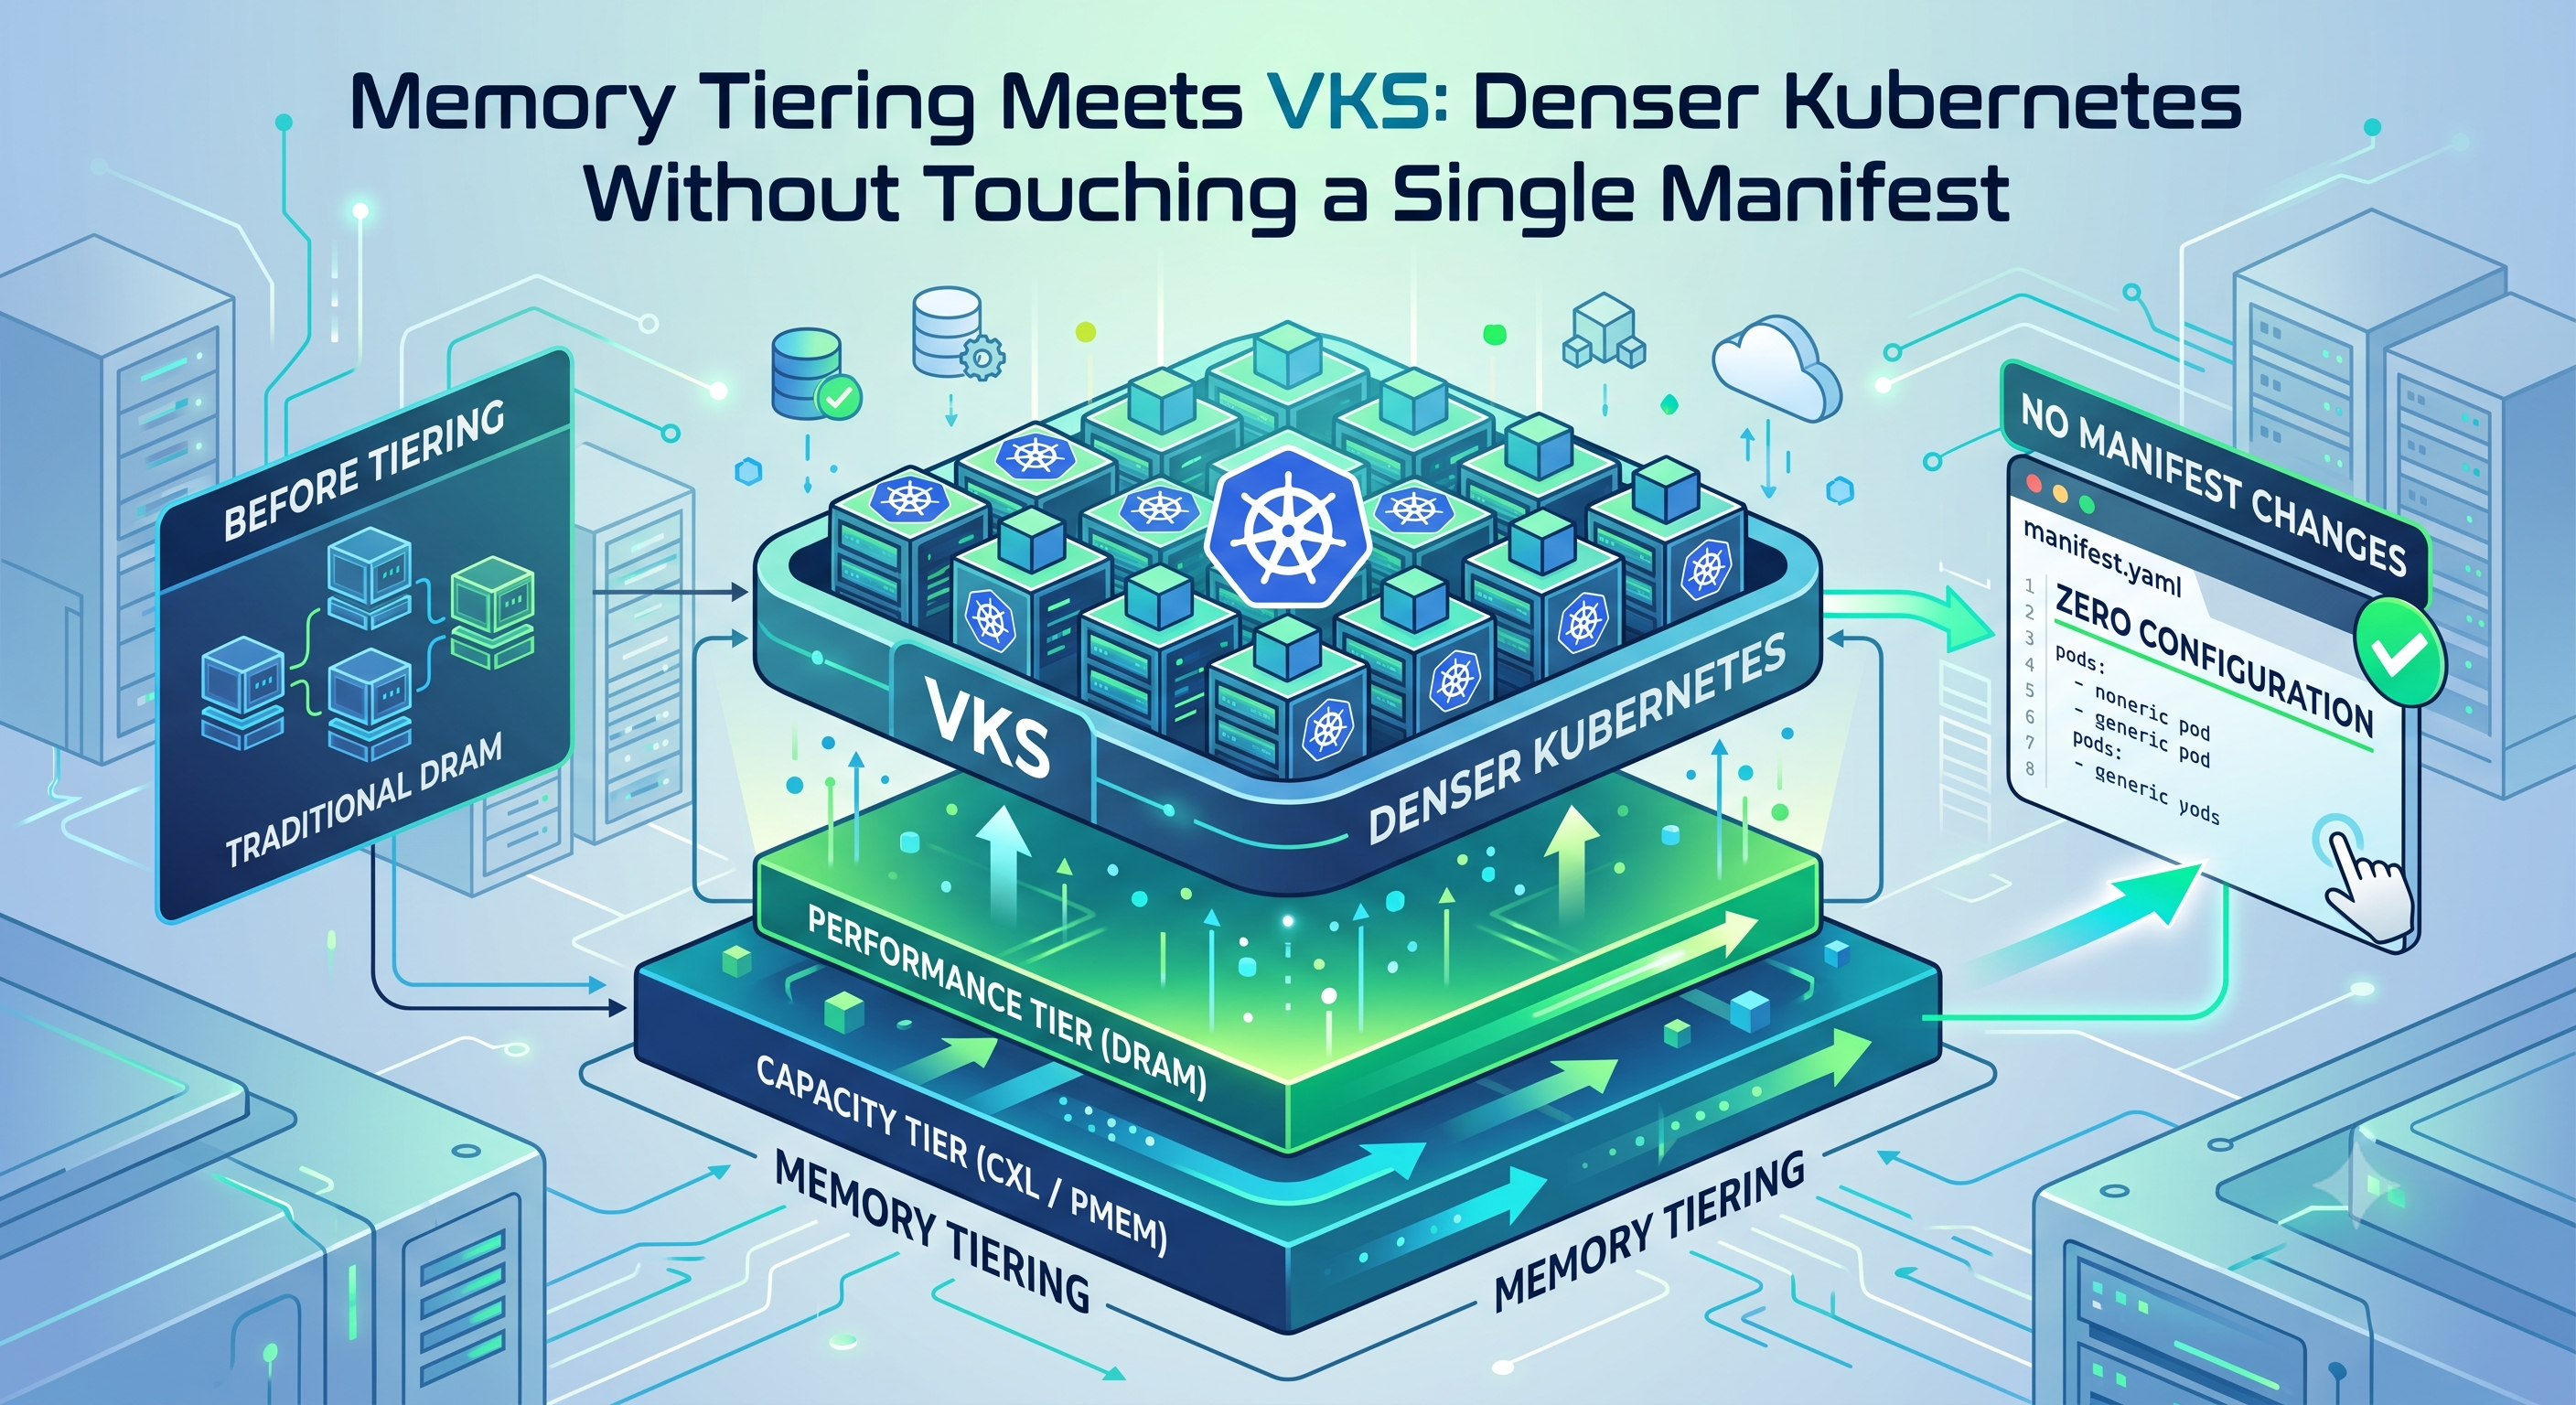
    Memory Tiering Meets VKS: Denser Kubernetes Without Touching a Single Manifest

    Every so often a platform capability arrives that your workloads benefit from without a single line of configuration. Memory Tiering under vSphere Kubernetes Service (VKS) is exactly that: enable it once at the cluster level, and every Kubernetes node — and every pod on it — inherits smarter memory economics automatically. No drivers, no manifest changes, no separate policy for containers. Broadcom has now published testing that confirms it works for VKS just as well as it does for VMs. Here is what the feature actually does, why the Kubernetes inheritance is the interesting part, and how to put it to work.

    TL;DR for the busy architect:
    • Memory Tiering lets an ESXi host combine DRAM with an NVMe-backed second tier into one memory pool — hot pages stay in DRAM, cold pages move to NVMe, and pages promote back automatically when touched.
    • Because VKS worker nodes are VMs on that same hypervisor, Kubernetes inherits the capability transparently — nothing above the hypervisor needs to know it exists.
    • The payoff: more worker nodes per host, a smaller DRAM footprint for your Kubernetes estate, and one capacity model that covers VMs and containers together.
    • Broadcom’s validation shows VKS workloads on tiered hosts performing in line with VM workloads — so the sizing guidance you already use for VMs extends to Kubernetes with confidence.
    • It is a workload-class decision, not a global switch — the “where it fits” section below matters as much as the feature.

    The quiet memory problem every Kubernetes platform team knows

    Kubernetes schedules pods on requests, and requests are set defensively. The app team asked for 4 GiB “to be safe,” the Helm default was generous, and nobody wants to own the OOMKill. Multiply that across hundreds of pods and every production cluster carries a wide gap between the memory workloads reserve and the memory they actually touch. Platform teams fight this with rightsizing dashboards and VPA recommendations — worthy work that never quite ends, because it treats the symptom: the reservation. The reserved-but-cold memory itself still sits in expensive DRAM.

    What if the infrastructure could simply handle cold memory differently from hot memory — without Kubernetes, the node OS, or the application having to participate?

    What Memory Tiering actually does

    Memory Tiering in VCF 9 lets an ESXi host present a single memory pool built from two tiers: fast DRAM and an NVMe device configured as a memory extension. The hypervisor watches page access patterns and manages placement automatically:

    • Hot pages stay in DRAM. Actively-touched memory lives where latency matters.
    • Cool pages move to the NVMe tier. Reserved-but-idle memory stops occupying your most expensive resource.
    • Touched pages promote back. If a cooled page becomes active again, it returns to DRAM — the process is continuous and automatic.

    The crucial design point is where this happens: below the guest OS, below the Kubernetes node VM, below the container runtime. The workload sees one contiguous memory space. There is no driver to install, no kernel parameter to tune, and no application change required. And the economics follow naturally — enterprise NVMe capacity costs a fraction of DRAM per gigabyte, and NVMe bays are plentiful where DIMM slots are finite.

    The VKS part: inheritance for free

    Here is the architectural elegance that makes this a Kubernetes story. A VKS worker node is a VM running on the same vSphere infrastructure as everything else. So when you enable Memory Tiering on a VCF cluster, your Kubernetes nodes inherit it the moment they land there — exactly as your VMs do. The Kubernetes scheduler keeps making its decisions against each node’s advertised capacity, exactly as before. ESXi, underneath, manages page temperature. Kubernetes manages reservations; the hypervisor manages reality. Each layer does the job it is best at, and neither needs to know about the other.

    Contrast that with what this would take anywhere else: per-node OS tuning, kernel-version dependencies, careful coordination with the container runtime, and a Kubernetes-specific memory policy to maintain forever. Under VKS it is one setting, applied at the infrastructure layer, covering your entire fleet — VMs and clusters alike.

    The fair question has always been whether the container layer changes the story — Kubernetes workloads are dense, churny, and allocation-happy. Broadcom put exactly that question to the test in their July 2026 post Memory Tiering for VMs and VKS, running database benchmarks on tiered hosts with half the DRAM of the baseline. The finding that matters: VKS workloads performed in line with the equivalent VM workloads, staying close to the full-DRAM baseline within the published sizing guidance. The Kubernetes layer neither breaks nor degrades the feature. Their numbers and test parameters are in the post, with deeper sizing detail in the Memory Tiering performance whitepaper.

    The picture

    K8s node on fixed memory VKS worker node (VM on tiered host) All memory in DRAM, hot or cold Hot working set actually touched Requested but cold occupying premium DRAM anyway Only lever: chase rightsizing forever DRAM tier — hot pages Hot working sets kept in DRAM by ESXi NVMe tier — cold pages Cold / rarely-touched pages promoted back to DRAM on access Lever: infrastructure absorbs the slack same K8s, smarter physics

    How it helps: four practical wins

    1. More worker nodes per host, without buying DRAM. Memory — not CPU — is the binding constraint on most Kubernetes host density. Tiering raises the addressable memory per host using NVMe capacity, which means more (or larger) worker VMs on the same hardware. Your cold-page-rich container estate is precisely the workload profile this was built for: hundreds of defensively-sized pods generate exactly the reserved-but-idle memory that tiers gracefully.

    2. A smaller DRAM footprint for the same Kubernetes estate. Flip the same coin: instead of packing more onto big hosts, run the estate you have on hosts with less DRAM. That matters most where DIMM slots are the constraint — edge sites, dense chassis, or refresh cycles where high-capacity DIMMs dominate the bill of materials. Because VCF licensing is per-core, capacity gained through memory density adds nothing to the software line — a point worth one sentence in any business case, even a feature-focused one.

    3. One capacity model for VMs and containers. This is the quietly valuable one for platform teams. Broadcom’s validation means the sizing and tiering guidance you use for VM workloads extends to VKS workloads — one set of recommendations, one configuration, one capacity plan for a mixed fleet. No Kubernetes-specific memory policies to author, document, and maintain alongside your VM standards.

    4. Zero change to the things you least want to touch. No application code, no container images, no Kubernetes manifests, no node OS tuning. For a platform team, features that require app-team cooperation move at the speed of your slowest app team; features that live below the stack move at the speed of a maintenance window. This one lives below the stack.

    Where it fits — and where it doesn’t

    An honest feature guide names the boundaries. Memory Tiering is a workload-class decision:

    1. Hot working sets don’t tier. The benefit comes from cold pages. In-memory databases, Redis, Kafka page cache, JVM heaps under sustained load — workloads that touch most of what they allocate — keep their pages in DRAM, and tiering buys little on those nodes. Plan node pools accordingly rather than expecting uniform gains everywhere.
    2. Latency-critical pods deserve DRAM guarantees. A page served from NVMe is fast by storage standards and slow by memory standards. Keep tail-latency-sensitive services on untiered or conservatively tiered hosts, and steer them there with the taints and node selectors you already use — your existing Kubernetes scheduling machinery is exactly the right control surface.
    3. Respect the published guardrail. The official guidance keeps active memory comfortably within DRAM capacity — the working set, not the addressable total, is your design boundary. Start with conservative tier ratios, observe real page-temperature behavior, then extend.
    4. It complements rightsizing; it doesn’t replace it. Tiering does not change what the Kubernetes scheduler sees — which is the point — but that also means inflated requests still strand schedulable capacity. Keep the rightsizing hygiene; let tiering absorb what hygiene can’t reach.

    A practical adoption path

    Step Action Output
    1Baseline active vs. consumed memory across VKS clusters in VCF OperationsYour cold-memory opportunity, quantified
    2Classify node pools: tiering-friendly (stateless services, batch, CI, dev/test) vs. DRAM-guaranteed (data services, latency-critical)A node-pool map, enforced with taints and labels
    3Enable tiering on one tiering-friendly host group at a conservative ratioReal page-temperature data from your workloads
    4Validate application SLOs and node stability through a full business cycleGo/no-go evidence per workload class
    5Extend host group by host group, re-baselining as you goA fleet-wide rollout grounded in your own data

    The bottom line

    The strongest features are the ones your workloads don’t have to know about. Memory Tiering under VKS is a hypervisor capability that Kubernetes inherits simply by running where it runs — hot pages in DRAM, cold pages on NVMe, everything transparent above the hypervisor line. For platform teams it means denser hosts or leaner DRAM configurations, one capacity model across VMs and containers, and not a single manifest changed. VKS already removes the operational overhead of running Kubernetes beside your VM estate; Memory Tiering quietly removes a good part of the DRAM overhead of running it at scale.

    Start with the baseline in VCF Operations — the gap between active and consumed memory on your clusters is the feature’s opportunity in your environment, measured. Everything after that is a controlled rollout.

    Are you running Memory Tiering under VKS yet — or planning to? I would love to hear which workload classes you are tiering first, and what your active-vs-consumed gap looks like in practice. And if there is interest, a tiering-readiness calculator in the style of my other VCF tools might be the natural follow-up.

  • From Org VDC to Namespace: The Architect’s Field Guide to VCD → VCFA Migration

    From Org VDC to Namespace: The Architect’s Field Guide to VCD → VCFA Migration

    In July 2025 I wrote about navigating the shift from VMware Cloud Director to VCF Automation — what stays familiar, what changes, and why VCFA is not a rebranding exercise. That post answered the “what.” With VCF 9.1 now generally available and shipping an official VCD-to-VCFA Migration Tool, it is time to answer the harder question: how do you actually plan this migration?

    This guide is written for cloud service providers and enterprise architects running Cloud Director today. It covers the two migration paths, a full construct-by-construct mapping, the networking decisions that will make or break your timeline, and a readiness checklist you can take into your planning workshop.

    TL;DR for the busy architect:
    • VCFA 9.1 ships an official in-place Migration Tool for VCD — plan the migration from the official documentation, and treat this guide as the design layer on top of it.
    • This is a resource-model migration, not an upgrade: Org VDCs become Supervisor namespaces inside NSX VPCs, and that changes networking, security, and automation design.
    • Most providers will run a hybrid strategy — Migration Tool for standard tenants, side-by-side rebuild for complex ones, retirement for the long tail.
    • The three timeline killers are networking disposition (extend vs. re-IP), automation porting (especially legacy XML API callers), and billing continuity against VCF Operations.
    • Do the inventory and tenant classification now; both cost nothing and inform every downstream decision.
    Scope note: This post deliberately stays at the architecture and planning layer — construct mapping, network design, tenant strategy. For the Migration Tool itself, its step-by-step procedures, and version prerequisites, always work from the official VCFA 9.1 migration documentation. Think of this guide as the homework you do before opening the runbook, so you arrive with a design instead of a question mark.

    Why this is a migration, not an upgrade

    Let’s be honest about what Cloud Director got right, because it explains why this transition deserves respect. VCD gave providers a battle-tested multi-tenancy model, a mature API that an entire ecosystem built against, and constructs — Org VDCs, Edge Gateways, vApps, catalogs — that thousands of operators know by muscle memory. Fifteen years of production hardening is not something you wave away with a version number.

    VCF Automation keeps the best of that lineage — the provider-facing Tenant Manager is built on the VCD codebase, so the provider experience will feel familiar — but the underlying resource model is fundamentally different. VCFA delivers infrastructure through vSphere Supervisor namespaces and NSX VPCs, not through Org VDCs carved out of Provider VDCs. That means workloads, networking, and tenancy boundaries all land on new primitives. Your VMs move; your mental model migrates.

    The payoff for making that jump is real: a single platform that serves VMs, Kubernetes (VKS), and AI workloads to the same tenants under the same quota and governance model, with self-service networking (vDefend firewalling, Avi load balancing, tenant-managed NAT/VPN) that VCD needed extensions and bolt-ons to approximate. VCF 9.1’s tenancy improvements are explicitly aimed at providers running hundreds of isolated tenants on shared infrastructure.

    The two migration paths

    There are exactly two credible strategies, and most providers will end up using both across their estate.

    Path 1: In-place migration with the Migration Tool

    New in VCFA 9.1, the Migration Tool performs an in-place migration of VCD workloads and configuration into VCF Automation. The critical planning facts:

    • Your VCD environment must first be updated to the specific VCD version the tool requires — verify the current prerequisite in the official migration documentation before scheduling anything.
    • The target is a deployed and configured VCF 9.1 landing zone — VCFA does not exist as a standalone product, so the fleet (SDDC Manager, VCF Operations, NSX, Supervisor-enabled workload domains) must be in place first.
    • “In-place” refers to the workloads: the goal is migrating tenants and their VMs with minimal downtime, not a forklift.

    Path 2: Side-by-side build and move

    Stand up VCF 9.1 with VCFA greenfield, design your organizations and regions natively, and move workloads tenant by tenant. VM import into VCFA namespaces is a documented pattern — including VLAN-backed connectivity options (Distributed VLAN Connections attached to a tenant’s Transit Gateway) that let imported VMs keep their existing L2 networks during transition.

    Reality check: Side-by-side costs more hardware and more calendar time, but it converts migration risk into design freedom — you are not importing fifteen years of VCD configuration decisions into a brand-new platform. In-place is faster and preserves tenant continuity, but you inherit your own legacy. Neither answer is universally right; the decision framework below is where most workshops should start.

    Construct mapping: VCD to VCFA

    First, the picture. The left stack is what your operations team knows by muscle memory; the right stack is where each piece lands:

    VMware Cloud Director VCF Automation 9.1 Organization tenancy boundary Organization All-Apps or VM-Apps Provider VDC capacity pool Region mapped to vSphere Supervisors Org VDC allocation models Region quota + Namespaces VM classes · storage classes · VPC Edge Gateway (T1) provider-managed edge Transit Gateway / VPC GW tenant self-service NAT · VPN · FW Provider Gateway (T0) north-south uplink External Connection multiple per org in 9.1 IP Spaces public IP management External IP Blocks multi-CIDR · Infoblox IPAM Catalogs / vApp Templates tenant image library Content Libraries bound per namespace Container Service Extension bolt-on Kubernetes VKS (native) same quota & tenancy model

    Now the detail. This is the table to keep open during every design session. “Closest equivalent” does not mean “identical behavior” — read the notes.

    VMware Cloud Director VCF Automation 9.1 What actually changes
    Organization Organization (All-Apps or VM-Apps) Concept survives intact. New decision: All-Apps orgs (Supervisor-backed, VMs + containers) vs. VM-Apps orgs (VM-only). Choose per tenant based on their roadmap — this is hard to change later.
    Provider VDC Region (mapped to vSphere Supervisors) Regions map VCFA to Supervisors. 9.1 adds multi-Supervisor region quotas, so one tenant’s quota can span Supervisors within a region.
    Org VDC Region quota + namespaces The biggest conceptual shift. Capacity is granted as quota against a region; tenants consume it by creating namespaces (Supervisor namespaces with storage classes, VM classes, and an NSX VPC).
    Org VDC network VPC subnet Routed/isolated Org VDC networks become subnets inside the tenant’s NSX VPC. NAT’d topologies map naturally; direct-connect topologies need the VLAN extension patterns.
    Edge Gateway (T1) Transit Gateway / VPC gateway Tenants can create multiple NSX Transit Gateways and self-manage NAT, IPsec VPN, and vDefend Gateway Firewall on them — genuinely more self-service than VCD Edge management.
    Provider Gateway (T0) External Connection Renamed and expanded: 9.1 supports multiple external connections per organization for split egress paths.
    IP Spaces External IP Blocks Renamed in 9.1, now with multiple CIDRs per block, include/exclude ranges, Infoblox external IPAM integration, and the option to hide block contents from consuming tenants.
    NSX DFW via VCD vDefend DFW + Gateway Firewall, delegated 9.1 brings vDefend firewalling natively into VCFA with delegation to org admins, out-of-the-box security profiles for VPCs, and RBAC-labeled dynamic security groups. Policy will be rebuilt, not translated — plan a rule rationalization exercise.
    Avi / NSX ALB integration Native self-service Avi Full self-service load balancing with provider-set quotas (service engine and application limits) for both All-Apps and VM-Apps orgs.
    Catalogs Content Libraries Templates and media move to vSphere content libraries surfaced through VCFA. Plan a template hygiene pass — do not migrate a decade of orphaned vApp templates.
    vApp No direct equivalent Multi-VM vApps with fencing, start-order, and lease semantics do not map 1:1. Grouping lands on namespaces and deployments; orchestration behavior must be re-expressed in templates and automation. Validate per tenant during the classification workshop.
    Container Service Extension (CSE) VKS (native) A clean win: bolt-on Kubernetes becomes first-class vSphere Kubernetes Service under the same tenancy and quota model.
    Chargeback / VCD tenant metering VCF Operations Metering, capacity, and logs consolidate into VCF Operations. Validate your billing pipeline against the new data sources early — this is a common late surprise.

    Networking: where the timeline is won or lost

    Everything else in this migration is bookkeeping compared to networking. Three decisions dominate:

    1. VPC-native or VLAN-extended? The clean end state is tenants inside NSX VPCs. But brownfield tenants have VMs on VLAN-backed networks with hardcoded IPs, external firewall rules, and neighboring physical systems. VCFA supports Distributed VLAN Connections and VLAN extension subnets precisely for this — imported VMs keep their L2 while the tenant’s Transit Gateway provides the routed path. Decide per tenant which networks extend and which re-IP into VPC subnets, and record it in your migration runbook.

    For a VLAN-extended tenant, the provider-side sequence looks like this in practice:

    1. Deploy the VNA cluster in NSX. In the VCF 9.1 networking model, Virtual Network Appliances take over the role Edge Nodes played — the tenant’s Distributed Transit Gateway (DTGW) needs them in place before any VLAN-backed connectivity works.
    2. Create a shared Distributed VLAN Connection (VLAN-backed) that the DTGW uses as its uplink path. This is provider-scoped plumbing, created once.
    3. Create a dedicated Distributed VLAN Connection per legacy subnet, using the exact VLAN ID of the existing portgroup the source VMs sit on. This is what preserves L2 adjacency for the imported workloads.
    4. Configure the tenant’s region network connectivity to use the Distributed VLAN Connection option, attaching the DTGW to the shared connection, then assign the dedicated per-subnet connection to the organization (Organization > Networking > Connections).
    5. Import the VMs into the tenant’s namespace. The VMs keep their IPs and VLAN; north-south routing and firewalling now flow through the tenant’s self-managed Transit Gateway.
    Design consequence: every VLAN you extend is technical debt you are choosing to carry into the new platform. That is often the right call — re-IP on the tenant’s schedule, not yours — but cap it. Set a policy up front: VLAN extension is a transition state with an owner and an expiry, not a destination.

    2. IP addressing continuity. Map every VCD IP Space to an External IP Block before moving anything. The 9.1 additions (multiple CIDRs, exclusion ranges, Infoblox integration) make it possible to mirror your existing allocations exactly — use that to keep tenant SNAT/VIP addresses stable so their downstream firewall rules and DNS survive the move.

    3. Security policy rebuild. Treat the vDefend transition as an opportunity, not a chore. Export and rationalize existing DFW rule sets, then rebuild them as delegated vDefend policy with dynamic groups. If you are automating this (and at provider scale, you should be), the VCFA cloud template path with Cloud.SecurityGroup resources lets you express tenant micro-segmentation as code from day one — a topic I will cover in depth in a follow-up post.

    Under the hood: what a tenant actually consumes now

    In VCD, a tenant consumed an Org VDC — an opaque slice of a Provider VDC with allocation-model semantics that only VCD understood. In VCFA, the consumption unit is a Supervisor namespace, and it is worth being precise about what that bundle contains, because it is what your migrated VMs land inside:

    • VM classes — t-shirt-sized CPU/memory shapes the provider curates and the tenant selects from (the successor to VCD sizing policies).
    • Storage classes — vSphere storage policies (vSAN ESA policies included) surfaced as Kubernetes storage classes; this is how storage tiering reaches the tenant.
    • An NSX VPC — the tenant’s private routing domain, with subnets, SNAT, and the Transit Gateway attachment.
    • Content library bindings — the curated image catalog (your old VCD catalogs, post-hygiene).
    • Quota enforcement — counted against the organization’s region quota, which in 9.1 can span multiple Supervisors.

    The practical consequence: a “VM” in VCFA is a declarative object served by the VM Service, not a row in the VCD database. The same VM a tenant deploys through the VCFA catalog can be expressed — and lifecycle-managed — as YAML against the namespace:

    apiVersion: vmoperator.vmware.com/v1alpha3
    kind: VirtualMachine
    metadata:
      name: app-vm-01
      namespace: tenant-a-prod        # the Supervisor namespace
    spec:
      className: guaranteed-medium     # provider-curated VM class
      imageName: ubuntu-22.04-lts      # from the bound content library
      storageClass: vsan-esa-gold      # vSphere storage policy
      network:
        interfaces:
          - name: eth0                 # lands on a VPC subnet
    

    Why this matters for migration planning: VMs, VKS clusters, and (in All-Apps orgs) AI workloads are all served through the same namespace primitive. When you classify a tenant as All-Apps, you are not enabling a feature flag — you are placing them on a consumption plane where their VCD-era VMs and their future Kubernetes estate share quota, networking, and governance. That is the architectural payoff that justifies the migration effort, and it is why tenant classification (checklist item 3) deserves a real workshop rather than a default.

    What your tenants will notice

    Your migration communication plan should be built around this table — it is the difference between tenants experiencing an upgrade and tenants filing tickets:

    Tenant task In VCD In VCFA 9.1 Tenant impact
    Deploy a VMvApp wizard from catalog templateCatalog request or cloud template deployment into a namespaceRetraining needed — vApp semantics (fencing, start order, leases) are gone; deployments are the new grouping unit
    Create a networkOrg VDC network via Edge Gateway (often provider-assisted)Self-service VPC subnet creationGenuine upgrade — less waiting on the provider
    Firewall a workloadEdge/DFW rules through VCD proxy, provider guardrails informalDelegated vDefend policy with dynamic groups, provider guardrails enforcedUpgrade, but rules look different — walk tenants through the rebuild
    Publish a serviceEdge NAT + manual LB or bolt-on ALBSelf-service NAT on Transit Gateway + native Avi LB within quotaUpgrade — full self-service within provider limits
    Get KubernetesCSE (if the provider deployed it)VKS cluster from the same portal, same quotaMajor upgrade and the headline of your tenant comms
    Automate deploymentsVCD API scripting, task pollingDeclarative YAML / cloud templates / Supervisor APITheir scripts break; give them a porting guide and examples

    The API transition: where your automation goes

    If you run a service provider practice, your VCD automation — onboarding pipelines, billing extracts, tenant portals — is the part of this migration nobody budgets properly. The mapping:

    Automation surface (VCD) VCFA 9.1 equivalent Porting effort
    Legacy API (/api, XML) None — end of the line Anything still on the XML API gets rewritten, full stop. If you have not inventoried these callers, start there.
    CloudAPI (/cloudapi/1.0.0, JSON) Tenant Manager APIs (VCD-derived) Low-to-moderate for provider-side operations — Tenant Manager inherits the VCD codebase, so org/quota/network provisioning calls will feel structurally familiar. Validate endpoint-by-endpoint; familiar is not identical.
    Tenant-side consumption automation Supervisor Kubernetes APIs + VCFA cloud templates Moderate — but a genuine upgrade. Declarative YAML against the namespace replaces imperative task-polling against VCD, and cloud templates give tenants versionable, reviewable infrastructure definitions.
    Blocking tasks / extensibility framework Blocking tasks on Tenant Manager workflows + VCFA extensibility Better than feared: blocking tasks carry over conceptually in VCFA, tied to provider (Tenant Manager) workflows — your CMDB and metadata-tagging hooks have a landing spot. Tenant-facing UI plugins and custom extensions still need rebuilding; map each to carry-over, rebuild, or retire (checklist item 8).
    Terraform provider for VCD Terraform/IaC against VCFA + Supervisor Moderate — state files do not transfer between providers; plan a re-import or parallel-manage strategy per tenant.

    One concrete example of the tenant-side upgrade. In VCD, giving a tenant firewall self-service meant DFW sections scoped through the VCD proxy and a lot of provider hand-holding. In VCFA, security intent lives directly in the cloud template alongside the workload it protects:

    resources:
      web_sg:
        type: Cloud.SecurityGroup
        properties:
          name: web-tier-sg
          securityGroupType: new       # provisions the group at deploy time
      web_vm:
        type: Cloud.vSphere.Machine
        properties:
          image: ubuntu-22.04-lts
          flavor: guaranteed-medium
          networks:
            - network: '${resource.vpc_net.id}'
              securityGroups:
                - '${resource.web_sg.id}'   # micro-seg attached as code
    

    The deployment provisions the security group, attaches the workload, and — with 9.1’s delegated vDefend model — keeps the whole thing inside guardrails the provider defines once. Tenant micro-segmentation becomes a code review, not a ticket queue. This deserves its own deep dive, and it will get one in the follow-up post.

    Migration readiness checklist

    # Item Why it gates the migration
    1VCF 9.1 landing zone deployed (fleet, NSX, Supervisor-enabled domains)VCFA has no standalone mode; the platform must exist before tenants can land. Size for VCFA’s appliance footprint (24 vCPU) plus VCF Management Services.
    2VCD inventory and version auditThe Migration Tool requires a specific minimum VCD version; know your upgrade distance. Inventory orgs, VDCs, edges, IP allocations, catalogs, and extensions now.
    3Tenant classification: All-Apps vs. VM-AppsOrg type shapes everything downstream — Supervisor placement, quotas, network design. Survey tenant container/AI roadmaps before deciding.
    4Region and Supervisor designRegions replace Provider VDCs as your capacity boundaries. Design them for the target state, including multi-Supervisor quota where tenants need headroom.
    5External IP Block plan mirroring current IP SpacesIP continuity is the difference between a maintenance window and a tenant escalation.
    6Per-tenant network disposition (extend vs. re-IP)Drives the migration order and the amount of VLAN-extension plumbing (VNA clusters, distributed connections) you deploy.
    7DFW rule export and rationalizationRules rebuild as vDefend policy; a rationalized rule set migrates in days, an unrationalized one in months.
    8Extension and ecosystem dependency mapVCD plugins, blocking-task integrations, and portal customizations have no automatic path. Identify each and decide: replace, rebuild via VCFA APIs, or retire.
    8aAPI caller inventory (legacy XML API vs. CloudAPI)Legacy XML API callers must be rewritten; CloudAPI callers port with moderate effort to Tenant Manager APIs. You cannot scope the automation workstream without this split.
    9Billing/metering validation against VCF OperationsRevenue-affecting and always discovered too late. Run parallel metering during pilot tenants.
    10Pilot tenant selectionPick one friendly, low-complexity tenant per network pattern (VPC-native, VLAN-extended, VPN-heavy) and migrate them first.

    Decision framework: which path for which tenant

    Tenant profile Recommended path Rationale
    Standard IaaS tenant, NAT’d networks, no exotic extensionsIn-place (Migration Tool)The tool exists for exactly this profile; minimal downtime, configuration carried over.
    Tenant with heavy VCD API/extension integrationSide-by-sideTheir tooling must be rebuilt against VCFA APIs regardless; a clean landing zone avoids migrating assumptions that no longer hold.
    Tenant asking for Kubernetes/AI servicesSide-by-side into an All-Apps orgDesign the namespace, VKS, and GPU consumption model natively rather than retrofitting after import.
    Tenant with direct-connect/VLAN-backed networks and hardcoded IPsIn-place with VLAN extensionDistributed VLAN Connections preserve L2 continuity; re-IP later on the tenant’s schedule, not yours.
    Dormant or minimal tenantsNeither — consolidate or retireEvery migration is a chance to shrink the estate. Do not pay migration cost for tenants who should be offboarded.
    Bottom line: Treat this as a portfolio decision, not a platform decision. Most providers will run the Migration Tool for the long tail of standard tenants, hand-craft side-by-side moves for their strategic and complex tenants, and quietly retire the rest. The VCD-familiar Tenant Manager means your operations team’s experience transfers; the new resource model means your designs should not.

    Putting it on a calendar: the phased wave plan

    Durations below assume a mid-size provider (50–200 tenants) with a dedicated migration team. Scale accordingly — but keep the phase boundaries, because each phase gates the next:

    Phase Typical duration Key activities Exit criteria
    0 — Foundation4–8 weeksDeploy VCF 9.1 landing zone; region/Supervisor design; External IP Block plan; VNA/DTGW plumbing for VLAN extension; stage the prerequisite VCD update and work through the official Migration Tool documentationLanding zone health-checked; IP plan signed off; migration runbook drafted
    1 — Pilot3–4 weeksMigrate one friendly tenant per network pattern (VPC-native, VLAN-extended, VPN-heavy); run parallel metering; draft tenant comms from real findingsAll three patterns validated end-to-end; billing extract matches VCD baseline
    2 — Standard waves2–6 monthsMigration Tool waves for standard tenants, grouped by network pattern and maintenance windows; automation porting runs in parallel~80% of tenant count migrated; VCD write-freeze for migrated orgs
    3 — Complex rebuilds1–3 months (overlaps Phase 2)Side-by-side moves for extension-heavy and strategic tenants; All-Apps onboarding for Kubernetes/AI adopters; blocking-task logic rebuiltNo tenant left with a “we’ll figure it out later” flag
    4 — Decommission4–6 weeksVCD read-only period; final billing reconciliation; certificate/DNS cleanup; capacity reclaimed into VCFVCD powered off — and nobody noticed

    Five ways this migration goes wrong

    Patterns worth naming, because every one of them is avoidable and every one of them happens:

    1. Migrating the mess. Fifteen years of VCD accumulates orphaned vApp templates, dead orgs, and firewall rules nobody can explain. Running the Migration Tool over an uncleaned estate turns technical debt into migrated technical debt on a platform where it is now unfamiliar debt. Hygiene first.
    2. Classifying every tenant as All-Apps “to be safe.” Org type drives Supervisor placement and consumption design. Defaulting everyone to All-Apps burdens VM-only tenants with a model they will not use and complicates your capacity math. Classify on evidence, not hedging.
    3. Treating VLAN extension as the destination. It is a bridge. Providers who extend everything “temporarily” find themselves running a permanent hybrid L2 estate with double the operational surface. Expiry dates, owners, tracked in the same register as the migration itself.
    4. Discovering the XML API callers in Phase 2. The billing script someone wrote in 2016 against the legacy API will fail loudly mid-wave. The API caller inventory (checklist 8a) is boring, which is why it gets skipped, which is why it becomes the outage.
    5. Underinvesting in tenant communication. The tenant experience genuinely improves — but only tenants who were told what changed will experience it as improvement. Budget real effort for the porting guide, the vApp-to-deployment explanation, and the “your new self-service powers” message. Your NPS through this migration is a comms outcome, not a technical one.

    Frequently asked questions

    Does this mean Cloud Director is end-of-life?
    Check the official Broadcom product lifecycle matrix for authoritative dates rather than blog speculation (including mine). What is unambiguous from the 9.1 release is strategic direction: the Migration Tool exists, the VCSP tenancy investment is landing in VCFA, and the Tenant Manager carries the VCD codebase forward inside VCF. Plan on the trajectory, not the deadline.

    Can I run VCD and VCFA side by side during migration?
    Yes — and you will, for months. That is precisely why the phased plan includes parallel metering and a VCD write-freeze discipline for migrated orgs. The risk is not coexistence; it is coexistence without an exit date.

    Do my tenants’ IP addresses survive?
    They can, if you do the work: mirror IP Spaces into External IP Blocks before moving anything, and use VLAN extension where re-IP is not yet feasible. IP continuity is a design outcome, not a tool feature.

    What happens to my vApps?
    The VMs inside them migrate; the vApp construct itself (fencing, start order, leases) does not have a 1:1 successor in VCFA. Grouping lands on namespaces and deployments, and orchestration behavior is re-expressed in cloud templates. Audit your production vApp patterns during the inventory phase and validate each against the official migration documentation — this is the single biggest tenant-facing conceptual change, so put it at the top of your comms plan.

    How does object-level access control change?
    Significantly, and it needs design work before migration. VCD scoped object access at the vApp and catalog level; VCFA scopes it at the Project level — a new construct where org admins group users and namespaces, and the same user can hold different roles in different projects. Translate your existing vApp-sharing and catalog-permission patterns into a project design per tenant as part of the classification workshop, so access lands correctly on day one instead of being retrofitted after tickets.

    What to do next

    1. Run the inventory and classification exercises (checklist items 2 and 3) — they cost nothing and inform everything.
    2. Work through the official VCFA 9.1 migration documentation and stage the prerequisite VCD update, with your inventory in hand.
    3. Stand up the VCF 9.1 landing zone and pilot one tenant per network pattern before committing to a wave plan.

    In the next post, I will go deeper on the security layer of this story: rebuilding tenant micro-segmentation as code with VCFA cloud templates and Cloud.SecurityGroup — turning the DFW rationalization exercise from this guide into delegated, self-service lateral security.

    Have you started planning a VCD-to-VCFA migration? I would love to hear which construct mappings are causing you the most friction — drop a comment below.

  • Why VCF with VKS is a Stronger Enterprise Choice Than KubeVirt

    Why VMware VKS Is a Stronger Enterprise Choice Than KubeVirt | vmtechie.blog

    KubeVirt is a capable open-source project and a legitimate choice in the right context. But when the workload is enterprise AI at scale — GPU clusters, production AI factories, regulated environments — the gap between VKS with VCF and KubeVirt is not a minor preference. It spans architecture, operations, governance, and enterprise transformation strategy.

    PREMISE Let’s Be Honest About KubeVirt First

    A technically credible argument never starts by dismissing the competition. KubeVirt is a real, production-used project with genuine strengths. Let’s acknowledge them honestly before making the VKS case.

    Where KubeVirt genuinely wins: Cloud-native purists wanting a single Kubernetes control plane for everything. Cost-sensitive environments where ESXi licensing is a barrier. Dev/test scenarios where VM-grade isolation isn’t critical. Upstream OSS communities wanting full control over the stack. Teams with deep Kubernetes operational maturity who want to manage VMs and containers through a unified API.

    If your organisation is already 100% Kubernetes-native with no enterprise VM workloads or compliance requirements, KubeVirt is a reasonable choice. That’s the honest truth. This is not a case of good vs bad — it is a case of enterprise integration vs architectural freedom.

    But here’s the equally honest truth: for enterprise AI infrastructure — GPU clusters, DGX/HGX environments, production AI factories, regulated tenancy — VKS with VCF tends to hold a stronger position across most architectural and operational dimensions that matter to enterprise teams. Here’s the case, dimension by dimension.

    00 The Core Difference: Integrated Platform vs Extension Model

    Before diving into technical specifics, it’s worth understanding the conceptual gap — because it explains every practical difference that follows.

    With VKS, Kubernetes is delivered as a built-in service on top of the VMware infrastructure stack. It is tightly integrated with vSphere, storage, networking, policy, and lifecycle management. It is designed as part of the platform — not added to it.

    With KubeVirt, virtualisation is added into Kubernetes as an extension. It is an innovative approach, but it still means you are effectively layering VM functionality into an environment originally built for containers. In practice, VKS gives enterprises a unified operating model. KubeVirt often introduces more integration points, more dependencies, and more operational responsibility.

    The directional difference: KubeVirt extends Kubernetes to run VMs. VKS extends a mature enterprise virtualisation platform to run Kubernetes properly. In production, that direction matters more than it appears on a whiteboard.

    01 Hypervisor Architecture — Purpose-Built vs Added On

    The most fundamental difference is architectural. KubeVirt layers VM capability onto a system designed for containers. VKS extends a hypervisor designed from day one to run workloads with hardware-level isolation.

    KubeVirt Stack
    Application / AI Workload
    QEMU/KVM Process
    Container (Pod)
    Kubernetes Node
    Linux Kernel
    Hardware
    VKS with VCF Stack
    Application / AI Workload
    Container / Kubernetes Pod
    VM (vSphere Supervisor)
    ESXi Microkernel (Type-1)
    Hardware

    ESXi is a Type-1 bare-metal hypervisor — it runs directly on hardware with a microkernel architecture under 150MB in size. It was designed to do one thing exceptionally well: run workloads with deterministic performance and hardware isolation. VMs and containers on VKS are both first-class constructs — not one emulating the other.

    The analogy: KubeVirt is running a city inside a shipping container. VKS is building a city on actual land. Each abstraction layer in KubeVirt compounds — adding latency, scheduling complexity, and failure domains that are less pronounced in a purpose-built hypervisor model.

    02 GPU & AI Workload Performance — The Widest Gap

    This is the dimension that matters most for anyone building NVIDIA AI infrastructure. The gap here is not marginal — it is architectural.

    KubeVirt GPU Reality

    GPU passthrough to VMs via KubeVirt requires VFIO/IOMMU — complex to configure, brittle in production, and requiring deep Linux kernel expertise. More critically:

    • No native MIG (Multi-Instance GPU) awareness — partitioning must be configured externally
    • GPU sharing across VMs and containers in the same cluster is operationally complex
    • No current equivalent of NVIDIA vGPU time-slicing with hardware-enforced QoS guarantees
    • The KubeVirt device plugin model does not yet integrate cleanly with MIG partition profiles

    VKS with VCF with NVIDIA AI Enterprise

    This is the explicitly certified, supported path for enterprise NVIDIA GPU deployments:

    • NVIDIA vGPU natively supported on ESXi — VMs get dedicated vGPU profiles (A100-40C, H100-80C) with hardware-enforced QoS [1]
    • MIG partitioning integrates cleanly — a single H100 can serve multiple Kubernetes pods and VMs simultaneously with hard partition isolation [2]
    • NVIDIA GPU Operator supports vSphere Supervisor as a validated deployment target
    • NVIDIA AI Enterprise is explicitly certified on vSphere — the recommended enterprise path for DGX/HGX production deployments [3]
    // VKS — GPU resource request (clean, native)
    resources: limits: nvidia.com/gpu: 1 # vGPU profile enforced at hypervisor level # MIG partitioning transparent to workload # QoS guaranteed by ESXi scheduler

    03 Security & Isolation — 20 Years vs 5 Years

    Security is where enterprise architects lose sleep — and where VKS has the most compelling, battle-tested story.

    KubeVirt’s Security Model

    VM isolation in KubeVirt depends on the container runtime security boundary plus QEMU process isolation. A compromised container runtime (containerd, runc vulnerability) can potentially affect the QEMU process hosting the VM. Nested virtualisation increases the kernel attack surface. RBAC for VM operations is layered onto Kubernetes RBAC — not purpose-built for multi-tenant VM isolation.

    VKS + NSX Security Model

    ESXi’s VMX process isolation is 20+ years hardened. Each VM is fully isolated at the hypervisor level regardless of what happens in the container layer above. Beyond that:

    • NSX Distributed Firewall (DFW) applies microsegmentation at the vNIC level — every Kubernetes pod can have firewall policy enforced at the hypervisor, not just the overlay network [4]
    • vSphere Trust Authority and TPM integration provide cryptographic attestation of host state before VMs are allowed to run — KubeVirt currently has no comparable integrated mechanism
    • Regulatory compliance (PCI-DSS, HIPAA, SOC2) control mapping for vSphere is well-established and widely audited; equivalent mappings for KubeVirt environments are still maturing
    • ESXi security patches are coordinated and tested against the full vSphere stack — KubeVirt kernel updates require independent validation across the QEMU/KVM/container runtime chain

    04 Day-2 Operations — Where the Pain Is

    Every infrastructure architect knows that Day-1 deployment is 10% of the story. Day-2 operations — patching, upgrades, live migration, monitoring — is where you live for the next 3-5 years.

    VCF / VKS Capability
    KubeVirt Equivalent
    vMotion — zero-downtime live migration
    Basic VM migration (no storage vMotion)
    VCF Lifecycle Manager — full stack upgrade
    Manual Kubernetes + KubeVirt operator coordination
    VCF Operations — unified VM + container observability
    Separate toolchains (Prometheus + custom exporters)
    VKS K8s upgrades decoupled from vCenter lifecycle
    K8s + KubeVirt operator + host OS must be co-validated
    vSphere Update Manager — coordinated patching
    DIY patching across kernel, QEMU, CRI, CNI layers
    SPBM — storage QoS policy across VMs + PVCs
    CSI only, no differentiated storage QoS

    VCF Lifecycle Manager manages the entire stack — ESXi, vCenter, NSX, vSAN, and Kubernetes cluster versions — in a single coordinated upgrade workflow. In KubeVirt environments, version skew between the Kubernetes release, KubeVirt operator version, QEMU version, and the host kernel is a recurring operational hazard that requires dedicated engineering effort to manage safely.

    One of the most underappreciated advantages of VKS is that Kubernetes cluster upgrades are fully decoupled from vCenter upgrades. In practice, this means platform teams can roll out new Kubernetes versions — moving from 1.28 to 1.29 to 1.30 — independently, without waiting for a vCenter maintenance window or coordinating with the infrastructure team managing the underlying SDDC. Each Tanzu Kubernetes cluster has its own lifecycle, managed via the Supervisor and VCF LCM, with no hard dependency on the vCenter version for day-to-day Kubernetes updates. Compare this to KubeVirt, where the Kubernetes control plane, KubeVirt operator, and host OS are all tightly coupled — a Kubernetes minor version upgrade requires validating compatibility across all three layers simultaneously. For enterprises running multiple Kubernetes clusters across workload domains, VKS’s decoupled upgrade model is a significant operational advantage.

    05 Networking — NSX vs CNI Complexity

    Networking for AI workloads is not just about connectivity — it’s about bandwidth, latency, topology awareness, and security policy across a mixed VM and container estate.

    KubeVirt Networking Complexity

    VM network interfaces in KubeVirt are exposed as secondary interfaces via Multus — requiring careful co-ordination between multiple CNI plugins. SR-IOV for VM workloads requires manual IOMMU/VF configuration per node. There is no unified microsegmentation plane between VMs and pods — policy must be applied at multiple layers independently.

    VKS + NSX — Unified Fabric

    NSX provides a single network fabric for both VMs and Kubernetes pods. The same DFW policy engine applies to both. NSX Advanced Load Balancer (AVI) handles Kubernetes ingress and LoadBalancer services natively with full traffic visibility across both VM and container workloads. Critically for AI infrastructure: Geneve overlay with hardware offload to SmartNICs including BlueField DPUs — directly aligned with NVIDIA’s AI factory reference architecture.

    06 Enterprise Transformation Reality — The Mixed Workload Problem

    Most enterprise modernisation conversations get derailed by a false premise: that organisations are either “all VMs” or “all containers.” The reality, in virtually every large enterprise, is a persistent mix that will not resolve cleanly for years.

    A typical enterprise estate in 2026 includes: traditional VM-based business applications, modern microservices and cloud-native workloads, packaged enterprise software with no container-native path, data platforms and stateful databases, and security or compliance-sensitive workloads requiring strict isolation guarantees. VKS is designed for this hybrid reality. It does not force everything into a Kubernetes-first abstraction before the organisation is ready for it.

    The modernisation argument: VKS allows organisations to modernise without forcing them to abandon the operational model they already trust. Infrastructure teams keep using the VMware foundation they know — while platform teams gain access to Kubernetes in a way that feels native to the environment. That makes transformation more realistic, not just more aspirational.

    Operational Risk — The Questions That Matter

    When enterprises evaluate platforms, they often focus too much on feature checklists and not enough on operational risk. The real questions are not just “Can this run VMs and containers?” They are:

    • How hard is it to support at 2am when something breaks?
    • How predictable are upgrades across the full stack?
    • How many teams need to coordinate for a routine patch?
    • How many integration gaps need to be owned and maintained internally?
    • How fast can issues be isolated and root-caused in a mixed VM/container environment?

    VKS reduces this risk because the platform is more cohesive — fewer seams between layers, fewer teams needed, fewer custom integrations to maintain. KubeVirt can be very attractive architecturally, but it assumes a higher level of Kubernetes operational maturity and a stronger tolerance for platform engineering complexity that most enterprise IT organisations do not have the staffing to sustain.

    07 Governance & Private Cloud Readiness

    For regulated industries, sovereign cloud environments, and enterprise private clouds, governance matters just as much as technology capability. Organisations need consistent policy, security boundaries, visibility, and controlled operations. They need to know who owns what, how workloads are deployed, and how infrastructure changes are managed.

    This is where VMware’s enterprise DNA shows. VKS fits naturally into environments that require structure, compliance, and clear operational accountability:

    • Role-based access control unified across VMs, Kubernetes namespaces, and vSphere objects — one policy model, not two
    • Audit trails from vCenter and NSX cover both VM and container operations in a single log stream [5]
    • Change management integration — VCF’s API surface maps cleanly to ITSM platforms (ServiceNow, Jira Service Management)
    • Sovereign cloud readiness — vSphere’s tenancy model and encryption capabilities are mapped to GDPR, data residency, and sovereign cloud frameworks across APAC, EU, and regulated US sectors

    KubeVirt can absolutely be used in serious environments — but it is more often the right fit for organisations that want deeper open-source flexibility and are comfortable owning more of the platform decisions themselves. For most enterprise private clouds, that is not a trade-off they are willing to make.

    08 Head-to-Head Summary

    Dimension VKS with VCF KubeVirt
    Platform Model ✅ Integrated — Kubernetes is native to the stack ⚠️ Extension model — VMs added onto Kubernetes
    GPU / AI Workloads ✅ vGPU, MIG, NVIDIA AI Enterprise certified ⚠️ VFIO passthrough, limited MIG integration
    Security Isolation ✅ 20+ yr hardened VMX, NSX microsegmentation ⚠️ QEMU-in-container, larger attack surface
    Live Migration ✅ vMotion — zero-downtime, storage + compute ⚠️ Functional but no storage vMotion equivalent
    Lifecycle Management ✅ VCF LCM unified + K8s upgrades decoupled from vCenter ❌ K8s, KubeVirt operator & host OS must be co-validated
    Networking ✅ NSX unified VM + container fabric + DPU offload ⚠️ Multus + multi-CNI complexity
    Storage QoS ✅ SPBM across VMs + PVCs, vSAN ESA ⚠️ CSI only, no differentiated QoS
    Mixed Workload Support ✅ Native — VMs and containers are co-equals ⚠️ Container-first; VMs require abstraction overhead
    Governance & Compliance ✅ Unified RBAC, audit, PCI/HIPAA/SOC2 controls ⚠️ Immature compliance tooling, separate audit streams
    Operational Risk ✅ Cohesive platform, fewer integration gaps ❌ Higher ownership burden, more seams to maintain
    Observability ✅ Unified VM + container via VCF Operations ⚠️ Separate toolchains required
    NVIDIA Certification Path ✅ Explicit NCP-AII / NVIDIA AI Enterprise support ❌ Not part of NVIDIA enterprise certification stack
    Cost (Licensing) ⚠️ VCF licensing required ✅ Open source, no hypervisor licensing
    // The Directional Argument
    KubeVirt makes Kubernetes run VMs.
    VKS makes a production-hardened hypervisor run Kubernetes.

    When the workload is enterprise AI at scale, the foundation matters more than the interface. Choose your substrate based on the operational reality you’ll live with for the next five years.

    CLOSING The Right Tool for the Right Job

    KubeVirt will continue to evolve. The upstream community is active, and features like live migration and GPU support are maturing. For greenfield cloud-native organisations without legacy VM estates or strict compliance requirements, it deserves serious evaluation.

    Where KubeVirt is the better fit: If your organisation is already deeply Kubernetes-native, your team has strong platform engineering capability, you want to avoid hypervisor licensing costs, and you are comfortable owning more of the integration decisions — KubeVirt is a legitimate and architecturally coherent choice. Open-source flexibility and a Kubernetes-first operating model are real advantages in the right context.

    But for enterprise organisations running AI workloads on NVIDIA DGX/HGX infrastructure, managing regulated environments, and needing proven lifecycle tooling across a mixed VM and container estate — VKS with VCF backed by VCF offers a more mature, better-integrated, and lower-risk path. It is the architecture that has been most thoroughly validated for this use case in production enterprise environments.

    The question was never “containers vs VMs.” The question is: what platform will reduce operational complexity rather than relocate it?

    My view: VKS is the stronger enterprise choice. Not because KubeVirt lacks innovation. Not because Kubernetes is weak. But because VKS is aligned with enterprise operational reality — and in production, that alignment is what separates an exciting architecture from a platform you can actually sustain.

    KubeVirt moves complexity from the hypervisor layer into your Kubernetes operations team. VKS distributes it across a tested, integrated platform with decades of enterprise hardening. For most organisations, that trade-off has a clear answer.

    And in enterprise IT, that is often what separates an exciting architecture from a successful platform.

    More from vmtechie.blog VCF architecture, AI infrastructure, sizing tools and upgrade planners for enterprise engineers.
    Visit the Blog →
  • VCF 9 – Updating the Supervisor Service

    VCF 9 – Updating the Supervisor Service

    Supervisor and VKS clusters are built using a common Kubernetes distribution core, but their Kubernetes versions are delivered differently. Starting with VCF 9, Supervisor Kubernetes releases are delivered independently of vCenter. You can update the Supervisor version by deploying a release from the Supervisor Content Library. In this blog post, we will walk through the Supervisor update process step by step. Let’s get started!

    Create and Configure a Subscribed Content Library for Supervisor Images

    For vSphere Supervisor, VMware publishes Supervisor images through a content delivery network (CDN). To enable or upgrade vSphere Supervisor, you can create a Subscribed Content Library that synchronizes with the Supervisor release images.

    You can configure the content library in either Immediate or On-Demand synchronization mode. Note that immediate synchronization from the public CDN may require more time and consume additional disk space.

    • Log in to vCenter as a vSphere administrator.
    • From the Home menu, select Content Libraries
    • Click Create
    • Provide a name for the library (for example, supervisor update library) and click Next.
    • On the Configure Content Library page, select Subscribed Content Library.
    • In the Download content section, select the synchronization mode of the content library and click Next
    • When prompted, accept the SSL certificate thumbprint.The thumbprint will remain stored on your system until the subscribed content library is removed from the inventory
    • Apply Security Policy click Next
    • On the Add storage page, select a datastore as a storage location for the content library contents and click Next.
    • Review the details and click Finish

    Assign the content library to the vSphere Supervisor platform

    • on vCenter go to Home menu, select Supervisor Management
    • Select Content Distribution.
    • On the Supervisor Images Library card, click Assign
    • Select the Content Library that created above and click Assign
    • The new content library begins synchronizing, which may take some time. After synchronization is complete, the new Supervisor Kubernetes versions included in the images will appear under the Updates tab

    Apply Updates

    • Select the Available Version you want to update to. For example: v1.30.10+vmware.1-fips-vsc9.0.0.0100. ⚠️ Updates must be applied incrementally. You cannot skip versions (e.g., upgrading directly from 1.28 to 1.30). The correct sequence is 1.28 → 1.29 → 1.30.
    • Select a Supervisor to update and click Apply Updates

    The system runs a series of pre-checks to verify the compatibility of the different components against the Supervisor Kubernetes version to which you want to update.

    Learn which are the pre-checks that are run before updating the supervisor and how to troubleshoot in case of errors resulting from failed pre-checks, HERE

    When the pre-checks are completed successfully, you can update the Supervisor.

    Upgrading the VMware vSphere Supervisor service is a critical step in maintaining a secure, stable, and feature-rich VMware Cloud Foundation environment. By following best practices—planning incremental updates, leveraging subscribed content libraries, and validating compatibility at every stage—administrators can ensure minimal downtime while keeping workloads and Kubernetes clusters up to date. Regular Supervisor upgrades not only enhance platform capabilities but also strengthen the foundation for running modern applications, containers, and cloud-native services efficiently and reliably.

  • Deploy, Run, and Manage Any Application with VMware Cloud Director Content Hub

    Deploy, Run, and Manage Any Application with VMware Cloud Director Content Hub

    In today’s fast-paced digital landscape, businesses require agile and scalable solutions to deploy and manage their applications efficiently. VMware Cloud Director Content Hub (VDCH) introduced in VMware Cloud Director 10.5, offers a robust platform for a simplified and automated way to deploy, run, and manage a wide range of applications. In this blog, we’ll explore the key features and benefits of VMware Cloud Director Content Hub and how it streamlines the application deployment process.

    What is Content Hub ?

    Content Hub, introduced in VMware Cloud Director 10.5, serves as a convenient tool that unifies the interface for accessing both VM and container-based content. This feature seamlessly integrates external content sources, such as VMware Marketplace and Helmchart Repositories, into the VMware Cloud Director environment.

    By incorporating external sources, content can be seamlessly brought into the catalogs of VMware Cloud Director, ensuring its immediate availability for users. With the integration of Content Hub, VMware Cloud Director introduces an interface oriented towards applications, enabling users to effortlessly visualize and retrieve catalog content, thus elevating the overall content management experience.

    As a result of these enhancements, catalog items are presented as “Application Images,” highlighting crucial application information like the application’s name, version, logo, screenshots, and other pertinent details necessary for the consumption of the application

    Integration with VMware Marketplace

    To integrate Marketplace with VMware Cloud Director, a Cloud Provider needs to create a Marketplace Connection and then share it with one or more tenant organisations. Here is the procedure:

    • Cloud Provider must be logged in as a system administrator.
    • Cloud Provider must have access to VMware Marketplace and there generated an API token. (see Generate API Tokens in the VMware Cloud Services Product Documentation)
    • From the left panel, select VMware Marketplace & Click New.
    • The New VMware Marketplace dialog opens, and there enter the following values:

    Integration with Helm Chart Repository

    A Helm chart repository is a named resource that stores all the information required to establish a connection with a Helm chart repository, allows users to browse contents from a remote repository, and imports applications from the repository.

    Cloud Providers and tenants both can create Helm chart repository content connections. Tenants need special RIGHTs that providers can assign to specific tenants based on requirements.

    • From the left panel, select Helm Chart Repository & Click New.
    • The New Helm Chart Repository dialog opens, and there enter the following values:

    • Password-protected Helm chart repositories are also supported. 
    • You can create multiple Helm chart repository resources in VMware Cloud Director.

    Share a VMware Marketplace/Helm Chart Repository Resource with tenants

    As a service provider administrator, you can share the configured VMware Marketplace resources with other tenant organizations.

    • Inside VMware Marketplace/Helm Chat Repository, on the left of the name of the connection that you want to share, click the vertical ellipsis and select Share.
    • Share the resource.
    • Select the tenant organizations you want to share the resource with.
    • You can set the individual access level for the respective tenant organization only as Read Only.
    • Click Save.

    NOTE: Since vCD does a DB caching of the helm chart repository items in vCD DB, you can click on Sync which will ensure the latest from the remote repository is cached in vCD DB.

    Roles Required

    A new set of User Roles has been introduced to facilitate users in accessing and managing the Content Hub. Assigning the appropriate user roles to individuals within the organization to grant them access and utilize the Content Hub feature effectively is crucial.

    Right Bundles: A Rights Bundle is a collection of rights for the tenant organization and A Rights Bundle defines what a tenant organization has access to. Rights Bundles are always defined globally, and they can be applied to zero or more tenants.

    Roles: A Role is a collection of rights for a user. A Role defines what an individual user has access to. Roles can either be tenant-specific–defined within a single organization and only visible to that organization, or global–defined globally and applied to zero or more tenants. 

    Putting all the pieces together looks something like this:

    Following are the new RIGHTs introduced to manage CatalogContentSource entities:

    Apply the Above Rights for organizations as well as the user, so that they have enough rights to add and deploy applications.

    Content Hub Operator for Kubernetes Container Service Extention

    To perform this operation, First, you need full control of the Kubernetes cluster, where you are deploying the container applications, and additionally the following VMware Cloud Director rights:

    You must install a Kubernetes operator to allow tenant users to deploy container applications from external content sources. From the top navigation bar, select Content Hub, from the left panel, select Kubernetes Operator, and on the Kubernetes Operator page, select the Kubernetes cluster on which you want to install the Kubernetes operator, and click Install Operator.

    The Install operator on cluster-name dialog opens, on this page Configure the source location of the Kubernetes operator package.

    Select the type of source location for the Kubernetes operator package. VMware Registry location with anonymous access is selected by default.

    (Optional) To configure a custom registry, first, you must clone the Content Hub Kubernetes operator package from the VMware container registry to your custom registry. The Content Hub Kubernetes operator package is in Carvel format and you must use the Carvel imgpkg tool for cloning the package.

    Click Install Operator.

    After a Few minutes it shows “Not Reachable”

    And then finally it turns to “ready”, basically After the installation of the operator completes successfully, the system creates two namespaces under the Kubernetes cluster. In the first namespace, “vcd-contenthub-system”, the Content Hub Operator manager is installed. The second namespace, “vcd-contenthub-workloads”, is empty. This namespace is used to deploy container applications at a later stage.

    Catalog Versioning

    In the previous version of VMware Cloud Director, there was no concept of versioning in catalogs. For instance, when a user imports multiple versions of the same application from external sources into the catalog, each version of the VM or container will be stored and represented (listed) as an individual resource, but from VMware Cloud Director 10.5 onwards, a Virtual Machine application or Container application that was imported with multiple versions either at the same time or at different intervals, Content Hub is capable of managing and structure the versioning of that resource.

    Let’s Deploy a Container Application

    Upon launching an application image that has multiple versions, you will be prompted to choose the specific version of the image you wish to deploy.

    If the Container application is launched, then the Container Application launcher window will open and then you need to provide the application Name, select the version to deploy and select the TKG Cluster.

    (Optional) To customize the application parameters, click Show Advanced Settings.

    Click Launch Application.

    The system deploys the container application. After the deploy operation completes, on the card for the application, the status appears as Deployed. VMware Cloud Director deploys the container application as a Helm release under the vcd-contenthub-workloads namespace to the Kubernetes cluster.

    Either clicking on Application Name or DETAILS, it takes user to details of the application, like Status, Pods Status, Access URLs etc..

    User can use the access URL details to access the application easily

    Deploy an Stateful Container Application

    In this section we will deploy Casandra database using Cloud Director Content Hub, process is simple as we followed in above section, once deployed the application, check the details, here details are different like no access URL, it also created required Persistent Volumes automatically

    it also give visibility to Stateful Set and its status, secrets if any, services and its type as well as other resources. this allow end user to not to check in K8s clusters vs this info is available in vCD GUI.

    Deploy an Virtual Machine Application

    A vApp consists of one or more virtual machines that communicate over a network and use resources and services in a deployed environment. A vApp can contain multiple virtual machines.If you have access to a catalog, you can use the vApp templates in the catalog to create vApps.

    A vApp template can be based on an OVF file with properties for customizing the virtual machines of the vApp. The vApp inherits these properties. If any of those properties are user-configurable, you can specify their values.

    Enter a name and, optionally, a description for the vApp.

    Enter a runtime lease and a storage lease for the vApp, and click Next.

    From the Storage Policy drop-down menu, select a storage policy for each of the virtual machines in the vApp, and click Next.

    If the placement policies and the sizing policies for the virtual machines in the vApp are configurable, select a policy for each virtual machine from the drop-down menu.

    If the hardware properties of the virtual machines in the vApp are configurable, customize the size of the virtual machine hard disks and click Next.

    If the networking properties of the virtual machines in the vApp are configurable, customize them and click Next.

    On the Configure Networking page, select the networks to which you want each virtual machine to connect.

    (Optional) Select the check box to switch to the advanced networking workflow and configure additional network settings for the virtual machines in the vApp.

    Review the vApp settings and click Finish.

    You can see under Applications -> Virtual Applications, VM is getting deployed.

    With Content Hub feature provide can offers centralized content management for application images, vApp and VM templates, and media. VMware Cloud Director now has full control over the deployed and listed images, storing all pertinent information in its database. Unlike the application images imported from App Launchpad, where VMware Cloud Director only listed the imported images and App Launchpad stored all the details and information in its own database as well as It offers ease of use since you won’t have to set up and configure App Launchpad, which would otherwise be an additional task.

  • Harness the Power of Cloud Director Data Solutions: Offer DBaaS using VMware SQL with MySQL

    Harness the Power of Cloud Director Data Solutions: Offer DBaaS using VMware SQL with MySQL

    In the ever-evolving landscape of cloud technology, Cloud Service Providers (CSPs) play a crucial role in helping businesses unlock the potential of their data. Database as a Service (DBaaS) offerings have become essential tools for organizations looking to streamline their data management processes. This article will explore how our CSP is revolutionizing DBaaS with Cloud Director Data Solutions, powered by VMware SQL with MySQL. Discover how this powerful combination can transform CSP and customers’ data management experience.

    VMware Cloud Director Extension for Data Solutions: An Introduction

    The VMware Cloud Director Extension for Data Solutions is a game-changing plug-in for the VMware Cloud Director. By incorporating data and messaging services into the VMware Cloud Director portfolio, it enables cloud providers and their tenants to access and manage services such as VMware SQL with MySQL, VMware SQL with PostgreSQL, and the efficient messaging system, RabbitMQ.

    The extension operates in conjunction with Container Service Extension 4.0 or later, facilitating the publication of popular data and messaging services to tenants. These services are deployed in a Tanzu Kubernetes Grid Cluster, which is managed by Container Service Extension 4.0 or later. This powerful combination simplifies the process of deploying and managing these services, while also offering data analytics and monitoring through Grafana and Prometheus.

    How the VMware Cloud Director Extension for Data Solutions Functions

    The VMware Cloud Director Extension for Data Solutions works hand-in-hand with the Container Service Extension 4.x to provide cloud providers with the ability to publish data and messaging services to their tenants. In turn, tenants can utilize these services for building new applications or maintaining existing ones.

    Services are deployed within a Tanzu Kubernetes Grid Cluster, which is managed by the Container Service Extension 4.0 or later. This plays a crucial role in the deployment of services, with a service operator installed in a selected tenant Tanzu Kubernetes Cluster responsible for managing the entire lifecycle of a service, from inception to dissolution.

    To better understand the architecture of the VMware Cloud Director Extension for Data Solutions, consider the high-level diagram provided below.

    Use Cases for the VMware Cloud Director Extension for Data Solutions

    Tenants can utilize the VMware Cloud Director Extension for Data Solutions for various purposes, such as creating database and messaging services at scale. Once these services are available in a tenant organization, authorized tenant users can create, upgrade, or delete PostgreSQL, MySQL, or RabbitMQ services. Advanced settings, such as enabling High Availability for VMware SQL with MySQL and VMware SQL with PostgreSQL, can be applied during the creation of a service.

    In addition to creating database and messaging services, tenants can effortlessly manage their upgrades. When a newer version becomes available, the VMware Cloud Director Extension for Data Solutions interface will notify the user and prompt them to take action. Tenant administrators or users can then upgrade the chosen service with a single click, safeguarding the service against vulnerabilities and ensuring its stability.

    Tenant self-service UI for the lifecycle management of VMware SQL with MySQL

    Step:1 – Installing VMware Cloud Director Data Solutions operator

    To run VMware SQL with MySQL in a Kubernetes cluster using the VMware Cloud Director extension for Data Solutions, you must install a VMware Cloud Director extension for the Data Solutions operator to a Kubernetes cluster. The VMware Cloud Director Data Solutions operator (DSO) is a backend service running within each tenant Kubernetes cluster. DSO manages the lifecycle of user resources in Kubernetes clusters upon user requests, sent through VMware Cloud Director Resource Defined Entities. The resources include both data solution operators like VMware RabbitMQ operators for Kubernetes and data solution instances like VMware RabbitMQ for Kubernetes. It deploys, upgrades, and updates various data solutions in Kubernetes clusters on behalf of the user.

    • Log in to VMware Cloud Director extension for Data Solutions from VMware Cloud Director.
    • Click Settings > Kubernetes Clusters.
    • Select the Kubernetes cluster where you want to run VMware Cloud Director extension for Data Solutions, and click Install Operator.
    • It takes a few minutes for the Operator Status of the cluster to change to Active.

    Step:2 – Installing VMware SQL with MySQL

    • Log in to VMware Cloud Director extension for Data Solutions from VMware Cloud Director.
    • Click Instances > New Instance.
    • Enter the necessary details.
      • Enter the instance name.
      • Select the solution, for which you want to create an instance.
      • Select the Kubernetes cluster for this instance. 
      • you must enter only a default passwordSelect a sizing template for this instance.
    • To customize more details click Show Advanced Settings
    • To connect to a MySQL instance from outside of your Kubernetes cluster, we must configure the Kubernetes service for the instance to be of type “Load Balancer”. Select “Expose Service by Load Balancer”
    • Click Create.
    • You can also track the progress of the deployment by running:
    #kubectl get pods -n vcd-ds-workloads
    • After a few minutes, you should see MySQL status is “Running” in vCD GUI as well
    • You can continue to see progress in the vCD taskbar as well as the Monitor section of vCD GUI, it is automatically creating required persistent volumes as well as Network services like Load Balancer and NAT rules
    • Kubernetes will request and Cloud Director then allocate an external IP address (load balancer IP) to the service, which we can use to connect to the MySQL service from outside the cluster. You can view the Load Balancer IP by running:
    #kubectl get svc -A
    • Take note of the External IP, which in this case is 172.16.2.6, we will use this IP to connect to the MySQL cluster from outside

    Step:3 – Connecting to VMware SQL with MySQL

    To connect to a MySQL service using Workbench, you can follow these steps:

    • Download and install MySQL Workbench from the official MySQL website if you haven’t already.
    • Launch MySQL Workbench on your computer.
    • In the Workbench home screen, click on the “+” icon next to “MySQL Connections” to create a new connection.
    • In the “Setup New Connection” dialog, enter a connection name of your choice.
    • Configure the following settings:
    1-Connection Method: Standard TCP/IP
    2-MySQL Hostname: External IP address of the MySQL server.in this case is 172.16.2.6
    3-MySQL Server Port: Enter the port number(default is 3306).
    4-Username: Enter the MySQL username as “mysqlappuser”
    5-Password: Enter the MySQL password as you entered while deploying MySQL
    
    • Click on the “Test Connection” button to check if the connection is successful. If the test is successful, you should see a success message.
    • Click on the “OK” button to save the connection settings.

    After following these steps, you should be connected to your MySQL service using MySQL Workbench. You can then use the Workbench interface to view this newly deployed instance, run queries, and perform various read-only database-related tasks, because:

    When Tenant creates a MySQL deployment through VMware Cloud Director for Data Solutions extension, the MySQL instance gets a default DB user named “mysqlappuser”, This “mysqlappuser” user’s privilege is limited to the default DB instance. “mysqlappuser” user does not have enough permission to create a database, we need to create a new user which has enough permissions to create a database.

    Step:4 – Enable a full-privileged DB user for your MySQL instance provisioned by the VMware Cloud Director Extension for Data Solutions

    MySQL by default has a built-in “root” user with administrator privilege in every MySQL deployment, but it doesn’t support external access. We will use this user to create another full-privileged DB user.

    • Find DB root user’s password by using below commands:
    # kubectl get secret -n vcd-ds-workloads
    #kubectl get secret mysqldb01-credentials -n  vcd-ds-workloads -o jsonpath='{.data}'
    
    • Take note of “rootPassword” from the output of the above command and copy the full encrypted password, which in this case starts with “RE1n**********”
    • Decode the above “rootPassword” using below command
    # echo "RE1nem90TmltZ2laQWdsZC1oqM0VGRw==" | base64 –decode
    • The output of the above command will be the root password, use this password to log in.
    • Enter the primary (writable) pod of your MySQL deployment by command: (Refer to this Link to identify Writable Pod )
    # kubectl exec -it mysqldb01-2 -n vcd-ds-workloads -c mysql – bash
    • Now run the below command to connect to the MySQL instance:
    1 - Login to SQL 
          #mysql -u root -p$ADMIN_PASSWORD -h 127.0.0.1 -P 3306
    2 - Enter decoded password, once you successfully connected to the MySQL
    3 - Create a local MySQL user using:
          #CREATE USER 'user01'@'%' IDENTIFIED BY 'password';
          #GRANT ALL PRIVILEGES ON * . * TO 'user01'@'%';
    • That’s it, now we can connect to this SQL Instance and can create a new database as you can see below screenshot

    NOTE: Thanks to the writer of this blog, https://realpars.com/mysql/, I am using this database for this blog article.

    In Summary, by leveraging VMware Cloud Director Extension for Data Solutions, CSPs can unlock the power of DBaaS using VMware SQL with MySQL, offering customers a comprehensive and efficient platform for their data management needs. With simplified deployment and management, seamless scalability, enhanced performance optimization, high availability, and robust security and compliance features, CSPs can provide businesses with a reliable and scalable DBaaS solution. Embrace the potential of DBaaS with VMware Cloud Director Extension for Data Solutions and VMware SQL with MySQL, and empower your customers with streamlined data management capabilities in the cloud.

  • Assess Your Sovereign Cloud Stack for Compliance

    VMware vRealize (ARIA) Operations Compliance Pack for Sovereign Cloud is a management pack available in the VMware Marketplace. You can download and install this management pack on an instance of vRealize (ARIA) Operations to automatically assess a Sovereign Cloud stack for compliance. 

    VMware vRealize (ARIA) Operations Compliance Pack for Sovereign Cloud is intended to be used by the VMware Cloud Service Partners who are part of the Sovereign Cloud Initiative. The following products in the Sovereign Cloud stack are currently supported for compliance assessment:

    • vSphere
    • NSX-T
    • VMware Cloud Director
    • VMware Cloud Director Availability

    For every Sovereign Cloud instance, providers need one instance of vRealize (ARIA) Operations with the VMware vRealize (ARIA) Operations Compliance Pack for Sovereign Cloud installed and configured. The compliance score card is available in the Optimize > Compliance screen of vRealize (ARIA) Operations.

    Compliance Pack for Sovereign Cloud Controls Rules

    The compliance rules are based on a checklist that VMware vRealize (ARIA) Operations Compliance Pack for Sovereign Cloud utilizes to monitor the products in the Sovereign Cloud stack. The checklist is based on the Sovereign Cloud Framework which takes into consideration the following key principles:

    Data Sovereignty and Jurisdictional Control

    Data should reside locally.
    The cloud should be managed and governed locally, and all data processing including API calls should happen within the country/geography.
    Data should be accessible only to residents of the same country, and the data should not be accessible under foreign laws or from any outside geography.

    Data Access and Integrity

    Two data center locations.
    File, Block, and Object store options
    Backup services, Disaster Recovery
    Low-latency connectivity, Micro segmentation

    Data Security and Compliance

    Industry recognized Security Controls (minimum ISO/IEC 27001 or equivalent)
    Additional relevant industry or governmental certifications
    Third-party audits & Zero Trust Security & Encryption
    Catalog of trusted images using the sovereign repository
    Support for air gapped zones/regions
    Operating personnel requirements and security clearance

    Data Independence and Interoperability

    Workload migration with bi-directional workload portability
    Modern application architecture using containers
    Support for hybrid cloud deployments

    Control Rules and Product Control Set for vSphere

    The vSphere control set is available for version 7, and 6.5/6.7 separately and details can be Here

    Control Rules and product control set for nsx-t

    Control rules and product control set for NSX-T and details can be found Here. The NSX-T version supported is greater than or equal to 3.2.x.

    Controls Rules and Product Control Set for VMware Cloud Director

    Control rules and product control set for VMware Cloud Director and details can be found Here. The supported version of the VMware Cloud Directory management pack is 8.10.2.

    Control Rules and Product Control Set for VMware Cloud Director Availability

    Controls rules and product control set for VMware Cloud Director Availability and details can be found Here. The version of the VMware Cloud Director Availability management pack supported is 1.2.1.

    Install the VMware vRealize (ARIA) Operations Compliance Pack for Sovereign Cloud

    The VMware vRealize (ARIA) Operations Compliance Pack for Sovereign Cloud consists of a PAK file that contains default contains views, reports, alerts and symptoms for the VMware software in the Sovereign Cloud stack.

    • Download the PAK file for VMware vRealize Operations Compliance Pack for Sovereign Cloud from the VMware Marketplace, and save the file to a temporary folder on your local system.
    • Log in to the vRealize (ARIA) Operations user interface with administrator privileges. Installation of this management pack is to be done by VMware Cloud Provider Program Partners.
    • In the left pane of vRealize (ARIA) Operations, click Integrations under Data Sources.
    • In the Repository tab, click the ADD button.
    • The Add Solution dialog box opens , Click BROWSE to locate the temporary folder on your system, and select the PAK file.
    • Read and select the checkboxes if required, Click Upload. The upload might take several minutes
    • Read and accept the EULA, and click Next. Installation details appear in the window during the process.
    • When the installation is completed, click Finish.

    in the vROps instance, go to Optimize > Compliance. In the VMware Cloud tab, you can see the VMware Sovereign Cloud Compliance card in the VMware Sovereign Cloud Benchmarks section. Click Enable.

    When you click Enable, a list of policies appears. You must select a policy that you want to apply. i am selecting default policy here

    With the vRealize (ARIA) Operations reporting functions, you can generate a report to view the compliance status of your Sovereign Cloud. You can download the report in a PDF or CSV file format for future and offline needs.

    Accessing Compliance Reports

    In the VMware vRealize (ARIA) Operations Compliance Pack for Sovereign Cloud two kinds of reports are available:

    At a VMware Cloud Provider Program Partner level – This report considers all the infrastructure level resources and generates a report at the org level, showing non-compliance. The compliance data is for the org and associated child hierarchy. Includes compliance details for org, org-vdc, virtual machines, logical switches, and logical routers as per the hierarchy.

    From the left menu, click Visualize > Reports and run the report – [vCloud Director] – VMware Sovereign Cloud – Non-Compliance Report.

    From the Reports panel, click Generated Reports, To select a generated report from the list, click the vertical ellipsis against the [vCloud Director] – VMware Sovereign Cloud – Non-Compliance Report report and select options such as run and delete.

    At a tenant level – The VMware Cloud Provider Program Partner generates a filtered report that the tenant can access. This report is at an org-VDC level. The compliance data is for the child hierarchy only. Includes compliance details for virtual machines, logical switches, and logical routers as per the hierarchy and Tenants can view the generated reports in the VMware Chargeback console by logging in and navigating to Reports > Tenant Reports and clicking the Generated Reports tab.

    Custom Benchmarks

    In case the CSP partner/customer requires they can create a custom compliance benchmark to ensure that objects comply with compliance alerts available in vRealize (ARIA) Operations, or custom compliance alert definitions. When a compliance alert is triggered on your vCenter instance, hosts, virtual machines, distributed port groups, or distributed switches, you investigate the compliance violation. You can add up to five custom compliance scorecards

    This is the first version of the sovereign cloud compliance pack for ARIA Operations for our Cloud Providers brings a comprehensive compliance checklist that encompasses the sovereign framework as a benchmark and continuously validates applications and infrastructure to help partners maintain their sovereignty posture. This brings extended capabilities to ARIA Operations, which, now addition to the capacity, cost, and performance monitoring, will monitor and report compliance drifts to the right stakeholders to better manage their compliance structure.

  • Cloud Director Container Service Extension – Tanzu Contour, Prometheus and Grafana Install Guide

    This post explains how to install and access Tanzu Contour, Promethous and Grafana on Tanzu clusters deployed by Cloud Director Container Service extension. so to get started first ensure TANZU CLI is installed on your local machine, if not then you can install by following documentation given Here

    Next thing you need is the kubeconfig file of your target TKG cluster which is reachable from your local client machine on which you have installed Tanzu CLI, also make sure you run:

    # tanzu init 

    Installation Steps

    NOTE: CSE4 provisioned TKG cluster, cert-manager, kapp-controller, secretgren-controller and tanzu-standard package repository already have been installed. so you can skip step1,2 and 3.

    Step:1- Install kapp-controller

    kapp-controller gives us a flexible way to fetch, template, and deploy our applications to Kubernetes. It will also keep our apps continuously up to date when the configuration in our source repository changes. Install kapp-controller in the cluster using:

    #kubectl apply -f https://github.com/vmware-tanzu/carvel-kapp-controller/releases/latest/download/release.yml

    Step:2- Install secretgren-controller

    In order to manage secrets across namespaces, Tanzu utilizes the carvel secret-gen-controller. you can install secretgren-controller in the cluster using:

    #kubectl apply -f https://github.com/vmware-tanzu/carvel-secretgen-controller/releases/latest/download/release.yml

    Step:3- Install cert-manager

    Install cert-controller in the cluster using:

    #kubectl apply -f https://github.com/cert-manager/cert-manager/releases/download/v1.9.1/cert-manager.yaml

    Verify Tanzu Packages

    Using the Tanzu CLI, you can install packages from the built-in tanzu-standard package repository or from other package repositories that you add to your target cluster, such as the Tanzu Application Platform Repository. Install tanzu-standard package repository v1.6.0.

    #tanzu package repository add tanzu-standard --url projects.registry.vmware.com/tkg/packages/standard/repo:v1.6.0

    Verify that the Prometheus package is available in your Tanzu K8s cluster as well as retrieve the version of the available package:

    #tanzu package available list prometheus.tanzu.vmware.com -A

    Verify that the Contour package is available in your Tanzu K8s cluster as well as retrieve the version of the available package:

    #tanzu package available list contour.tanzu.vmware.com -A

    verify that the Grafana package is available in your Tanzu K8s cluster as well as retrieve the version of the available package:

    #tanzu package available list grafana.tanzu.vmware.com -A

    Step4:- Implement Ingress Control with Contour

    Contour is a Kubernetes ingress controller that uses the Envoy edge and service proxy. Tanzu Kubernetes Grid includes signed binaries for Contour and Envoy, which you can deploy into Tanzu Kubernetes (workload) clusters to provide ingress control services in those clusters.

    You must first create the configuration file that will be used when you install the Contour package and then install the package. you can generate config file using:

    #tanzu package available get contour.tanzu.vmware.com/1.20.2+vmware.1-tkg.1 --values-schema
    
    #tanzu package available get contour.tanzu.vmware.com/PACKAGE-VERSION -generate-default-values-file

    I am using below using data-values.yaml for contour

    envoy:
      service:
        type: LoadBalancer
      hostPorts:
        enable: false
      hostNetwork: false
    certificates:
      useCertManager: true

    Install the package as below:

    #tanzu package install contour --package-name contour.tanzu.vmware.com --version 1.20.2+vmware.1-tkg.1 --values-file contour-data-values.yaml

    Step 5:- Deploy Prometheus

    Prometheus is an open-source systems monitoring and alerting toolkit. Tanzu Kubernetes Grid includes signed binaries for Prometheus that you can deploy on workload clusters to monitor cluster health and services.verify the configuration file using below commands, this file configures the Prometheus package.

    #tanzu package available get prometheus.tanzu.vmware.com/2.36.2+vmware.1-tkg.1 --values-schema
    #tanzu package available get prometheus.tanzu.vmware.com/PACKAGE-VERSION --generate-default-values-file

    This command lists configuration parameters of the Grafana package and their default values. You can use the output to update your prometheus-data-values.yaml file, I have used below config file which is hosted on git, if you want you can download and use and in my config file ingress is enabled in the yaml which means it works with ingress.

    https://raw.githubusercontent.com/avnish80/prometheus/main/prometheus-data-values.yaml

    Install/update/delete prometheus pkg using below commands..

    #tanzu package install prometheus --package-name prometheus.tanzu.vmware.com --version 2.36.2+vmware.1-tkg.1 --values-file prometheus-data-values.yaml
    
    #tanzu package installed update prometheus --values-file prometheus-data-values.yaml
     
    #tanzu package installed delete prometheus

    Step 6:- Deploy Grafana

    Grafana is open-source software that allows you to visualize and analyze metrics data collected by Prometheus on your clusters. Tanzu Kubernetes Grid includes a Grafana package that you can deploy on your Tanzu Kubernetes clusters. verify the configuration file, this file configures the Grafana package..

    #tanzu package available get grafana.tanzu.vmware.com/7.5.16+vmware.1-tkg.1 --values-schema
    
    ##tanzu package available get grafana.tanzu.vmware.com/PACKAGE-VERSION --generate-default-values-file
    

    This command lists configuration parameters of the Grafana package and their default values. You can use the output to update your grafana-data-values.yml file, I have used below config file which is hosted on git, if you want you can download and use and in my config file ingress is enabled in the yaml which means it works with ingress.

    https://raw.githubusercontent.com/avnish80/grafana/main/grafana-data-values.yaml

    #tanzu package install grafana --package-name grafana.tanzu.vmware.com --version 7.5.16+vmware.1-tkg.1 --values-file grafana-data-values.yaml
     
    #tanzu package installed update grafana --values-file grafana-data-values.yaml
     
    #tanzu package installed delete grafana

    Access the Grafana Dashboard

    After Grafana is deployed, the grafana package creates a Contour HTTPProxy object with a Fully Qualified Domain Name (FQDN) of grafana.system.tanzu. To use this FQDN to access the Grafana dashboard, Use the IP address of the LoadBalancer for the Envoy service in the tanzu-system-ingress namespace.

    In case FQDN to access the Grafana dashboard does not work

    1. Create an entry in your local /etc/hosts file that points an IP address to this FQDN:
    2. Use the IP address of the LoadBalancer for the Envoy service in the tanzu-system-ingress namespace.
    3. Navigate to https://grafana.system.tanzu.

    Another issue is because the site uses self-signed certificates, you might need to navigate through a browser-specific security warning before you are able to access the dashboard.

  • Getting Started with VMware Cloud Director Container Service Extension 4.0

    VMware Cloud Director Container Service Extension brings Kubernetes as a service to VMware Cloud Director, offering multi-tenant, VMware supported, production ready, and compatible Kubernetes services with Tanzu Kubernetes Grid. As a service provider administrator, you can add the service to your existing VMware Cloud Director tenants. By using VMware Cloud Director Container Service Extension, customers can also use Tanzu products and services such as Tanzu® Mission Control to manage their clusters.

    Pre-requisite for Container Service Extension 4.0

    • Provider Specific Organization – Before you can configure VMware Cloud Director Container Service Extension server, it is must to create an organization to hosts VMware Cloud Director Container Service Extension server
    • Organization VDC within Organization – Container Service extension Appliance will be deployed in this organization virtual data center
    • Network connectivity – Network connectivity between the machine where VMware Cloud Director Container Service Extension is installed, and the VMware Cloud Director server. VMware Cloud Director Container Service Extension communicates with VMware Cloud Director using VMware Cloud Director public API endpoint
    • CSE 4.0 CPI automatically creates Load balancer, you must ensure that you have configured  NSX Advanced Load Balancer, NSX Cloud, and NSX Advanced Load Balancer Service Engine Group for tenants who need to create Tanzu Kubernetes Cluster.

    Provider Configuration

    With the release of VMware Cloud Director Container Service Extension 4.0, service providers can use the CSE Management tab in the Kubernetes Container Clusters UI plug-in, which demonstrate step by step process to configure the VMware Cloud Director Container Service Extension server.

    Install Kubernetes Container Clusters UI plug-in for VMware Cloud Director

    You can download the Kubernetes Container Clusters UI plug-in for the VMware Cloud Director Download Page and upload the plug-in to VMware Cloud Director.

    NOTE: If you have previously used the Kubernetes Container Clusters plug-in with VMware Cloud Director, it is necessary to deactivate it before you can activate a newer version, as only one version of the plug-in can operate at one time in VMware Cloud Director. Once you activate a new plug-in, it is necessary to refresh your Internet browser to begin using it.

    Once partner has installed plugin, The Getting Started section with in CSE Management page help providers to learn and set up VMware Cloud Director Container Service Extension in VMware Cloud Director through the Kubernetes Container Clusters UI plug-in 4.0. At very High Level this is Six Step process:

    Lets start following these steps and deploy

    Step:1 – This section links to the locations where providers can download the following two types of OVA files that are necessary for VMware Cloud Director Container Service Extension configuration:

    NOTE- Do not download FIPS enabled templates

    Step:2 – Create a catalog in VMware Cloud Director and upload VMware Cloud Director Container Service Extension OVA files that you downloaded in the step:1 into this catalog

    Step:3 – This section initiates the VMware Cloud Director Container Service Extension server configuration process. In this process, you can enter details such as software versions, proxy information, and syslog location. This workflow automatically creates a Kubernetes Clusters rights bundle, CSE Admin Role role, Kubernetes Cluster Author role, and VM sizing policies. In this process, the Kubernetes Clusters rights bundle and Kubernetes Cluster Author role are automatically published to all tenants as well as following Kubernetes resource versions will be deployed

    Kubernetes ResourcesSupported Versions
    Cloud Provider Interface (CPI)1.2.0
    Container Storage Interface (CSI)1.3.0
    CAPVCD1.0.0

    Step:4 – This section links to the Organization VDCs section in VMware Cloud Director, where you can assign VM sizing policies to customer organization VDCs. To avoid resource limit errors in clusters, it is necessary to add Tanzu Kubernetes Grid VM sizing policies to organization virtual data centers.The Tanzu Kubernetes Grid VM sizing policies are automatically created in the previous step. Policies created are as below:

    Sizing PolicyDescriptionValues
    TKG smallSmall VM sizing policy2 CPU, 4 GB memory
    TKG mediumMedium VM sizing policy2 CPU, 8 GB memory
    TKG largeLarge VM sizing policy4 CPU, 16 GB memory
    TKG extra-largeX-large VM sizing policy8 CPU, 32 GB memory

    NOTE: Providers can create more policies manually based on requirement and publish to tenants

    In VMware Cloud Director UI, select an organization VDC, and from the left panel, under Policies, select VM Sizing and Click Add and then from the data grid, select the Tanzu Kubernetes Grid sizing policy you want to add to the organization, and click OK.

    Step:5 – This section links to the Users section in VMware Cloud Director, where you can create a user with the CSE Admin Role role. This role grants administration privileges to the user for VMware Cloud Director Container Service Extension administrative purposes. You can use this user account as OVA deployment parameters when you start the VMware Cloud Director Container Service Extension server.

    Step:6 – This section links to the vApps section in VMware Cloud Director where you can create a vApp from the uploaded VMware Cloud Director Container Service Extension server OVA file to start the VMware Cloud Director Container Service Extension server.

    • Create a vApp from VMware Cloud Director Container Service Extension server OVA file.
    • Configure the VMware Cloud Director Container Service Extension server vApp deployment lease
    • Power on the VMware Cloud Director Container Service Extension server.

    Container Service Extension OVA deployment

    Enter a vApp name, optionally a description, runtime lease and storage lease (should be no lease so that it does not suspend automatically), and click Next.

    Select a virtual data center and review the default configuration for resources, compute policies, hardware, networking, and edit details where necessary.

    • In the Custom Properties window, configure the following settings:
      • VCD host: VMware Cloud Director URL
      • CSE service account’s username The username: CSE Admin user in the organization
      • CSE service account’s API Token: to generate API Token, login to provider session with CSE user which you created in Step:5 and then go to “User Preferences” and click on “NEW” in “ACCESS Tokens” section (When you generate an API Access Token, you must copy the token, because it appears only once. After you click OK, you cannot retrieve this token again, you can only revoke it. )

    • CSE service account’s org: The organization that the user with the CSE Admin role belongs to, and that the VMware Cloud Director Container Service Extension server deploys to.
    • CSE service vApp’s org: Name of the provider org where CSE app will be deployed

    In the Virtual Applications tab, in the bottom left of the vApp, click Actions > Power > Start. this completes the vApp creation from the VMware Cloud Director Container Service Extension server OVA file. This task is the final step for service providers to perform before the VMware Cloud Director Container Service Extension server can operate and start provisioning Tanzu Kubernetes Clusters.

    CSE 4.0 is packed with capabilities that address and attract developer personas with an improved feature set and simplified cluster lifecycle management. Users can now build and upgrade versions, resize, and delete K8s clusters directly from the UI making it simpler and faster to accomplish tasks than before. This completes provider section of Container Service extension in next blog post i will write about Tenant workflow.