Create a VPC-backed subnet in VCFA 9 and NSX assigns the default gateway for you — the first usable address in the CIDR. Try to change it in NSX Manager and the field is greyed out. It looks like a platform limitation. It isn’t. The gateway is fully configurable, at creation and afterwards, through the Supervisor API. This post covers the whole path: installing the CLI, establishing organization and namespace context, creating a subnet with a custom gateway, modifying an existing one, and verifying that NSX actually realised the change.
Contents
1. Why the NSX Manager field is disabled ·
2. Prerequisites ·
3. Establishing context with the VCF CLI ·
4. Understanding the two Subnet kinds ·
5. Creating a subnet with a custom gateway ·
6. Modifying an existing subnet ·
7. Verifying realisation ·
8. Choosing a valid CIDR
1. Why the NSX Manager field is disabled
VPC-backed subnets in VCFA 9 are managed declaratively. The Kubernetes object is the source of truth, and a controller reconciles it into NSX continuously. Editing the realised configuration in NSX Manager sits outside that loop — so even when a change appears to save, the controller restores whatever the object specifies. That is also why the value reverts on refresh: a symptom that reads like a defect but is the reconciliation loop working correctly.
The rule that follows is worth carrying beyond this specific case: in a declarative system, a greyed-out control usually means you are looking at realised state rather than desired state. The edit belongs in the object.
2. Prerequisites
Requirement
Where to get it
VCF CLI (the vcf command)
Broadcom Support portal. It supersedes the older kubectl cci plugin.
kubectl
Any recent release. The VCF CLI generates the kubeconfig it uses.
An API token
VCF Automation org portal → user menu → API Tokens → Generate. Displayed once; copy it immediately.
Namespace access
A role that permits creating objects in a Supervisor Namespace. Read-only consumers can follow along but not apply.
Commands below are PowerShell on Windows. They work identically on Linux and macOS with the usual quoting differences.
3. Establishing context with the VCF CLI
Store the token in a variable. The quotes matter — without them PowerShell attempts to execute the token as a command.
$vcfa_token = "your-api-token-here"
Create the organization context. This is the CLI’s term for a saved connection to a VCF Automation tenant.
Substitute your endpoint and tenant name. Use --insecure-skip-tls-verify only in a lab; in production supply your fleet CA with --ca-certificate instead.
The CLI creates one context for the organization plus one for every Supervisor Namespace you can reach. List them:
kubectl config get-contexts
NAME                                      NAMESPACE
my-org
my-org:app-ns-4hm32:default-project       app-ns-4hm32
my-org:phoenix-ns-kj9g6:team-phoenix      phoenix-ns-kj9g6
Context names have three parts
The format is <org>:<namespace>:<project>. Using the bare namespace name returns “no context exists with the name”. Copy the full string from the output above.
Switch into the namespace where the subnet will live:
Tokens expire mid-session
An expired token surfaces as Unauthorized, as com.vmware.vapi.std.errors.unauthorized, or — confusingly — as a complaint about downloading the OpenAPI schema on an otherwise valid manifest. All three mean the same thing. Re-authenticate with vcf context use my-org, then switch back to your namespace context.
4. Understanding the two Subnet kinds
Before writing any YAML, know which object you are creating. VCFA 9 exposes two distinct Subnet kinds in different API groups, corresponding to the two areas of the VCF Automation UI. They are not interchangeable.
Build & Deploy
Manage & Govern
Context
Namespace
Organization
API group
crd.nsx.vmware.com/v1alpha1
vpc.nsx.vmware.com/v1alpha1
Scope
Supervisor Namespace
VPC
Name format
db-tier
<vpc>:db-tier
Additional required fields
—
regionName, vpcName
Both support custom gateways, so the technique here applies at either level. Most consumers want the namespace-scoped object; the VPC-scoped one is for governance workflows.
Diagnosing the wrong layer“The server doesn’t have a resource type” almost always means you are on the wrong context rather than that the object does not exist. Check with kubectl config current-context before assuming a CRD is missing.
5. Creating a subnet with a custom gateway
By default NSX assigns the first usable address in the range — a subnet allocated 172.30.0.192/27 receives gateway 172.30.0.193. To choose a different address you must supply both the CIDR and the gateway, because the gateway is only meaningful relative to a known range.
Use create, not applykubectl apply writes a last-applied-configuration annotation that this API rejects outright with “Annotation updates are not supported.” Use kubectl create for new objects and kubectl edit or kubectl patch for changes. Inside a VKS guest cluster, ordinary apply works normally — the restriction applies to the VCF Automation API only.
The gateway may sit at any usable address within the CIDR. It does not have to be the first.
6. Modifying an existing subnet
Contrary to what the greyed-out NSX Manager field suggests, the gateway can also be changed after creation:
PowerShell and inline JSON
Wrap the JSON in single quotes and use plain double quotes inside. Escaping the inner quotes with backslashes — the pattern that works in bash — produces “invalid character ‘\\’ looking for beginning of object key string” here.
Changing the gateway alters routing for every workload on the subnet, so treat it as a change with a maintenance window rather than a routine edit.
7. Verifying realisation
This is the step most worth building into your habits, and it generalises well beyond gateways.
kubectl create and kubectl edit return success the moment the Kubernetes API accepts the object. NSX realisation happens afterwards, asynchronously, and it can fail silently.
kubectl get subnet db-tier -o jsonpath='{.status.conditions}'
A healthy subnet:
[{"reason":"SubnetReady","status":"True","type":"Ready",
  "message":"NSX Subnet with DHCPDeactivated has been successfully created/updated"}]
A failed one carries the real NSX error in the condition message:
[{"reason":"SubnetNotReady","status":"False","type":"Ready",
  "message":"... IpAddressBlocks path=[...] do not have spare capacity
   to allocate CIDR of size 32 and startIp 172.30.0.160."}]
Confirm the realised addressing too, which is where you will see whether your requested gateway was honoured:
kubectl get subnet db-tier -o jsonpath='{.status.networkAddresses}{"\n"}{.status.gatewayAddresses}'
A failed subnet still looks created
It appears in kubectl get subnets with a name, an access mode, and a spec. It simply has no network behind it. Any automation against this API should poll status.conditions rather than trusting the command’s exit code.
8. Choosing a valid CIDR
Specifying ipAddresses disables automatic allocation — ipv4SubnetSize is then ignored entirely, and selecting a valid free range becomes your responsibility.
Each access mode draws from a different IP block, and the blocks do not overlap:
Access mode
Address source
Reachable from
Private
The VPC’s own private range
Within the VPC; SNAT applied on egress
PrivateTGW
A separate transit-gateway block
Other VPCs on the same transit gateway — routed, not NAT’d
Public
The NSX Project’s external block
Natively routed beyond the VPC
Choose from the wrong pool and NSX names the block it expected:
CIDR 172.30.1.64/27 does not belong to IpAddressBlocks
path=[/orgs/default/projects/.../ip-blocks/default-tgw-region-west]
To find free space, list what is already allocated:
kubectl get subnets,subnetsets -o custom-columns=`
'NAME:.metadata.name,CIDR:.status.networkAddresses'
Allocation is sequential
NSX allocates from the next free boundary rather than filling gaps. Apparent gaps in your namespace’s view are usually claimed by other namespaces sharing the same VPC, which you cannot see from a tenant context. Step past the highest allocated block rather than attempting to reuse a gap — and if you hit “do not have spare capacity” on a range that looks free, that is why.
Summary
Task
Command or field
Authenticate
vcf context create <org> --type cci --api-token $token
Switch to namespace
kubectl config use-context <org>:<ns>:<project>
Set gateway at creation
spec.advancedConfig.gatewayAddresses plus spec.ipAddresses
Change it later
kubectl edit subnet <name>
Verify
kubectl get subnet <name> -o jsonpath='{.status.conditions}'
Find free ranges
kubectl get subnets,subnetsets with status.networkAddresses
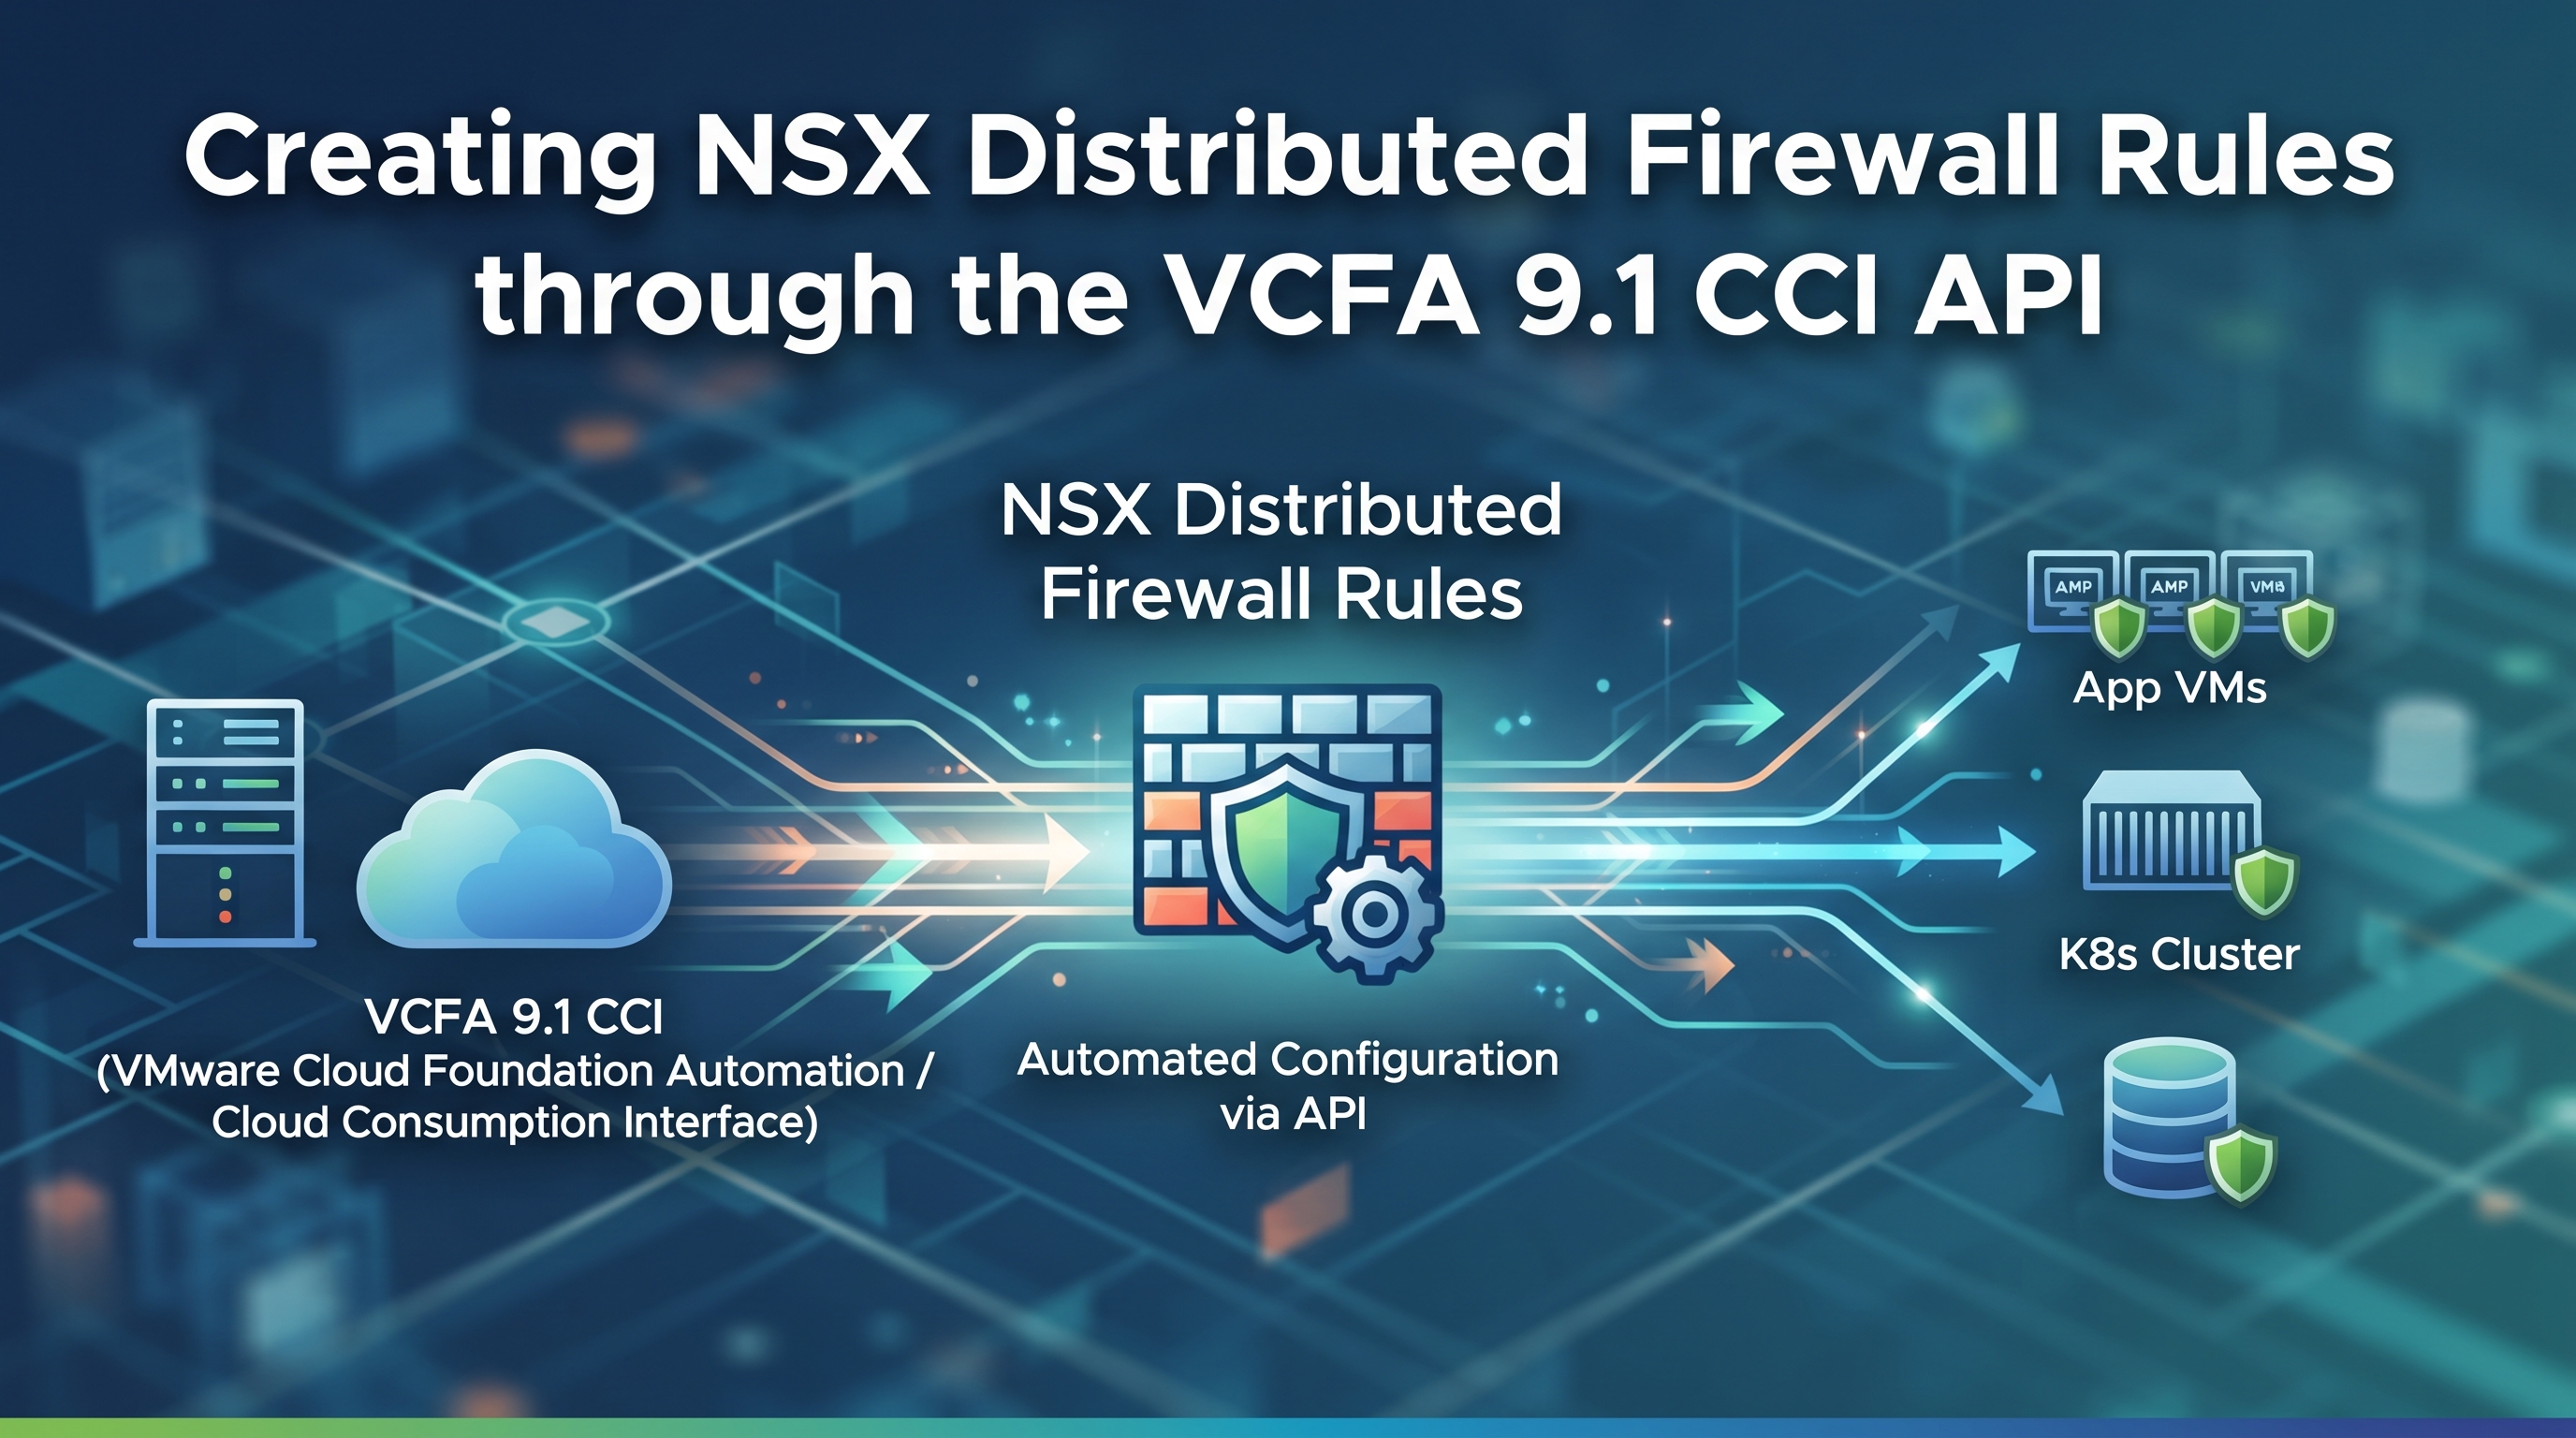
On VCF Automation 9.1, the Cloud Consumption Interface turns an NSX distributed firewall policy into what is, mechanically, just a Kubernetes object — you POST a manifest and NSX enforces it. That means firewall-as-code without ever logging into NSX Manager. This is the complete, tested toolkit: every Postman request, a browser helper, and two scripts that push a whole rule set from a CSV. It also includes the three walls I hit — a 404, a PowerShell quirk, and a dependency error — because you’ll hit them too, and the errors don’t say what they mean.
Who this is for
VCF architects and platform engineers automating east-west segmentation on VCFA 9.1. If you’re building a real GitOps pipeline, the idiomatic tool is vcf-cli plus kubectl apply against these same resources. What follows is the REST-level view — the exact request shapes, clicked through in Postman — useful when you want to understand what’s on the wire, or bulk-load rules from a spreadsheet a human maintains.
What the CCI actually exposes
The All-Apps organization in VCFA 9.1 fronts a Kubernetes-style API at /cci/kubernetes. NSX VPC objects appear on it as Custom Resource Definitions in the vpc.nsx.vmware.com/v1alpha1 group. Distributed firewall policy is the FirewallPolicy kind; security groups are NetworkSecurityGroup; named services are NetworkService. You address them with ordinary REST verbs and a bearer token, and the platform realizes your intent as genuine NSX vDefend policy.
firewallpolicies
The DFW policy resource (cluster-scoped)
networksecuritygroups
Groups you reference from rules
status.Realized
Enforcement signal, inline on every object
The full path. Everything below fills in each box, plus the errors between them.
Postman setup
Create an environment with these variables so the requests below resolve: vcfaHost, vcfaTenant, apiToken (durable, from the portal), accessToken (filled by the token request’s script), and namespace is not needed — this resource is cluster-scoped. Select the environment in the top-right dropdown. For a *.vcf.lab self-signed cert, turn off Settings → SSL certificate verification. If you’re in the signed-out Lightweight client (no environments or scripts), just paste literal values instead of {{variables}}.
1
Authentication
Get a bearer token
Every request carries an Authorization: Bearer header. Mint an API token once in the VCFA portal (account settings → API Tokens, shown only once), then exchange it for a short-lived access token. The exchange is an OAuth refresh-token grant against the tenant manager:
Capture the token automatically so every later request can use it — add this on the request’s Scripts → Post-response tab:
Scripts → Post-response
const res = pm.response.json();
pm.environment.set("accessToken", res.access_token);   // some builds: res.token
The token exchange in Postman — an x-www-form-urlencoded POST returns access_token (a Bearer token), valid for expires_in seconds (3600 here).
Already holding a valid bearer token from the portal or a prior exchange? Skip all of the above and paste it straight into the Authorization header (or the scripts’ -AccessToken parameter). Both scripts below support that.
400 vs 401
A 400 on the exchange endpoint usually means you fed it something that isn’t a refresh token (an access token, say). A 401 later, on the actual API calls, means your access token expired — re-run the token request to refresh {{accessToken}}. The durable API token doesn’t expire on the same cadence; the access token does.
2
The endpoint
Discover the resource — and learn it’s cluster-scoped
Here’s the first wall. POST to what looks like the obvious path with a namespace segment and you get a 404 whose details block is empty — meaning the route itself isn’t served, not that your object is missing. Don’t guess the path; ask the API server what it serves:
Discovery confirms firewallpolicies is namespaced: false — cluster-scoped, so the request path carries no /namespaces/ segment. Adding one is what produces the empty-details 404. The CCI proxy is already per-tenant; your org scoping rides on the token.
3
CRUD in Postman
Create, read, update, delete
Create a policy by POSTing to the collection. Trim metadata to just the name — uid, resourceVersion, and creationTimestamp are server-owned, and a non-empty resourceVersion can be rejected on create:
Read. A crucial quirk: the list response omits each policy’s rules array — you get only policy-level fields and status. To see the rules, GET the policy by name:
GET list · by-name
# List — no rules array, but shows status.ruleCount + Realized per policy
GET  https://{{vcfaHost}}/cci/kubernetes/apis/vpc.nsx.vmware.com/v1alpha1/firewallpolicies

# By name — includes the full rules array
GET  https://{{vcfaHost}}/cci/kubernetes/apis/vpc.nsx.vmware.com/v1alpha1/firewallpolicies/policy-web01

# Headers (both)
Authorization: Bearer {{accessToken}}
Update is read-modify-write: GET the object, change what you need, PUT the whole thing back echoing the current resourceVersion. A PUT replaces the entire rules array, so send them all — an omitted rule is a deleted rule.
# Headers
Authorization: Bearer {{accessToken}}
Content-Type:  application/json

# Body → raw · JSON  (full object; paste from your GET, echo resourceVersion)
{
  "kind": "FirewallPolicy",
  "apiVersion": "vpc.nsx.vmware.com/v1alpha1",
  "metadata": { "name": "policy-web01", "resourceVersion": "<from the GET>" },
  "spec": {
    "appliedTo": { "groupNames": ["Any"] },
    "category": "Environment", "regionName": "region-west", "priority": 500000,
    "stateful": true, "tcpStrict": false, "locked": false,
    "rules": [ /* ALL rules here — the array is replaced wholesale */ ]
  }
}
The update PUT in Postman, echoing resourceVersion. The response is a 200 — but status.Realized is still False, reason InProgress: the API accepted the intent, NSX hasn’t finished enforcing it yet. Poll the GET until it flips to True.
The API returns 200 when it accepts your intent, not when NSX has enforced it. Every object carries the truth in status.conditions[].type == "Realized", alongside status.ruleCount. After any write, GET the policy and confirm Realized: True and the count you expect. No separate realized-state endpoint needed.
4
The schema
Rule fields, and the IP-or-group union
Source and destination members are a union type — a member is either a literal address or a group reference. This matters: for simple, literal rules you don’t need to pre-create any groups.
Member style
Example
Use when
ipAddress (host)
{ "ipAddress": "192.168.10.20" }
A single literal host
ipAddress (CIDR)
{ "ipAddress": "10.30.0.0/24" }
A literal subnet
groupName
{ "groupName": "web-servers" }
Dynamic or reused membership
Field
Values
direction
In, Out, InOut
action
Allow, Drop (silent), Reject (informs client)
ipProtocol
IPV4, IPV6, IPV4_IPV6
services
networkServiceName refs — Any or an existing named service (read-only via this API)
Lower number = evaluated first, within the category band
5
Dependencies
Groups must exist before the policy that references them
The second wall. If a rule references groupName: "web-servers" and that group doesn’t exist, the create fails with a 400 whose message spells out the exact policy path NSX couldn’t resolve. Groups are a sibling resource — cluster-scoped, full create verbs — so you provision them the same way, first:
The criteria shape can be IP-based (above) or condition/tag-based for dynamic membership. Create one and GET it back to confirm the exact schema your 9.1 build expects before scripting a batch. The group and the policy that references it must share the same regionName, or the reference won’t resolve.
6
Bulk from CSV
Drive a whole rule set from a spreadsheet
Now the payoff. Postman is great for single requests, but a whole rule set wants a script. Keep your rules in a CSV, one row per rule, grouped by a policy column. Multiple members in a cell are separated by ;. Row order is preserved as evaluation order, so a catch-all drop belongs last.
Two scripts consume that CSV identically. Both do the same loop: authenticate (exchange an API token, or use a bearer token you pass in), build a FirewallPolicy body per policy with IP-vs-group auto-detection, upsert (POST if new, PUT with resourceVersion if it exists), then poll Realized and report per policy. Both take --dry-run so you can inspect the JSON before anything hits the server, and --insecure for a self-signed lab cert.
Python
create_dfw_rules.py · python3, requires requests
#!/usr/bin/env python3
"""
create_dfw_rules.py

Create or update VCF Automation (CCI) distributed firewall policies and rules
from a CSV file.

Flow per run:
  1. Exchange the VCFA API token for a short-lived access (bearer) token.
  2. Read the CSV and group rows by policy name.
  3. Build a FirewallPolicy body per policy (auto-detecting IP/CIDR vs group name).
  4. Upsert: GET the policy -> POST if absent, PUT (with resourceVersion) if present.
  5. Re-read and report the Realized status and rule count.

Endpoint (cluster-scoped, no namespace):
  POST/PUT  https://<host>/cci/kubernetes/apis/vpc.nsx.vmware.com/v1alpha1/firewallpolicies[/<name>]

Config is read from environment variables (override with flags):
  VCFA_HOST       e.g. auto-a.site-a.vcf.lab
  VCFA_TENANT     your All-Apps org / tenant name
  VCFA_API_TOKEN  the durable API token minted in the VCFA portal

CSV columns (header required):
  policy,name,direction,action,protocol,from,to,service,appliedTo,disabled
Optional per-policy columns (taken from the first row of each policy group):
  category,priority,region
Multiple members in one cell are separated by ';'.
Rule order in the CSV is preserved as evaluation order (first match wins).
"""

import argparse
import csv
import json
import os
import re
import sys
import time

import requests

IP_RE = re.compile(r"^\d{1,3}(\.\d{1,3}){3}(/\d{1,2})?$")
API_GROUP = "vpc.nsx.vmware.com/v1alpha1"


# ---------- small helpers ----------

def log(msg):
    print(msg, flush=True)


def die(msg, code=1):
    print(f"ERROR: {msg}", file=sys.stderr, flush=True)
    sys.exit(code)


def split_cell(cell):
    return [p.strip() for p in (cell or "").split(";") if p.strip()]


def member(cell):
    """Turn a from/to cell into a list of {ipAddress|groupName} members."""
    out = []
    for v in split_cell(cell):
        out.append({"ipAddress": v} if IP_RE.match(v) else {"groupName": v})
    return out


def services(cell):
    vals = split_cell(cell) or ["Any"]
    return [{"networkServiceName": s} for s in vals]


def group_names(cell):
    vals = split_cell(cell) or ["Any"]
    return {"groupNames": vals}


# ---------- token exchange ----------

def get_access_token(session, host, tenant, api_token):
    url = f"https://{host}/tm/oauth/tenant/{tenant}/token"
    resp = session.post(
        url,
        headers={
            "Content-Type": "application/x-www-form-urlencoded",
            "Accept": "application/json",
        },
        data={"grant_type": "refresh_token", "refresh_token": api_token},
    )
    if resp.status_code != 200:
        die(f"token exchange failed [{resp.status_code}]: {resp.text[:300]}")
    body = resp.json()
    token = body.get("access_token") or body.get("token")
    if not token:
        die(f"token exchange returned no access_token/token field: {list(body)}")
    return token


# ---------- CSV -> policy bodies ----------

def build_policies(rows, defaults):
    """Group CSV rows by 'policy' and build a FirewallPolicy body for each.
    Returns an ordered dict {policy_name: body}."""
    order = []
    groups = {}
    for r in rows:
        name = (r.get("policy") or "").strip()
        if not name:
            die("a CSV row is missing the 'policy' column value")
        if name not in groups:
            groups[name] = []
            order.append(name)
        groups[name].append(r)

    policies = {}
    for pname in order:
        prows = groups[pname]
        head = prows[0]
        rules = []
        for r in prows:
            rules.append({
                "name": (r.get("name") or "").strip(),
                "direction": (r.get("direction") or "InOut").strip(),
                "action": (r.get("action") or "Allow").strip(),
                "ipProtocol": (r.get("protocol") or "IPV4").strip(),
                "from": member(r.get("from")),
                "to": member(r.get("to")),
                "appliedTo": group_names(r.get("appliedTo")),
                "services": services(r.get("service")),
                "disabled": str(r.get("disabled", "")).strip().lower() == "true",
            })
        body = {
            "kind": "FirewallPolicy",
            "apiVersion": API_GROUP,
            "metadata": {"name": pname},
            "spec": {
                "appliedTo": {"groupNames": ["Any"]},
                "category": (head.get("category") or defaults["category"]).strip(),
                "regionName": (head.get("region") or defaults["region"]).strip(),
                "priority": int(head.get("priority") or defaults["priority"]),
                "stateful": True,
                "tcpStrict": defaults["tcp_strict"],
                "locked": False,
                "rules": rules,
            },
        }
        policies[pname] = body
    return policies


# ---------- API calls ----------

def policy_url(host, name=None):
    base = f"https://{host}/cci/kubernetes/apis/{API_GROUP}/firewallpolicies"
    return f"{base}/{name}" if name else base


def get_policy(session, host, token, name):
    resp = session.get(
        policy_url(host, name),
        headers={"Authorization": f"Bearer {token}", "Accept": "application/json"},
    )
    if resp.status_code == 200:
        return resp.json()
    if resp.status_code == 404:
        return None
    die(f"GET {name} failed [{resp.status_code}]: {resp.text[:300]}")


def upsert_policy(session, host, token, name, body):
    existing = get_policy(session, host, token, name)
    headers = {
        "Authorization": f"Bearer {token}",
        "Content-Type": "application/json",
        "Accept": "application/json",
    }
    if existing is None:
        resp = session.post(policy_url(host), headers=headers, data=json.dumps(body))
        verb = "created"
    else:
        rv = existing.get("metadata", {}).get("resourceVersion")
        if rv is not None:
            body["metadata"]["resourceVersion"] = rv
        resp = session.put(policy_url(host, name), headers=headers, data=json.dumps(body))
        verb = "updated"
    if resp.status_code not in (200, 201):
        die(f"{verb} {name} failed [{resp.status_code}]: {resp.text[:400]}")
    return verb


def realized(policy):
    if not policy:
        return None, None
    conds = policy.get("status", {}).get("conditions", [])
    state = next((c.get("status") for c in conds if c.get("type") == "Realized"), None)
    return state, policy.get("status", {}).get("ruleCount")


# ---------- main ----------

def main():
    ap = argparse.ArgumentParser(description="Create/update CCI DFW policies from a CSV.")
    ap.add_argument("csv", help="path to the rules CSV")
    ap.add_argument("--host", default=os.environ.get("VCFA_HOST"))
    ap.add_argument("--tenant", default=os.environ.get("VCFA_TENANT"))
    ap.add_argument("--api-token", default=os.environ.get("VCFA_API_TOKEN"))
    ap.add_argument("--category", default="Environment", help="default category (default: Environment)")
    ap.add_argument("--priority", type=int, default=500000, help="default priority (default: 500000)")
    ap.add_argument("--region", default="region-west", help="default regionName (default: region-west)")
    ap.add_argument("--tcp-strict", action="store_true", help="set tcpStrict=true on policies (default false)")
    ap.add_argument("--insecure", action="store_true", help="skip TLS verification (self-signed lab certs)")
    ap.add_argument("--ca-cert", help="path to a CA bundle for TLS verification")
    ap.add_argument("--dry-run", action="store_true", help="print the JSON bodies and exit; no API calls")
    args = ap.parse_args()

    with open(args.csv, newline="", encoding="utf-8") as f:
        rows = list(csv.DictReader(f))
    if not rows:
        die("CSV has no data rows")

    defaults = {
        "category": args.category,
        "priority": args.priority,
        "region": args.region,
        "tcp_strict": args.tcp_strict,
    }
    policies = build_policies(rows, defaults)

    if args.dry_run:
        for name, body in policies.items():
            log(f"# ---- {name} ({len(body['spec']['rules'])} rules) ----")
            log(json.dumps(body, indent=2))
        log(f"\n{len(policies)} policy/policies parsed, "
            f"{sum(len(b['spec']['rules']) for b in policies.values())} rules total. (dry-run)")
        return

    for k in ("host", "tenant", "api_token"):
        if not getattr(args, k):
            die(f"missing --{k.replace('_','-')} (or its VCFA_* env var)")

    session = requests.Session()
    if args.ca_cert:
        session.verify = args.ca_cert
    elif args.insecure:
        session.verify = False
        requests.packages.urllib3.disable_warnings()
        log("WARNING: TLS verification disabled (--insecure)")

    log("Exchanging API token for access token ...")
    token = get_access_token(session, args.host, args.tenant, args.api_token)

    ok = True
    for name, body in policies.items():
        n = len(body["spec"]["rules"])
        log(f"\n> {name}: {n} rule(s)")
        verb = upsert_policy(session, args.host, token, name, body)
        # brief re-read to confirm realization
        state, count = None, None
        for _ in range(6):
            state, count = realized(get_policy(session, args.host, token, name))
            if state == "True":
                break
            time.sleep(2)
        flag = "OK" if state == "True" else "PENDING"
        if state != "True":
            ok = False
        log(f"  {verb}; Realized={state} ruleCount={count}  [{flag}]")

    log("\nDone." if ok else "\nDone with warnings (some policies not yet Realized).")
    sys.exit(0 if ok else 2)


if __name__ == "__main__":
    main()
run it
pip install requests
export VCFA_HOST=auto-a.site-a.vcf.lab
export VCFA_ACCESS_TOKEN=eyJ...        # or VCFA_TENANT + VCFA_API_TOKEN to auto-exchange

python3 create_dfw_rules.py rules.csv --dry-run     # preview JSON, no calls
python3 create_dfw_rules.py rules.csv --insecure    # create/update for real
PowerShell
Runs on stock Windows PowerShell 5.1 and on PowerShell 7+. One quirk to know about, because it produces a baffling error if you write this kind of code from scratch:
The PowerShell array-nesting trap
PowerShell’s ConvertTo-Json and its array handling fight each other. On a function return, a leading unary comma (return ,$out) is needed to stop the array unrolling to a scalar. But on a direct hashtable-value assignment, that same comma double-wraps — producing "groupNames": [["Any"]] instead of ["Any"], and NSX rejects it with “cannot unmarshal array into Go struct field … of type string”. The script below has this right: commas on returns, none on assignments. If you adapt it, keep that distinction.
Create-DfwRules.ps1
<#
.SYNOPSIS
  Create or update VCF Automation (CCI) distributed firewall policies and rules from a CSV.

.DESCRIPTION
  Per run:
    1. Exchange the VCFA API token for a short-lived access (bearer) token.
    2. Import the CSV and group rows by the 'policy' column.
    3. Build a FirewallPolicy body per policy (auto-detecting IP/CIDR vs group name).
    4. Upsert: GET the policy -> POST if absent, PUT (with resourceVersion) if present.
    5. Re-read and report Realized status + rule count.

  Endpoint (cluster-scoped, no namespace):
    https://<host>/cci/kubernetes/apis/vpc.nsx.vmware.com/v1alpha1/firewallpolicies[/<name>]

  Runs on Windows PowerShell 5.1 (built in) and PowerShell 7+.

.PARAMETER Csv
  Path to the rules CSV.

.EXAMPLE
  $env:VCFA_HOST='auto-a.site-a.vcf.lab'; $env:VCFA_TENANT='myorg'; $env:VCFA_API_TOKEN='...'
  .\Create-DfwRules.ps1 -Csv .\rules.csv -DryRun
  .\Create-DfwRules.ps1 -Csv .\rules.csv -Insecure

.NOTES
  CSV columns (header required):
    policy,name,direction,action,protocol,from,to,service,appliedTo,disabled
  Optional per-policy columns (read from the first row of each policy group):
    category,priority,region
  Separate multiple members in one cell with ';'. Row order = evaluation order.
#>

[CmdletBinding()]
param(
    [Parameter(Mandatory = $true)][string]$Csv,
    [string]$VcfaHost   = $env:VCFA_HOST,
    [string]$Tenant     = $env:VCFA_TENANT,
    [string]$ApiToken   = $env:VCFA_API_TOKEN,
    [string]$AccessToken = $env:VCFA_ACCESS_TOKEN,
    [string]$Category   = 'Environment',
    [int]$Priority      = 500000,
    [string]$Region     = 'region-west',
    [switch]$TcpStrict,
    [switch]$Insecure,
    [string]$CaCert,
    [switch]$DryRun
)

$ErrorActionPreference = 'Stop'
$ApiGroup = 'vpc.nsx.vmware.com/v1alpha1'
$IpRegex  = '^\d{1,3}(\.\d{1,3}){3}(/\d{1,2})?$'

function Fail($msg) { Write-Error $msg; exit 1 }

# ---- member / cell helpers ----
function Split-Cell($cell) {
    if ([string]::IsNullOrWhiteSpace($cell)) { return @() }
    return ($cell -split ';' | ForEach-Object { $_.Trim() } | Where-Object { $_ })
}
function Convert-Members($cell) {
    $out = @()
    foreach ($v in (Split-Cell $cell)) {
        if ($v -match $IpRegex) { $out += [ordered]@{ ipAddress = $v } }
        else                    { $out += [ordered]@{ groupName = $v } }
    }
    return ,$out    # comma keeps it an array even with one element
}
function Convert-Services($cell) {
    $vals = Split-Cell $cell; if ($vals.Count -eq 0) { $vals = @('Any') }
    return ,@($vals | ForEach-Object { [ordered]@{ networkServiceName = $_ } })
}
function Convert-GroupNames($cell) {
    $vals = Split-Cell $cell; if ($vals.Count -eq 0) { $vals = @('Any') }
    return [ordered]@{ groupNames = @($vals) }
}

# ---- build one policy body from its rows ----
function Build-Policy($name, $rows) {
    $head  = $rows[0]
    $rules = @()
    foreach ($r in $rows) {
        $rules += [ordered]@{
            name       = "$($r.name)".Trim()
            direction  = if ($r.direction) { "$($r.direction)".Trim() } else { 'InOut' }
            action     = if ($r.action)    { "$($r.action)".Trim() }    else { 'Allow' }
            ipProtocol = if ($r.protocol)  { "$($r.protocol)".Trim() }  else { 'IPV4' }
            from       = Convert-Members $r.from
            to         = Convert-Members $r.to
            appliedTo  = Convert-GroupNames $r.appliedTo
            services   = Convert-Services $r.service
            disabled   = ("$($r.disabled)".Trim().ToLower() -eq 'true')
        }
    }
    $cat  = if ($head.PSObject.Properties['category'] -and $head.category) { "$($head.category)".Trim() } else { $Category }
    $reg  = if ($head.PSObject.Properties['region']   -and $head.region)   { "$($head.region)".Trim() }   else { $Region }
    $prio = if ($head.PSObject.Properties['priority'] -and $head.priority) { [int]$head.priority }         else { $Priority }

    return [ordered]@{
        kind       = 'FirewallPolicy'
        apiVersion = $ApiGroup
        metadata   = [ordered]@{ name = $name }
        spec       = [ordered]@{
            appliedTo  = [ordered]@{ groupNames = @('Any') }
            category   = $cat
            regionName = $reg
            priority   = $prio
            stateful   = $true
            tcpStrict  = [bool]$TcpStrict
            locked     = $false
            rules      = $rules
        }
    }
}

# ---- HTTP: build common args for cert handling / version ----
function Get-IrmArgs {
    $a = @{}
    if ($CaCert)        { $a['Certificate'] = $null }   # placeholder; CA bundle handled below
    if ($PSVersionTable.PSVersion.Major -ge 6 -and $Insecure) { $a['SkipCertificateCheck'] = $true }
    return $a
}

function Get-AccessToken {
    $uri  = "https://$VcfaHost/tm/oauth/tenant/$Tenant/token"
    $body = "grant_type=refresh_token&refresh_token=" + [uri]::EscapeDataString($ApiToken)
    $args = Get-IrmArgs
    try {
        $resp = Invoke-RestMethod -Method Post -Uri $uri -Body $body `
            -ContentType 'application/x-www-form-urlencoded' -Headers @{ Accept = 'application/json' } @args
    } catch {
        Fail "token exchange failed: $($_.Exception.Message)"
    }
    $tok = $resp.access_token; if (-not $tok) { $tok = $resp.token }
    if (-not $tok) { Fail "token response had no access_token/token field" }
    return $tok
}

function Get-PolicyUrl($name) {
    $base = "https://$VcfaHost/cci/kubernetes/apis/$ApiGroup/firewallpolicies"
    if ($name) { return "$base/$name" } else { return $base }
}

function Get-Policy($token, $name) {
    $args = Get-IrmArgs
    try {
        return Invoke-RestMethod -Method Get -Uri (Get-PolicyUrl $name) `
            -Headers @{ Authorization = "Bearer $token"; Accept = 'application/json' } @args
    } catch {
        $code = $null
        if ($_.Exception.Response) { $code = [int]$_.Exception.Response.StatusCode }
        if ($code -eq 404) { return $null }
        Fail "GET $name failed: $($_.Exception.Message)"
    }
}

function Set-Policy($token, $name, $body) {
    $existing = Get-Policy $token $name
    $headers  = @{ Authorization = "Bearer $token"; Accept = 'application/json' }
    $args     = Get-IrmArgs
    if ($null -eq $existing) {
        $json = $body | ConvertTo-Json -Depth 12
        Invoke-RestMethod -Method Post -Uri (Get-PolicyUrl) -Headers $headers `
            -ContentType 'application/json' -Body $json @args | Out-Null
        return 'created'
    } else {
        if ($existing.metadata.resourceVersion) {
            $body.metadata['resourceVersion'] = $existing.metadata.resourceVersion
        }
        $json = $body | ConvertTo-Json -Depth 12
        Invoke-RestMethod -Method Put -Uri (Get-PolicyUrl $name) -Headers $headers `
            -ContentType 'application/json' -Body $json @args | Out-Null
        return 'updated'
    }
}

function Get-Realized($policy) {
    if ($null -eq $policy) { return @($null, $null) }
    $state = ($policy.status.conditions | Where-Object { $_.type -eq 'Realized' } | Select-Object -First 1).status
    return @($state, $policy.status.ruleCount)
}

# ================= main =================

if (-not (Test-Path $Csv)) { Fail "CSV not found: $Csv" }
$rows = Import-Csv -Path $Csv
if (-not $rows) { Fail "CSV has no data rows" }
if (-not ($rows | Get-Member -Name policy -MemberType NoteProperty)) {
    Fail "CSV is missing the required 'policy' column"
}

# preserve first-seen policy order
$order = @(); $seen = @{}
foreach ($r in $rows) {
    $p = "$($r.policy)".Trim()
    if (-not $p) { Fail "a CSV row has an empty 'policy' value" }
    if (-not $seen.ContainsKey($p)) { $seen[$p] = $true; $order += $p }
}

$policies = [ordered]@{}
foreach ($p in $order) {
    $prows = @($rows | Where-Object { "$($_.policy)".Trim() -eq $p })
    $policies[$p] = Build-Policy $p $prows
}

if ($DryRun) {
    foreach ($p in $order) {
        $b = $policies[$p]
        Write-Host "# ---- $p ($($b.spec.rules.Count) rules) ----"
        $b | ConvertTo-Json -Depth 12
    }
    $total = ($order | ForEach-Object { $policies[$_].spec.rules.Count } | Measure-Object -Sum).Sum
    Write-Host "`n$($order.Count) policy/policies parsed, $total rules total. (dry-run)"
    exit 0
}

if (-not $VcfaHost) { Fail "missing -VcfaHost (or VCFA_HOST env var)" }
if (-not $AccessToken) {
    foreach ($n in @('Tenant','ApiToken')) {
        if (-not (Get-Variable -Name $n -ValueOnly)) {
            Fail "missing -$n (or its VCFA_* env var). Alternatively pass -AccessToken to skip the exchange."
        }
    }
}

# TLS handling for Windows PowerShell 5.1 (no -SkipCertificateCheck there)
if ($PSVersionTable.PSVersion.Major -lt 6) {
    [System.Net.ServicePointManager]::SecurityProtocol = [System.Net.SecurityProtocol]::Tls12
    if ($Insecure) {
        Write-Host "WARNING: TLS verification disabled (-Insecure)"
        Add-Type @"
using System.Net;
using System.Security.Cryptography.X509Certificates;
public class TrustAllCerts {
    public static void Set() {
        ServicePointManager.ServerCertificateValidationCallback =
            delegate { return true; };
    }
}
"@ -ErrorAction SilentlyContinue
        [TrustAllCerts]::Set()
    }
} elseif ($Insecure) {
    Write-Host "WARNING: TLS verification disabled (-Insecure)"
}

if ($AccessToken) {
    Write-Host "Using provided bearer token (skipping token exchange)."
    $token = $AccessToken
} else {
    Write-Host "Exchanging API token for access token ..."
    $token = Get-AccessToken
}

$ok = $true
foreach ($p in $order) {
    $body  = $policies[$p]
    $count = $body.spec.rules.Count
    Write-Host "`n> $p : $count rule(s)"
    $verb = Set-Policy $token $p $body

    $state = $null; $rc = $null
    for ($i = 0; $i -lt 6; $i++) {
        $res = Get-Realized (Get-Policy $token $p)
        $state = $res[0]; $rc = $res[1]
        if ($state -eq 'True') { break }
        Start-Sleep -Seconds 2
    }
    $flag = if ($state -eq 'True') { 'OK' } else { 'PENDING' }
    if ($state -ne 'True') { $ok = $false }
    Write-Host "  $verb; Realized=$state ruleCount=$rc  [$flag]"
}

Write-Host $(if ($ok) { "`nDone." } else { "`nDone with warnings (some policies not yet Realized)." })
exit $(if ($ok) { 0 } else { 2 })
Give -AccessToken just the raw eyJ… value — the script adds the Bearer prefix itself. Paste Bearer eyJ… and you’ll double it up and get a 401.
Where this earns its keep: VCD-to-VCFA firewall migration
If you’re moving tenants off vCloud Director onto VCF Automation, the distributed firewall is one of the least glamorous and most error-prone parts of the cut-over — dozens or hundreds of per-tenant rules that have to land exactly right, because a missed allow is an outage and a missed deny is an exposure. Hand-recreating them in a new console doesn’t scale and doesn’t audit. This CSV-driven path turns it into a reviewable data problem: export the source DFW rules from VCD, normalize them into the same rules.csv shape (source, destination, service, action, direction), and let the script load them into VCFA — idempotently, so you can rerun it as many times as the migration-validation cycle needs. The CSV becomes the migration artifact itself: security and network teams review a spreadsheet instead of clicking through screens, it drops into source control as the record of what moved, and --dry-run gives you a diff before anything touches the target region. IP- and CIDR-based rules — the bulk of most VCD rule sets — map straight across as ipAddress members; group-based ones become NetworkSecurityGroup objects you create first, from the same kind of CSV. And because every policy reports Realized inline, you get an automated post-migration check: load the set, confirm every policy flipped to True, then cut traffic over. It won’t do the semantic mapping for you — VCD sections and applied-to scoping don’t line up one-to-one with VCFA’s category bands, and that judgement still needs an architect — but it removes the mechanical re-entry that makes firewall migration slow and risky, and leaves you reviewing intent in a CSV instead of transcribing rules by hand.
The other two walls, in one place
The first wall — the namespaced-path 404 — is covered above, in discovery. The two that bite later both throw a 400 whose message points away from the real cause:
Symptom
Real cause
Fix
400 “cannot unmarshal array … type string”
PowerShell double-wrapped an array ([["Any"]])
No leading comma on hashtable-value assignments
400 “Policy object path … does not exist”
A rule references a group that isn’t created yet
POST the NetworkSecurityGroup first, same region
The takeaway
Once the token flow and the cluster-scoped path click, DFW on VCFA 9.1 is just declarative Kubernetes resources you can POST from anything — Postman, Python, PowerShell, or a full kubectl/Terraform pipeline when you’re ready. The scripts here take a spreadsheet a human can maintain and turn it into realized, enforced firewall policy, with the realized status checked on the way out. Start with --dry-run, verify one policy, then let it run the set.
Lab-tested on VCF Automation 9.1 (CCI, vpc.nsx.vmware.com/v1alpha1). Verify resource schemas against your own build with a GET before batching — API surfaces shift between releases.
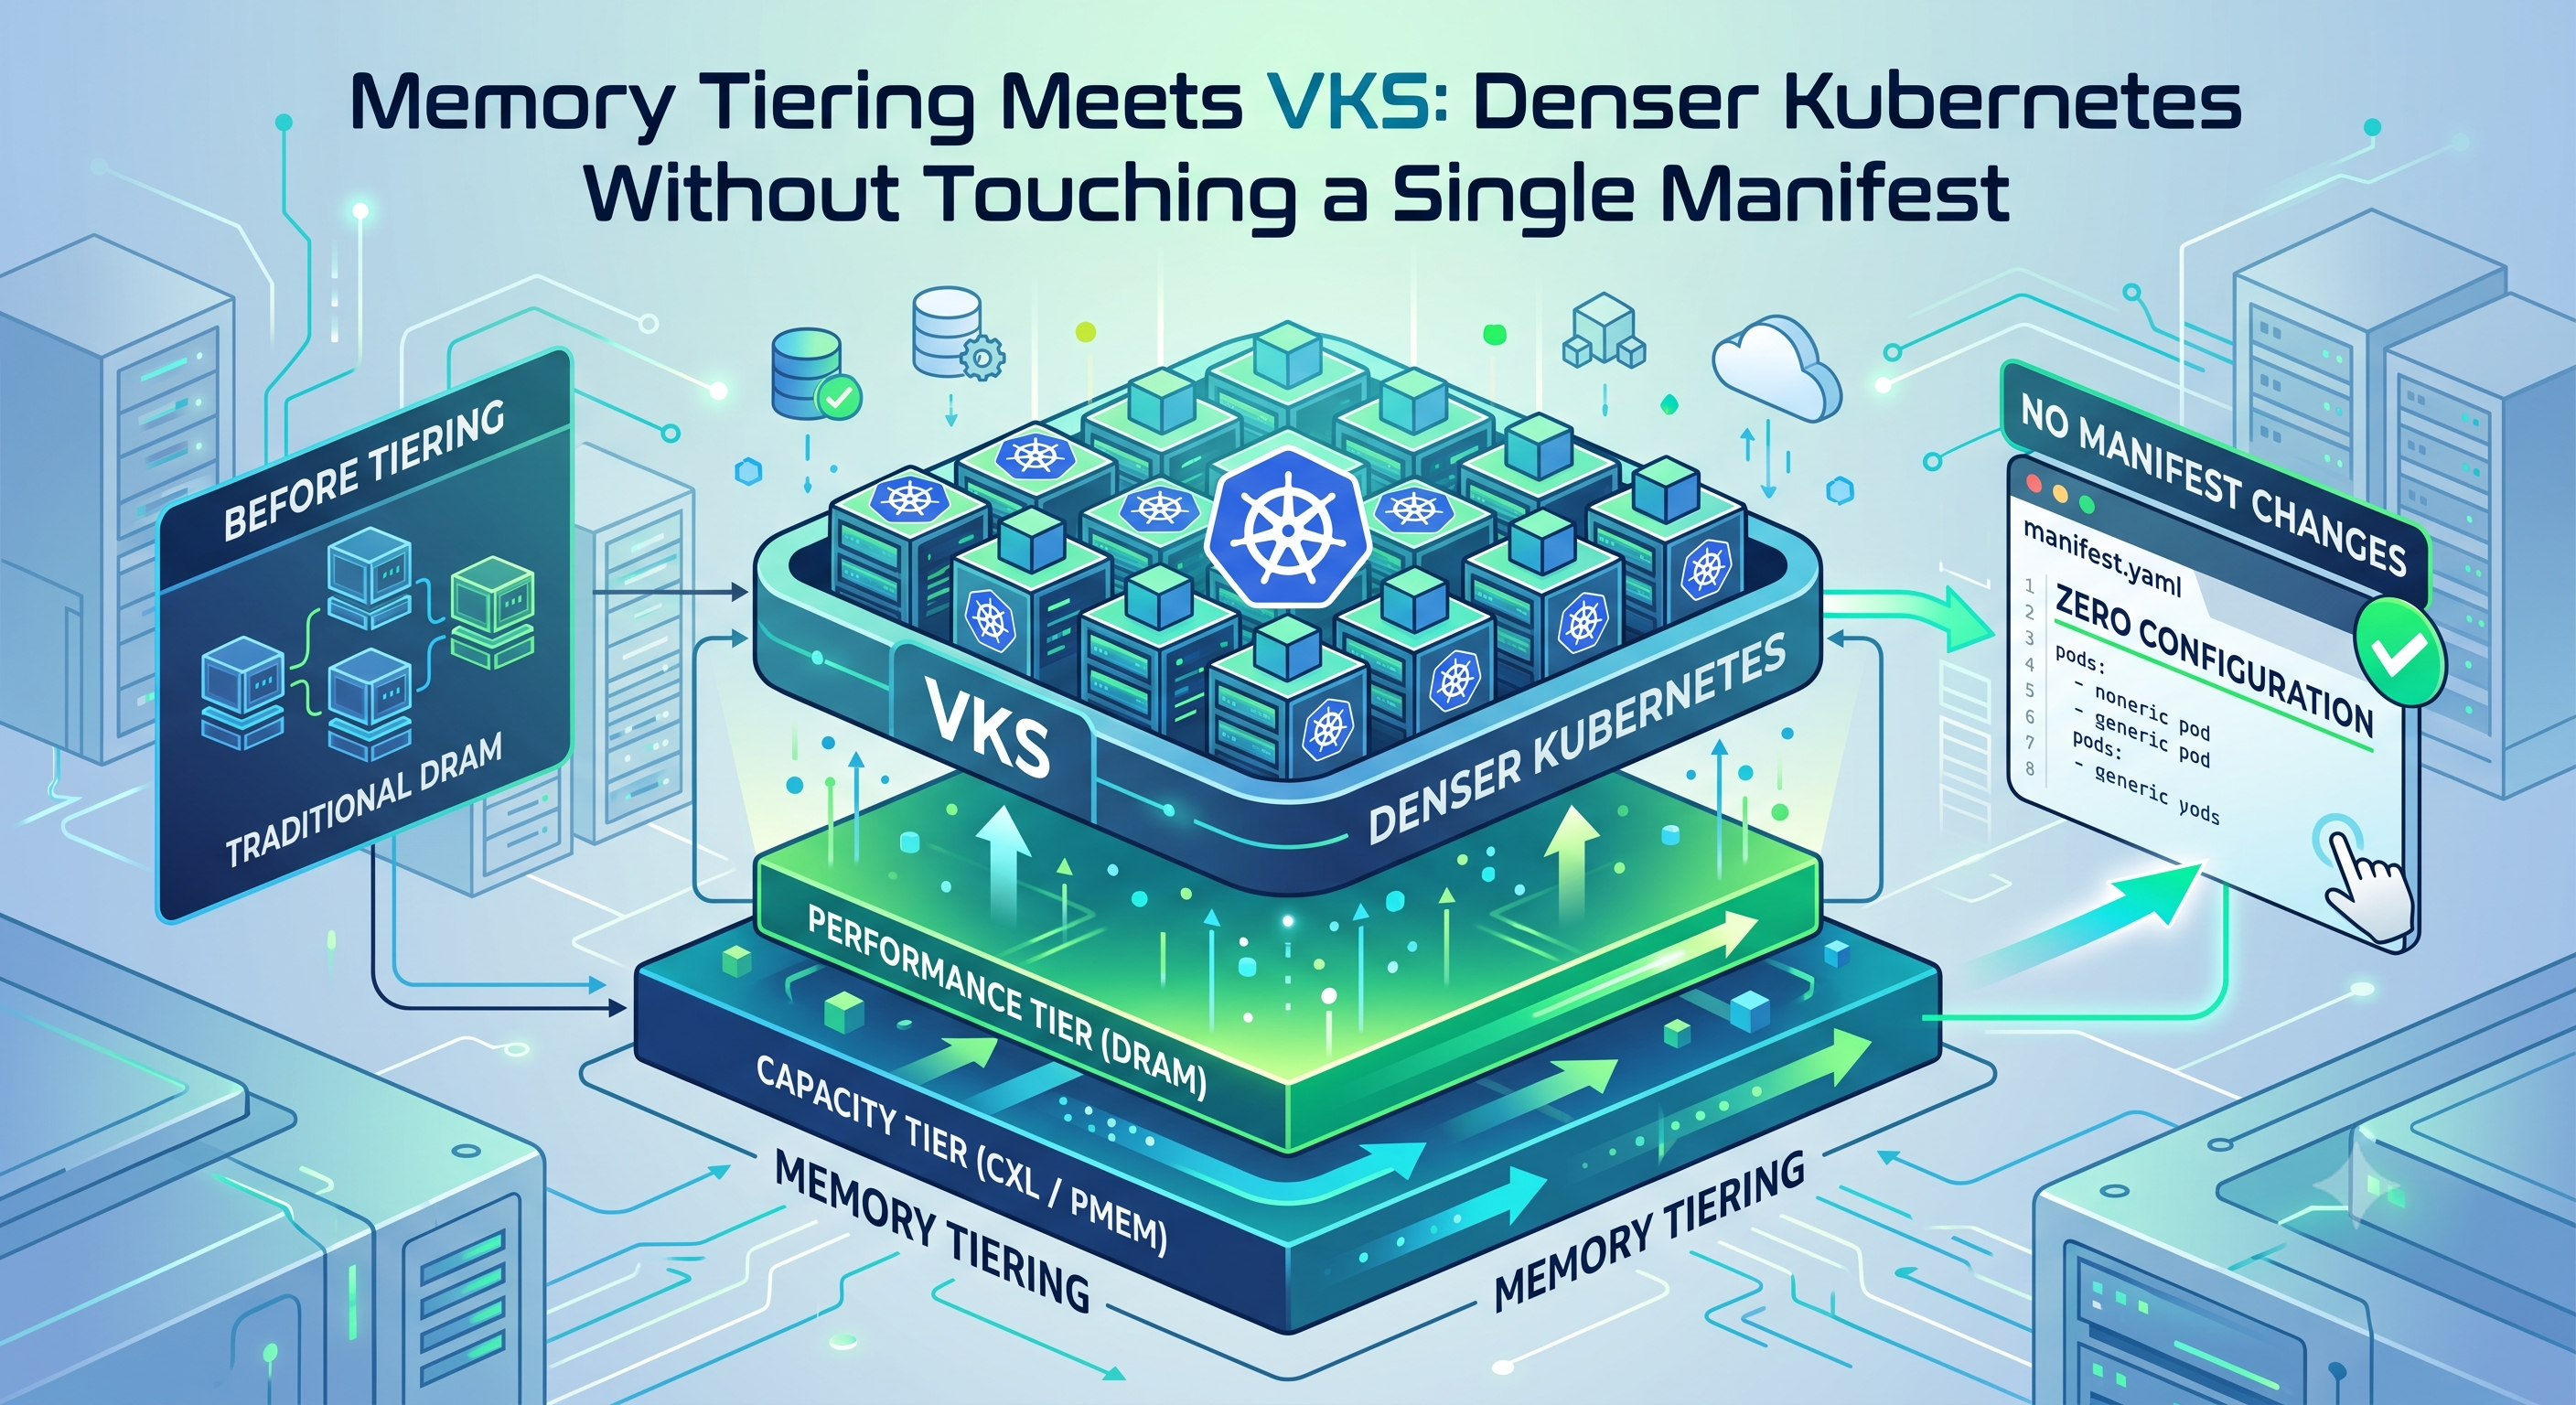
Every so often a platform capability arrives that your workloads benefit from without a single line of configuration. Memory Tiering under vSphere Kubernetes Service (VKS) is exactly that: enable it once at the cluster level, and every Kubernetes node — and every pod on it — inherits smarter memory economics automatically. No drivers, no manifest changes, no separate policy for containers. Broadcom has now published testing that confirms it works for VKS just as well as it does for VMs. Here is what the feature actually does, why the Kubernetes inheritance is the interesting part, and how to put it to work.
TL;DR for the busy architect:
Memory Tiering lets an ESXi host combine DRAM with an NVMe-backed second tier into one memory pool — hot pages stay in DRAM, cold pages move to NVMe, and pages promote back automatically when touched.
Because VKS worker nodes are VMs on that same hypervisor, Kubernetes inherits the capability transparently — nothing above the hypervisor needs to know it exists.
The payoff: more worker nodes per host, a smaller DRAM footprint for your Kubernetes estate, and one capacity model that covers VMs and containers together.
Broadcom’s validation shows VKS workloads on tiered hosts performing in line with VM workloads — so the sizing guidance you already use for VMs extends to Kubernetes with confidence.
It is a workload-class decision, not a global switch — the “where it fits” section below matters as much as the feature.
The quiet memory problem every Kubernetes platform team knows
Kubernetes schedules pods on requests, and requests are set defensively. The app team asked for 4 GiB “to be safe,” the Helm default was generous, and nobody wants to own the OOMKill. Multiply that across hundreds of pods and every production cluster carries a wide gap between the memory workloads reserve and the memory they actually touch. Platform teams fight this with rightsizing dashboards and VPA recommendations — worthy work that never quite ends, because it treats the symptom: the reservation. The reserved-but-cold memory itself still sits in expensive DRAM.
What if the infrastructure could simply handle cold memory differently from hot memory — without Kubernetes, the node OS, or the application having to participate?
What Memory Tiering actually does
Memory Tiering in VCF 9 lets an ESXi host present a single memory pool built from two tiers: fast DRAM and an NVMe device configured as a memory extension. The hypervisor watches page access patterns and manages placement automatically:
Hot pages stay in DRAM. Actively-touched memory lives where latency matters.
Cool pages move to the NVMe tier. Reserved-but-idle memory stops occupying your most expensive resource.
Touched pages promote back. If a cooled page becomes active again, it returns to DRAM — the process is continuous and automatic.
The crucial design point is where this happens: below the guest OS, below the Kubernetes node VM, below the container runtime. The workload sees one contiguous memory space. There is no driver to install, no kernel parameter to tune, and no application change required. And the economics follow naturally — enterprise NVMe capacity costs a fraction of DRAM per gigabyte, and NVMe bays are plentiful where DIMM slots are finite.
The VKS part: inheritance for free
Here is the architectural elegance that makes this a Kubernetes story. A VKS worker node is a VM running on the same vSphere infrastructure as everything else. So when you enable Memory Tiering on a VCF cluster, your Kubernetes nodes inherit it the moment they land there — exactly as your VMs do. The Kubernetes scheduler keeps making its decisions against each node’s advertised capacity, exactly as before. ESXi, underneath, manages page temperature. Kubernetes manages reservations; the hypervisor manages reality. Each layer does the job it is best at, and neither needs to know about the other.
Contrast that with what this would take anywhere else: per-node OS tuning, kernel-version dependencies, careful coordination with the container runtime, and a Kubernetes-specific memory policy to maintain forever. Under VKS it is one setting, applied at the infrastructure layer, covering your entire fleet — VMs and clusters alike.
The fair question has always been whether the container layer changes the story — Kubernetes workloads are dense, churny, and allocation-happy. Broadcom put exactly that question to the test in their July 2026 post Memory Tiering for VMs and VKS, running database benchmarks on tiered hosts with half the DRAM of the baseline. The finding that matters: VKS workloads performed in line with the equivalent VM workloads, staying close to the full-DRAM baseline within the published sizing guidance. The Kubernetes layer neither breaks nor degrades the feature. Their numbers and test parameters are in the post, with deeper sizing detail in the Memory Tiering performance whitepaper.
The picture
How it helps: four practical wins
1. More worker nodes per host, without buying DRAM. Memory — not CPU — is the binding constraint on most Kubernetes host density. Tiering raises the addressable memory per host using NVMe capacity, which means more (or larger) worker VMs on the same hardware. Your cold-page-rich container estate is precisely the workload profile this was built for: hundreds of defensively-sized pods generate exactly the reserved-but-idle memory that tiers gracefully.
2. A smaller DRAM footprint for the same Kubernetes estate. Flip the same coin: instead of packing more onto big hosts, run the estate you have on hosts with less DRAM. That matters most where DIMM slots are the constraint — edge sites, dense chassis, or refresh cycles where high-capacity DIMMs dominate the bill of materials. Because VCF licensing is per-core, capacity gained through memory density adds nothing to the software line — a point worth one sentence in any business case, even a feature-focused one.
3. One capacity model for VMs and containers. This is the quietly valuable one for platform teams. Broadcom’s validation means the sizing and tiering guidance you use for VM workloads extends to VKS workloads — one set of recommendations, one configuration, one capacity plan for a mixed fleet. No Kubernetes-specific memory policies to author, document, and maintain alongside your VM standards.
4. Zero change to the things you least want to touch. No application code, no container images, no Kubernetes manifests, no node OS tuning. For a platform team, features that require app-team cooperation move at the speed of your slowest app team; features that live below the stack move at the speed of a maintenance window. This one lives below the stack.
Where it fits — and where it doesn’t
An honest feature guide names the boundaries. Memory Tiering is a workload-class decision:
Hot working sets don’t tier. The benefit comes from cold pages. In-memory databases, Redis, Kafka page cache, JVM heaps under sustained load — workloads that touch most of what they allocate — keep their pages in DRAM, and tiering buys little on those nodes. Plan node pools accordingly rather than expecting uniform gains everywhere.
Latency-critical pods deserve DRAM guarantees. A page served from NVMe is fast by storage standards and slow by memory standards. Keep tail-latency-sensitive services on untiered or conservatively tiered hosts, and steer them there with the taints and node selectors you already use — your existing Kubernetes scheduling machinery is exactly the right control surface.
Respect the published guardrail. The official guidance keeps active memory comfortably within DRAM capacity — the working set, not the addressable total, is your design boundary. Start with conservative tier ratios, observe real page-temperature behavior, then extend.
It complements rightsizing; it doesn’t replace it. Tiering does not change what the Kubernetes scheduler sees — which is the point — but that also means inflated requests still strand schedulable capacity. Keep the rightsizing hygiene; let tiering absorb what hygiene can’t reach.
A practical adoption path
Step
Action
Output
1
Baseline active vs. consumed memory across VKS clusters in VCF Operations
Enable tiering on one tiering-friendly host group at a conservative ratio
Real page-temperature data from your workloads
4
Validate application SLOs and node stability through a full business cycle
Go/no-go evidence per workload class
5
Extend host group by host group, re-baselining as you go
A fleet-wide rollout grounded in your own data
The bottom line
The strongest features are the ones your workloads don’t have to know about. Memory Tiering under VKS is a hypervisor capability that Kubernetes inherits simply by running where it runs — hot pages in DRAM, cold pages on NVMe, everything transparent above the hypervisor line. For platform teams it means denser hosts or leaner DRAM configurations, one capacity model across VMs and containers, and not a single manifest changed. VKS already removes the operational overhead of running Kubernetes beside your VM estate; Memory Tiering quietly removes a good part of the DRAM overhead of running it at scale.
Start with the baseline in VCF Operations — the gap between active and consumed memory on your clusters is the feature’s opportunity in your environment, measured. Everything after that is a controlled rollout.
Are you running Memory Tiering under VKS yet — or planning to? I would love to hear which workload classes you are tiering first, and what your active-vs-consumed gap looks like in practice. And if there is interest, a tiering-readiness calculator in the style of my other VCF tools might be the natural follow-up.
VKS on VCF 9.1What Actually Changed & Why It Matters
A Comic Book Story in Seven Chapters
Issue #01 · May 2026 · The VCF 9.1 Saga
⚡ Cast of Characters ⚡
Captain VKS
vSphere Kubernetes Service 3.6
The hero. Born from vSphere, forged in CNCF conformance. Now powered up with VCF 9.1 abilities.
The Architect
Platform Engineer
Our protagonist. Runs multi-domain VCF estates. Needs Kubernetes at enterprise scale without the circus.
Cluster Creep
The Villain of Sprawl
Feeds on operational toil, slow provisioning, and fragmented toolchains. Grows stronger with every manual step.
The Oracle
VCF Operations 9.1
Sees all. Knows cost. Tracks every namespace. Speaks in metrics and FinOps.
🥊 The Challengers 🥊
The Cloud Twins
The Hyperscaler Duo
They move fast and always whisper: “Just move to our cloud.” They charge per hour and never let go.
The Red Baron
The Opinionated Platform
Arrives in full armor. Brings his own runtime, registry, mesh, and opinions about everything. Enterprise prices included.
The Wrangler
The Multi-Cluster Cowboy
Rides across any ranch — any cloud, any edge, any distro. Freedom is his creed. But who’s managing the cattle?
Bare Knuckle
The DIY Brawler
No platform. No hand-holding. Bare metal, kubeadm, and grit. Cheap up front. Costs you in blood and 3 AM pages.
Chapter 01The 37-Minute Nightmare
The data center. 6:42 AM. The Architect stares at a provisioning timer that refuses to move. Cluster Creep watches from the shadows, feeding on frustration.
The Architect
37 minutes to spin up a dev cluster. Thirty. Seven. Minutes. The hyperscaler team next door gets theirs in ten. The CTO is asking questions.
Cluster Creep
Yesss… and that’s just the deployment. Wait until you see the upgrade windows. I’ve got 45 minutes of downtime planned for each cluster. You have 200 clusters. Do the math. 😈
That’s 150 hours of maintenance windows per upgrade cycle… across the fleet…
May 5, 2026. Broadcom releases VCF 9.1. And everything changes.
Captain VKS
Miss me? I brought Fast Deploy. Let me show you the new numbers.
Metric
VCF 9.0
VCF 9.1
Cluster Deploy Time
37 min
11 min (↓69%)
Cluster Upgrade Time
45 min
15 min (↓67%)
Max Clusters / Supervisor
~100
500
Node Pool Placement
Manual
DRS Intelligent
Chapter 02The Challengers Step Forward
Word of VCF 9.1 spreads. Four challengers emerge from the fog, each claiming the throne of enterprise Kubernetes. The Architect has heard their pitches before.
The Cloud Twins
Adorable upgrade, Captain. But we’ve been doing sub-10-minute clusters for years. Managed control plane. Global regions. Auto-scaling node groups. Why fight gravity? Just come to the cloud.
Captain VKS
Sure — and your managed control plane costs how much per cluster per month? Multiply that by 500 clusters. Now add the egress fees. Now add the data sovereignty audit your CISO just mandated. I run on hardware you already own.
The Red Baron
How charming. You finally got CNI choice? I ship with my own SDN, my own service mesh, my own registry, my own CI/CD pipelines, and a full developer portal. I am the platform. You’re still assembling one.
Captain VKS
You are the platform. That’s the problem. Your opinions become my constraints. Your lifecycle becomes my upgrade treadmill. Your per-core subscription becomes my CFO’s nightmare. I give choice. You give mandates.
The Wrangler
Y’all are so cute with your single-vendor stacks. I run on any infrastructure. True multi-cluster freedom. No lock-in. Ever.
Captain VKS
Freedom is great until your team is maintaining six different infrastructure backends. I give you 500 clusters on one Supervisor with one operational model. You give them options and a prayer.
Bare Knuckle
I don’t need a platform. kubeadm, a Makefile, and raw skill. Zero licensing. Zero overhead. Pure Kubernetes.
Captain VKS
I respect the craft. But who patches your nodes at 2 AM? Who handles etcd backups? Who runs certificate rotation? Your “zero cost” platform costs three full-time engineers.
The Architect
I’ve evaluated all of you. Here’s my problem: I already run VCF. My VMs, NSX networking, vSAN storage, and security policies are all here. I need Kubernetes that joins my platform — not one that replaces it or ignores it.
The best Kubernetes platform is the one that doesn’t make me build a second operations team…
Chapter 03Fast Deploy — 11 Minutes or Bust
Captain VKS explains what changed under the hood. Fast Deploy isn’t a marketing stunt — it’s an architectural rework of the provisioning pipeline.
Captain VKS
Here’s what actually happened. We parallelized the node bootstrapping sequence, pre-staged container images into a local content library, and eliminated redundant API round-trips during cluster init. 11 minutes, from API call to workload-ready.
The Architect
What about upgrades? That’s where we bleed. Every cluster upgrade is a maintenance window, and my team juggles 200+ clusters.
Captain VKS45 minutes down to 15. Pre-staged images, parallel node drain-and-replace, and Multiple Clusters per Zone means you keep workloads running on Zone A while upgrading Zone B.
⚡ IMPACT METER ⚡
Provisioning Speed Gain
69%
Upgrade Speed Gain
67%
Scale Ceiling Increase
5× (500 clusters)
The Cloud Twins
11 minutes… fine, that’s competitive. But can you match our global availability zones?
Captain VKS
I don’t need 60 regions. My Architect’s data stays in his sovereign data center, on his hardware, under his compliance umbrella. Your 60 regions are 60 places his CISO has to audit.
Chapter 04DRS Strikes Back — Intelligent Node Pool Placement
VCF 9.1 introduces Intelligent Node Pool Placement. This isn’t basic affinity rules — it’s DRS-level scheduling applied to Kubernetes node pools.
Captain VKS
GPU pods → GPU hosts. NVMe workloads → NVMe nodes. DRS algorithm decides placement — not your YAML-wrestling platform team.
The Red Baron
I have Topology Manager, NUMA-aware scheduling, and a full operator ecosystem. Infrastructure-aware placement is table stakes for me.
Captain VKS
You schedule within the cluster. I schedule the cluster itself. DRS sees the whole estate. Your scheduler sees one namespace.
The Oracle
With VKS Cost Showback in VCF Operations 9.1, I can tell you exactly what each namespace, each cluster, each team is costing you. FinOps FOCUS-compliant.
The Oracle
I also expose an API for your RAG pipelines and MCP frameworks — your AIOps engine can query cost data directly.
Per-NS
Cost Attribution
FOCUS
FinOps Compliant
Real-Time
Pricing Estimates
Show + Charge
Back Capability
Chapter 05Container-as-a-Service & The CNI Revolution
VCF 9.1 introduces a simplified Container Service — deploy containers without deep Kubernetes expertise. Meanwhile, VKS 3.6 opens up CNI choice for the first time.
Captain VKS
First: Container-as-a-Service. Your app teams get a self-service surface. Click, deploy, done. No Supervisor clusters or ClusterClass YAML.
Captain VKS
Second: CNI freedom. VKS 3.6 deprecated ClusterBootstrap. Pick your CNI through the Addon Framework using AddonConfig CRDs. Antrea default, but the door is open.
The Wrangler
Oh, you’re just now letting people choose their CNI? Welcome to 2022, Captain.
Captain VKS
You let them choose. I let them choose with validated blueprints, lifecycle support, and a single vendor to call at 3 AM. Choice without support is just risk with extra steps.
The Architect
And the Ingress story? The popular open-source Ingress controller is being retired…
Captain VKSAvi Load Balancer — natively integrated. Centralized control plane, distributed data plane, full observability. Plus vDefend gives you zero-trust lateral security for every pod.
Chapter 06The Arena — Where Platforms Are Measured
The Architect pulls up the scoreboard. No hype. No marketing. Just the dimensions that matter when you’re running Kubernetes in a regulated enterprise with 500+ VMs already on VCF.
⚔️ HEAD TO HEAD ⚔️
Dimension
🛡️ Captain VKS
☁️ Cloud Twins
🎩 Red Baron
🤠 Wrangler
🥊 Bare Knuckle
Data Sovereignty
Your DC
Their DC
Your DC
Depends
Your DC
VM + K8s Unified Ops
Native
Separate
Separate
Separate
Separate
Infra-Aware Scheduling
DRS-Level
Node Groups
Topology Mgr
Manual
DIY
Cluster Scale Ceiling
500 / Supervisor
Unlimited*
Per Infra
Per Infra
Per Team
Integrated FinOps
FOCUS Native
Cost Explorer
3rd Party
3rd Party
Spreadsheet
Network Security
vDefend + NSX
VPC / SG
Built-in SDN
BYO
BYO
Licensing Model
Per-Core VCF
Per-Cluster/Hr
Per-Core Sub
Open Source
Free
Day 2 Toil
Low
Low
Medium
Medium
High
AI / GPU Conformance
CNCF AI Cert
GPU Pools
Operators
BYO
BYO
The Cloud TwinsWe still win on global reach and elastic scale.
The Red BaronAnd I still own the developer experience story. Integrated CI/CD, GitOps, developer portal — out of the box.
Captain VKS
Fair. I’m not claiming I win everywhere. But for organizations already running VCF — I’m the only Kubernetes that doesn’t create a second operational island. VMs and containers. One platform. One team. One pane.
The Architect
That’s the point everyone misses. I don’t need the “best” Kubernetes in a vacuum. I need the best Kubernetes for my stack. And my stack is VCF.
Chapter 07The Numbers Don’t Lie
💥 THE FINAL SHOWDOWN 💥
Broadcom surveyed 44 VCF 9 customers in March 2026. Here’s what they found — and why the challengers are looking over their shoulders.
51%
Less Infra Mgmt Time
46%
Less Monitoring Time
47%
Less Capacity Needed
39%
Faster MTTR/MTTI
Cluster Creep
No… NO! My sprawl… my complexity… my beautiful 37-minute deploy times… NOOOOO!
⚡ DEFEATED ⚡
The challengers watch from the sidelines. They’re not defeated — but they know the game just changed.
The Cloud TwinsWe’ll be back. Hybrid is where we’re heading too. See you at the edge…
The Red BaronImpressive numbers. But developer experience is the next battlefield. Don’t get comfortable.
The WranglerNot every ranch runs on one brand of fence. I’ll see you at the multi-cloud rodeo.
Bare KnuckleSome of us still prefer the raw fight. But… 11 minutes is hard to argue with.
The Architect
VCF 9.1 gives me 11-minute deploys, 15-minute upgrades, 500 clusters per Supervisor, intelligent DRS-based node placement, native FinOps cost tracking, self-service CaaS, open CNI choice, native Avi ingress, and zero-trust pod security. All on the same VCF stack I’m already running.
Captain VKS
And I’m CNCF Kubernetes AI Conformant. The challengers are strong — I respect each of them. But none of them can do what I do: run Kubernetes as a native citizen of your existing VMware estate.
VCF 9.1 doesn’t just iterate on VKS — it redefines the operational ceiling. Fast Deploy eliminates the provisioning tax. DRS-based placement removes manual scheduling toil. FinOps cost showback closes the last visibility gap. And with 500 clusters per Supervisor, VKS is the platform-scale Kubernetes runtime that VCF architects have been waiting for.
The challengers each bring real strengths — managed simplicity, opinionated platforms, multi-cloud freedom, zero-cost entry. This isn’t a story where the hero has no flaws. But for the Architect running a VCF estate with VMs, containers, and AI workloads under one roof — the calculus is clear.
The question is no longer “can VKS compete?” — it’s “what’s your excuse for not running it?”
If you’ve ever had to plan a VMware Cloud Foundation upgrade from scratch, you know how scattered the information can be — KB articles here, TechDocs pages there, blog posts from different release cycles, and no single place that ties it all together into a clear, ordered sequence.
That frustration is exactly what drove me to build the VCF Upgrade Path Planner. As someone who works with VCF environments day-to-day and runs vmtechie.blog to share practical infrastructure knowledge with the community, I wanted to create something that gives engineers a solid starting point before they walk into a maintenance window — a tool that reflects real-world upgrade sequencing, not just the high-level marketing overview.
Example — vSphere 7.0 → VCF 9.0 upgrade journey
This planner covers eight upgrade paths — spanning vSphere 7.0, 7.0 U2/U3, 8.0, and 8.0 U2/U3 converge routes to VCF 9.0, the VCF 5.0 and 5.1/5.2 in-place upgrade paths, the 9.0.0/9.0.1 to 9.0.2 maintenance path, and a current-state check for VCF 9.0.2 — all linked directly to official Broadcom Knowledge Base articles, TechDocs pages, and VMware blog posts so you can verify every recommendation against authoritative source material.
All 8 Upgrade Paths Covered
§
Why I Built This
If you’ve ever had to plan a VMware Cloud Foundation upgrade from scratch, you know how scattered the information can be. KB articles here, TechDocs pages there, blog posts from different release cycles, and no single place that ties it all together into a clear, ordered sequence. That frustration is exactly what drove me to build the VCF Upgrade Path Planner. As someone who works with VCF environments day-to-day and runs vmtechie.blog to share practical infrastructure knowledge with the community, I wanted to create something that gives engineers a solid starting point before they walk into a maintenance window — a tool that reflects real-world upgrade sequencing, not just the high-level marketing overview.
This planner covers eight upgrade paths spanning vSphere 7.0, 7.0 U2/U3, 8.0, and 8.0 U2/U3 converge routes to VCF 9.0, the VCF 5.0 and 5.1/5.2 in-place upgrade paths, the 9.0.0/9.0.1 to 9.0.2 maintenance path, and a current-state check for VCF 9.0.2 — all linked directly to official Broadcom Knowledge Base articles, TechDocs pages, and VMware blog posts so you can verify everything against authoritative source material. A significant amount of research, testing, iteration, and community review has gone into getting the sequencing, version gates, and critical warnings right. That said, VCF is a complex and fast-moving platform, and I’m one person — so if you spot a step that’s missing, a version gate that’s wrong, or guidance that doesn’t match your experience in the field, please reach out and let me know. Every piece of feedback makes this tool better for everyone in the community.
🔗
Everything is sourced
Every step links directly to the relevant Broadcom KB, TechDocs page, or VMware blog post so you can verify each recommendation against authoritative source material before acting on it.
⚠️
Critical gates are flagged
Version gates, one-way doors, and ordering requirements — like the Aria Operations 8.18 gate, the NSX Edge OVF certificate expiry fix in 9.0.2, and the mandatory vLCM Baseline-to-Image transition — are surfaced prominently, not buried in footnotes.
§
How We Calculate Time, Risk & Effort
The complexity numbers shown in each upgrade path — estimated duration, risk score, and effort score — are not pulled from a vendor SLA document. They are practical estimates built from field experience with VCF environments of varying sizes and community input from engineers who have executed these upgrades in production. Here is how each metric is derived.
Example — VCF 5.0 → VCF 9.0 path
Duration
4–8w
weeks estimated
Risk Score
50
out of 100
Effort Score
65
out of 100
Duration
Estimated based on the number of sequential phases in the path, the number of components that require ordered upgrades (SDDC Manager → NSX → vCenter → ESXi is always serial, never parallel), and the realistic time each component upgrade takes in a mid-sized environment. Converge paths from vSphere carry additional time for pre-converge remediation, vLCM Baseline-to-Image transitions, and the VCF Installer workflow itself. Paths starting from VCF 5.0 carry extra time for the mandatory VCF 5.2 intermediate hop. These are conservative estimates — your actual duration will vary based on node count, hardware speed, precheck findings, change management windows, and whether you are running a lab or a production fleet.
💡
What is RDU (Reduced Downtime Upgrade)?
Starting with VCF 9.0, vCenter upgrades exclusively use Reduced Downtime Upgrade (RDU). Instead of upgrading in-place and taking the existing vCenter offline for the full duration, RDU deploys a brand-new temporary vCenter appliance alongside the existing one, migrates all configuration and inventory data across while the environment stays running, then decommissions the old appliance. The result is a much shorter management plane outage — typically just a few minutes for the final cutover rather than the extended downtime of a traditional in-place upgrade. In VCF 9.0.1+, the Installer automatically assigns a 169.254.x.x link-local IP address for the temporary appliance, so you no longer need to pre-stage a static IP on your management network in most environments. RDU is only required for major version jumps (e.g. 8.x → 9.x) — within-9.x maintenance updates use a regular in-place upgrade with no temporary appliance needed.
Risk Score
A relative measure from 0 to 100 that reflects how many irreversible transitions the path contains, how many components must be upgraded in strict sequence, and how much room there is to safely roll back if something goes wrong. A vSphere 7.0 converge path scores higher risk not because converge is inherently dangerous, but because it involves more one-way doors — once the VCF Installer runs and creates the management domain, you cannot unconverge back to standalone vSphere. Maintenance paths like 9.0.0 to 9.0.2 score low risk because they involve fewer components, shorter windows, and well-understood rollback via snapshot.
Effort Score
Reflects the total planning and execution workload — number of discrete steps, number of decisions that require engineer judgment rather than automation, number of separate maintenance windows required, and the degree of documentation and preparation needed before you can safely begin. A vSphere 7.0 to VCF 9.0 path scores high effort not because any single step is especially hard, but because the cumulative preparation — HCL checks, Baseline-to-Image transitions, ELM removal, VCF Installer staging, Aria Suite pre-work, workload domain imports — adds up to a substantial project even before the first upgrade window opens.
⏱️
Duration Factors
Sequential component count
Intermediate hops required
Pre-converge remediation
Workload domain count
Aria Suite pre-work
🎯
Risk Factors
One-way door transitions
Rollback constraints
NSX version direction rules
vCenter RDU complexity
ELM removal requirements
🏗️
Effort Factors
Total discrete steps
Judgment calls required
Separate change windows
Documentation prep
Depot configuration work
Upgrade Path
Duration
Risk
Effort
Risk Bar
All three scores scale relative to each other across the eight paths, so they are most useful as a comparison tool — if you are deciding between targeting VCF 9.0.0 or 9.0.1, or choosing whether to converge from vSphere 8.0 U3 versus waiting to patch to U3 first, the scores give you a quick read on the relative complexity trade-off. They are starting points for your own planning conversation, not guarantees — always validate your specific environment against official Broadcom documentation and run the SDDC Manager upgrade prechecks before committing to a maintenance window.
§
A Community Tool
VCF is a complex and fast-moving platform, and I’m one person. A significant amount of hardwork has gone into building and refining this planner — cross-referencing every step against official Broadcom documentation, KB articles, and VMware engineering blog posts, running it through multiple review cycles, and iterating on the content based on community feedback. But if you spot a step that’s missing, a version gate that’s wrong, or guidance that doesn’t match your experience in the field, please reach out and let me know. Drop a comment below or contact me directly — every piece of feedback makes this tool better for everyone in the community.
Spotted something missing or incorrect?
Drop a comment below or reach out directly. Your field experience makes this tool better for the whole community.
A complete walkthrough of every calculation behind the tool — from raw NVMe capacity to ESA protection factors, NVMe memory tiering, and VCF licence entitlement. No black boxes.
Table of Contents
What the tool sizes
Host specification inputs
Management VM stack
Compute sizing formula
vSAN ESA storage pipeline
Protection policies & PF table
Final host count & limiter
NVMe memory tiering
External storage mode
VCF licence entitlement
Principal storage options (KB 416270)
Assumptions & caveats
1. What the tool sizes
The VCF 9 Fleet Sizer calculates the minimum number of ESXi hosts required across a VMware Cloud Foundation deployment — one Management Domain and any number of VI Workload Domains. For each domain it independently determines whether CPU, memory, or storage is the binding constraint, and returns the host count driven by the most demanding dimension.
The sizer is built specifically for VCF 9 with vSAN ESA — the Express Storage Architecture that requires NVMe-only drives and operates as a single storage tier without a separate cache/capacity split. It also models external storage mode (Fibre Channel, NFS) where hosts are sized on compute and memory only, and a disaggregated NVMe memory tiering model unique to VCF 9.
⚠️ Planning aid only — not an official Broadcom tool. All outputs are estimates based on the inputs you provide. Validate every design against official Broadcom documentation, the VMware HCL, and field engineering guidance before procurement or deployment. Real-world DRR and vSAN overheads vary significantly by workload.
2. Host specification inputs
Every domain (management and each WLD) has an independent host specification. The tool does not assume all hosts are identical across domains — a management cluster might run 2×16c hosts while a production WLD uses 2×32c AI-optimised nodes.
Input
Default
Used in
Notes
CPU Qty
2
Core count, licensing
Sockets per host
Cores per CPU
16
Core count, licensing
Physical cores — no hyperthreading multiplier applied
RAM (GB)
1,024
Memory sizing
Total usable host RAM
NVMe Qty
6
Storage sizing
NVMe drives per host (vSAN ESA only)
NVMe Size (TB)
7.68
Storage sizing
TB decimal — converted to GB via ×1,000
CPU Oversubscription
2×
Usable vCPU
vCPU:pCPU ratio — applies before reserve
RAM Oversubscription
1×
Usable RAM
1× = no oversubscription. Rarely exceed 1× for RAM
Compute Reserve %
30%
Usable vCPU & RAM
Headroom withheld from placement (HA, overhead)
Raw capacity per host formulas:
Host Cores = CPU Qty × Cores per CPU
Raw GB per Host = NVMe Qty × NVMe Size (TB) × 1,000
⚠️ No hyperthreading multiplier. The sizer deliberately does not multiply physical cores by 2 for hyperthreading. Logical thread counts are workload-specific and highly variable. Instead, the CPU oversubscription ratio gives you explicit control. A 2× ratio on a 32-core host models the same headroom as a 64-thread count at 1× — but you’re aware you’re making that choice.
3. Management VM stack
The Management Domain hosts a fixed stack of VCF infrastructure VMs. These are not user workloads — they are the control plane. Their combined vCPU, RAM, and disk demand is the entire sizing input for the management cluster. The tool carries an accurate per-component VM stack based on current VCF 9 T-shirt sizes from Broadcom documentation.
Component
Sizes
vCPU range
RAM range
Disk range
vCenter Server (Mgmt)
S / M / L / XL
4 – 24
21 – 58 GB
694 – 2,283 GB
NSX Manager
M / L / XL
6 – 24
24 – 96 GB
300 – 400 GB
NSX Edge
S / M / L / XL
2 – 16
4 – 64 GB
200 GB
NSX Global Manager
S / M / L / XL
4 – 24
16 – 96 GB
300 – 400 GB
Avi Load Balancer
S / M / L
8 – 24
24 – 48 GB
128 – 512 GB
vCenter Server (WLD)
S / M / L / XL
4 – 24
21 – 58 GB
694 – 2,283 GB
VCF Operations (SDDC Mgr)
S / M / L / XL
4 – 24
16 – 128 GB
274 GB
VCF Operations Collector
S / M
2 – 4
8 – 32 GB
144 GB
VCF Operations for Logs
S / M / L
12 – 48
24 – 96 GB
1,590 GB
VCF Operations for Networks
L / XL / XXL
12 – 48
24 – 96 GB
1,590 GB
VCF Net. Collector
M / L / XL / XXL
4 – 16
12 – 48 GB
200 – 300 GB
Identity Manager
Embedded / HA
0 – 32
0 – 64 GB
0 – 400 GB
Management sizing is deterministic: configure your component sizes, and the tool sums the total vCPU, RAM, and disk demand — no workload VM estimates needed.
4. Compute sizing formula
For Workload Domains, tenant demand is specified as VM count × per-VM averages for vCPU, RAM, and disk. Infrastructure VMs (NSX Edges, VKS Supervisor nodes) can optionally be included in the WLD demand totals. All demands are then sized against the host specification to determine the compute host floor.
vSAN ESA storage sizing is a sequential pipeline of capacity transformations. Each stage adds overhead for a specific reason. Starting from raw VM disk demand, the pipeline applies data reduction, swap space, protection overhead, free space reserve, and growth buffer — in that order — to arrive at the total raw capacity required and therefore the storage host floor.
Step 6 — Total Required = With Free GB × (1 + Growth%)
Storage host floor:
Effective Hosts = Total Hosts − Failures to Tolerate
Per-Host Requirement = Total Required GB ÷ Effective Hosts
Storage Hosts = ⌈ Total Required GB / Raw GB per Host ⌉ + Failures
Data Reduction Ratio (DRR)
The tool splits DRR into two separate inputs: Dedup Ratio and Compression Ratio. DRR = Dedup × Compression. Both default to 1.0 (no reduction) because real-world ratios depend entirely on data entropy — databases compress poorly, VDI golden images deduplicate extremely well. Using optimistic DRR values leads to undersized storage clusters.
⚠️ DRR above 2.0 is optimistic. Unless you have measured DRR from an equivalent workload in your environment, keep both ratios at 1.0. A DRR of 2.0 halves your storage host count. If the real-world ratio comes in at 1.2, you’ll need significantly more hosts than planned.
TiB conversion
The tool uses binary TiB throughout. NVMe drives are marketed in TB decimal (1 TB = 1,000 GB). Conversion: 1 TB = 1,000 GB = 0.9095 TiB. A 6× 7.68 TB host = approximately 41.9 TiB raw per host after conversion.
6. Protection policies & PF table
The Protection Factor (PF) is the storage overhead multiplier applied to usable data to account for redundancy. It is determined by your chosen RAID type, FTT (Failures to Tolerate), and for RAID-5, the stripe width. The tool enforces the minimum host count per policy.
Policy
PF
Min Hosts
FTT
Notes
RAID-5 2+1 FTT=1
1.50x
3
1
Default — best balance of protection and efficiency
RAID-5 4+1 FTT=1
1.25x
6
1
Lower overhead but needs 6+ hosts
RAID-6 4+2 FTT=2
1.5x
6
2
Two simultaneous drive failures tolerated
Mirror FTT=1
2.x
3
1
Simple mirror — highest rebuild performance
Mirror FTT=2
3.×
5
2
Three copies of every object
Mirror FTT=3
4.×
7
3
Maximum redundancy — very high storage cost
7. Final host count & limiter
The final host count is the maximum across four independent floors: CPU hosts, RAM hosts, storage hosts, and the policy minimum. The tool identifies which floor is binding and labels it the Limiter.
Final Hosts = max( CPU Hosts, RAM Hosts, Storage Hosts, Policy Min )
Limiter
Meaning
Common cause
Compute
CPU is the binding constraint
High vCPU density, low oversub ratio
Memory
RAM is the binding constraint
Memory-intensive workloads, RAM oversub at 1×
Storage
vSAN ESA capacity drives the count
Large disk demand, high PF, low DRR, insufficient NVMe
Policy
Protection policy min host count
Small cluster — compute fine but policy enforces minimum N hosts
When storage is the limiter, your NVMe capacity per host is insufficient to hold the protected dataset within the compute-determined host count. Solutions: increase NVMe drive count or size, relax the vSAN free% reserve, or accept a higher host count.
8. NVMe memory tiering (VCF 9)
VCF 9 introduces NVMe-backed memory tiering, where fast NVMe drives act as a memory extension. A partition of each NVMe drive is set aside as a memory tier — not storage — allowing effective RAM per host to exceed physical DRAM installed. This can reduce the host count when memory is the sizing constraint.
Tiering formulas:
Partition GB = min( Drive GB, DRAM × NVMe Ratio, 512 GB cap )
NVMe Ratio Used = Partition GB ÷ Host DRAM GB
Effective Host RAM = Host DRAM × (1 + NVMe Ratio Used)
Tiered Demand R = ( Eligible Demand ÷ (1 + NVMe Ratio Used) )
+ Ineligible Demand
Key inputs: Eligibility % (what fraction of workload is not latency-sensitive), NVMe-to-DRAM ratio (GB of NVMe tier per GB of DRAM), and tier drive size (separate from vSAN data drives). The effective RAM and reduced demand figure feed back into the RAM host floor calculation.
⚠️ Tiering caveats. NVMe tiering suits read-heavy workloads with temporal locality. It is not appropriate for latency-sensitive databases, real-time analytics, or anything where memory bandwidth consistency matters. The eligibility % input requires honest assessment of your workload mix.
9. External storage mode
Both the Management Domain and each WLD can be toggled to External Array mode — modelling Fibre Channel or NFS as principal storage. In this mode, the vSAN ESA storage pipeline is bypassed entirely. Host count is determined by compute only, and the user supplies an estimated array capacity for documentation.
Final Hosts (ext) = max( CPU Hosts, RAM Hosts, Policy Min )
— Storage floor is removed
The Limiter can only be Compute, Memory, or Policy. No ESA capacity, PF, or per-host storage figures are calculated for external domains.
Entitlement impact
Every VCF core licence includes 1 TiB of vSAN raw storage entitlement. When a domain runs external storage, those cores are still licensed at the same cost but the bundled vSAN storage is unused.
Forfeited TiB = Licensed Cores × 1 TiB/core
For a 10-host domain with 2×32c hosts, that’s 640 TiB of vSAN entitlement forfeited — storage the customer is paying for but not using. The tool surfaces this inline, in the Fleet License Summary, and in the export report so the commercial impact is visible before procurement conversations begin.
10. VCF licence entitlement calculation
VCF 9 is licensed per core. The tool calculates total core count across the fleet and derives the vSAN storage entitlement bundled with those licences.
If raw capacity exceeds entitlement, the difference is flagged as Add-on TiB Required — additional vSAN capacity licensing needed beyond what’s included in core licences. External storage domains exclude their array capacity from the fleet raw total.
11. Principal storage options in VCF 9 (KB 416270)
VCF 9 supports a broader set of principal storage options than previous versions. Some are available via standard greenfield workflows; others require the Converge workflow. This distinction matters — it affects automation, LCM, and Day 2 operations.
Storage Model
Mgmt Default
Mgmt Additional
VI WLD
Method
vSAN ESA
Principal
Principal
Principal
🟢 Greenfield
vSAN OSA
Principal
Principal
Principal
🟢 Greenfield
Storage Cluster (disagg. vSAN)
—
Principal
Principal
🟢 Greenfield
Compute-Only Cluster
—
Principal
Principal
🟢 Greenfield
Fibre Channel (FC)
Principal
Principal + Supp
Principal + Supp
🟢 Greenfield
NFS v3
Principal
Principal + Supp
Principal + Supp
🟢 Greenfield
iSCSI
Principal*
Principal*
Principal*
🔄 Converge
NFS v4.1
Principal*
Principal*
Principal*
🔄 Converge
FCoE
Principal*
Principal*
Principal*
🔄 Converge
NVMe/FC · NVMe/TCP · NVMe/RDMA
Principal*
Principal*
Principal*
🔄 Converge
* Via Converge workflow: deploy ESXi 9 → configure target datastore → deploy vCenter 9 → import into VCF 9 using Converge (management) or Import vCenter (WLD).
⚠️ Day 2 operations constraint: For non-LCM Day 2 operations (host commissioning, adding/removing hosts or clusters), perform the operation in vCenter first, then run Sync Inventory in VCF Operations. If this step is skipped, lifecycle management in VCF Operations will be blocked for those hosts and clusters.
Each WLD is modelled as one cluster. Multi-cluster WLDs are not supported.
Homogeneous hosts
All hosts within a domain use the same spec. Mixed-node clusters are not modelled.
vSAN ESA only
The storage pipeline models ESA only. vSAN OSA has different overhead characteristics.
Growth is a flat buffer
Growth % is applied once, not compounded year-over-year. Add headroom manually for multi-year plans.
VM Swap fixed at 100% for mgmt
The management domain’s swap requirement is not user-configurable.
No stretched cluster modelling
Stretched clusters double host count and require witness nodes — not currently modelled.
Flat DRR across all data
A single DRR applies to the entire disk demand. Mixed workloads with varying compressibility are not modelled per-VM.
No explicit vSAN CPU/RAM overhead
vSAN ESA consumes a small amount of host CPU and memory. Include this in your Compute Reserve % input.
🚫 Not an official Broadcom tool. This sizer is an independent planning aid built by vmtechie.blog. It is not endorsed by or affiliated with Broadcom. All figures are estimates. Validate every design against official Broadcom TechDocs, VMware HCL, and field engineering guidance before procurement or deployment.
After several VCF design sessions—navigating management domains, ESA policies, and the new core-based licensing—one thing became clear: we have plenty of docs, but we need more interactive clarity. I built the VCF 9 Fleet Planning Sizer (ESA Only) to help architects model environments quickly.
This is an independent planning calculator designed to help architects model:
Infrastructure VM footprint (Supervisor, Edge, etc.)
Management Domain sizing
Multiple Workload Domains
ESA storage behavior
DRR (Dedup × Compression realism)
Failure domain modeling (0 / N+1 / N+2)
Core-based licensing visibility
vSAN entitlement vs raw consumption
Why I Built This Tool
Designing VCF 9 isn’t just about adding up VMs. It’s about navigating the “Triple Constraint”: Compute, ESA Storage, and Licensing. In real architecture discussions, we constantly ask:
What is actually limiting this cluster?
CPU, Memory, or Storage?
How many hosts do we really need?
What does FTT=2 + RAID-6 really do to capacity?
Are we oversizing?
Are we license constrained?
What happens if I add Supervisor HA?
What does N-2 failure tolerance mean in practice?
Spreadsheets can answer parts of this, but they don’t show the dynamic interaction between policy, compute, and ESA, This tool tries to do that.
Management Domain Sizing
The calculator starts with:
🔹 Hardware Profile
CPUs per host
Cores per CPU
RAM per host
NVMe quantity & size
Minimum host count
🔹 Policy Inputs
CPU oversubscription
Memory oversubscription
Host reserve %
FTT & RAID policy
vSAN free space %
Dedup & compression
VM Swap Used %
Failure modeling
How It Calculates Management Hosts
Compute usable vCPU per host
Compute usable RAM per host
Apply reserve factor
Compare demand from full Management VM stack
Determine limiter (Compute / Memory / Storage)
Calculate ESA protected storage requirement
Apply failure domain logic
Final host count = max(CPU, RAM, Storage, Minimum Hosts)
You immediately see:
Demand vs Capacity
Protection Factor
ESA storage breakdown
Core licenses required
Raw TiB consumed
Full Management VM Stack Modeling
The tool includes:
SDDC Manager
vCenter
NSX Manager
NSX Edge
AVI
VCF Operations
Log Insight
Network Insight
Identity
Custom VMs
Each with T-shirt sizing.
ESA Storage Model
ESA math is often misunderstood,The calculator models:
VM Capacity = (VM disks + infra disks) / DRRSwap = Provisioned RAM × Swap %Interim Total = VM Capacity + SwapProtected = Interim × Protection Factor+ Free Space Reserve+ Growth %Storage Hosts = ceil(total / per-host raw capacity + failures)
Supervisor and VKS clusters are built using a common Kubernetes distribution core, but their Kubernetes versions are delivered differently. Starting with VCF 9, Supervisor Kubernetes releases are delivered independently of vCenter. You can update the Supervisor version by deploying a release from the Supervisor Content Library. In this blog post, we will walk through the Supervisor update process step by step. Let’s get started!
Create and Configure a Subscribed Content Library for Supervisor Images
For vSphere Supervisor, VMware publishes Supervisor images through a content delivery network (CDN). To enable or upgrade vSphere Supervisor, you can create a Subscribed Content Library that synchronizes with the Supervisor release images.
You can configure the content library in either Immediate or On-Demand synchronization mode. Note that immediate synchronization from the public CDN may require more time and consume additional disk space.
Log in to vCenter as a vSphere administrator.
From the Home menu, select Content Libraries
Click Create
Provide a name for the library (for example, supervisor update library) and click Next.
On the Configure Content Library page, select Subscribed Content Library.
In the Download content section, select the synchronization mode of the content library and click Next
When prompted, accept the SSL certificate thumbprint.The thumbprint will remain stored on your system until the subscribed content library is removed from the inventory
Apply Security Policy click Next
On the Add storage page, select a datastore as a storage location for the content library contents and click Next.
Review the details and click Finish
Assign the content library to the vSphere Supervisor platform
on vCenter go to Home menu, select Supervisor Management
Select Content Distribution.
On the Supervisor Images Library card, click Assign
Select the Content Library that created above and click Assign
The new content library begins synchronizing, which may take some time. After synchronization is complete, the new Supervisor Kubernetes versions included in the images will appear under the Updates tab
Apply Updates
Select the Available Version you want to update to. For example: v1.30.10+vmware.1-fips-vsc9.0.0.0100. ⚠️ Updates must be applied incrementally. You cannot skip versions (e.g., upgrading directly from 1.28 to 1.30). The correct sequence is 1.28 → 1.29 → 1.30.
Select a Supervisor to update and click Apply Updates
The system runs a series of pre-checks to verify the compatibility of the different components against the Supervisor Kubernetes version to which you want to update.
Learn which are the pre-checks that are run before updating the supervisor and how to troubleshoot in case of errors resulting from failed pre-checks, HERE
When the pre-checks are completed successfully, you can update the Supervisor.
Upgrading the VMware vSphere Supervisor service is a critical step in maintaining a secure, stable, and feature-rich VMware Cloud Foundation environment. By following best practices—planning incremental updates, leveraging subscribed content libraries, and validating compatibility at every stage—administrators can ensure minimal downtime while keeping workloads and Kubernetes clusters up to date. Regular Supervisor upgrades not only enhance platform capabilities but also strengthen the foundation for running modern applications, containers, and cloud-native services efficiently and reliably.
In today’s multi-tenant cloud environments, VMware Cloud Foundation Automation(VCFA) offers a robust layered architecture that seamlessly bridges enterprise-grade infrastructure management with developer-ready self-service capabilities.
By clearly separating responsibilities—from VMware Cloud Service Providers who manage the physical and virtual infrastructure, to organization administrators who allocate resources, and finally to developers who consume them—VCFA enables efficient resource governance, operational consistency, and scalability. This structured approach not only supports multi-tenancy and workload isolation but also accelerates innovation by empowering end users to deploy applications and services quickly within well-defined boundaries.
Why Tenant Management Matters?
Tenant management is more than just dividing resources—it’s about ensuring cost efficiency, security, scalability, and compliance in a shared infrastructure. In VCFA, these capabilities allow VMware Cloud Service Providers to maximize utilization without compromising performance or governance for individual tenants.
Key concepts to understand from both the Provider and Tenant perspectives:
Projects
Projects control user access to namespaces and user ownership of provisioned resources. All organizations are created with a default project. The default project is empty and does not have any namespaces or users.
Example: A VMware Cloud Service Provider might assign a dedicated project to each customer department for clearer billing and isolation.
Regions
The Regions page lists all the regions where the organization has a quota in. Organizations can have a quota in one or many regions. Your provider administrator assigns the regional quota to your organization. Quota in a region can come from one or many vSphere Zones within that region.
Example: A global enterprise hosted by a VMware Cloud Service Provider might have quotas in Asia and Europe to ensure low-latency access for local teams.
Namespace Class
Namespace classes are templates for namespace provisioning. These templates can be used to standardize namespace attributes, like utilization limits, reservations, VM classes, storage classes, and content libraries. organizations comes preconfigured with three default namespace classes (small, medium, and large), which are meant to serve as example templates. The only different attributes among these built-in templates are the CPU and Memory limits. Administrators can use these templates as-is or can modify them to suit their needs.
Namespace
Projects are the central construct for organizing and allocating infrastructure resources to tenants or teams. As the organization administrator, you manage and distribute infrastructure by assigning namespaces to projects. When configuring a project, you must add at least one namespace so that users within the project can begin provisioning workloads such as virtual machines, VMware Kubernetes Service (VKS) clusters, or other supported resources. Namespaces act as scoped resource pools, defining limits for CPU, memory, and storage to ensure fair allocation and performance consistency. Each namespace is tied to a Virtual Private Cloud (VPC) and a namespace class, which in turn is associated with at least one zone to determine placement and availability. This structure not only enforces resource governance but also enables automation workflows to deploy consistently within predefined boundaries. All organizations are created with a default project, which is initially empty and contains no namespaces or users, providing a baseline starting point for configuration.
Example: A tenant of a VMware Cloud Service Provider might create separate namespaces for development and production to avoid accidental resource conflicts.
Virtual Private Clouds (VPCs)
A Virtual Private Cloud (VPC) in VMware Cloud Foundation Automation (VCFA) offers an isolated networking environment that can be associated with one or more namespaces. Organizations can create multiple VPCs and assign each to specific namespaces based on workload or isolation requirements.
Each VPC is an independent network and supports three types of IP address spaces, each offering different levels of reachability:
Private CIDRs: These addresses are internal to the VPC and are not routable outside without NAT. They are managed by the VPC administrator and do not need to be globally unique, allowing reuse across multiple VPCs.
TGW Private IP Blocks: These IP blocks are scoped at the organization level and are advertised through the Transit Gateway (TGW) within the organization. Organization admins define these blocks, and project admins can allocate subnets from them for their VPCs. This enables direct communication between VPCs in the same organization using the TGW Private IP space.
External IP Blocks: Managed by the provider admin, these IPs enable outbound access through Source NAT. Organization admins can assign subnets from provider-defined external blocks, giving workloads external connectivity while still using internal addressing.
You can choose to deploy a separate VPC per namespace for stricter isolation, or share a VPC across namespaces where network separation is not required.
Transit Gateways
Each organization has a transit gateway which provides connectivity to the provider gateway within the organization. One or more VPCs are connected to the transit gateway, and that connection is defined by a VPC connectivity profile. Each VPC has connected workloads and a private subnet. SNAT rules translate addresses from this private subnet to a public address in the IP spaces block. This infrastructure enables the organization and its workloads to connect to external networks.
You can view what transit gateways are available to your organization on the Manage & Govern > Networking > Transit Gateways page.
IP Management
Provider can use IP Spaces to manage their IP address allocation needs. IP Spaces provide a structured approach to allocating public IP addresses to different organizations, enabling connectivity to external networks.
An IP space consists of a set of CIDR blocks that are reserved, these CIDRs must be dedicated to and used by organization administrators as they configure services. An IP space can only be IPv4.
Organization administrators can create and manage the private IP blocks within their organization. there tenant can view external IP address blocks assigned to this organization by a provider. You can also create and view private TGW IP address blocks for the entire organization to use. Finally, you can view private VPC IP address blocks that are applicable to specific VPCs.
In essence, VMware Cloud Foundation Automation’s tenant management capabilities provide a structured, role-based framework for organizing projects, namespaces, VPCs, transit gateways, and IP resources. By aligning provider and tenant responsibilities, VMware Cloud Service Providers ensure secure isolation, consistent governance, and streamlined automation—empowering organizations to scale efficiently while maintaining full control over infrastructure and networking resources.
VMware Cloud Foundation 9 (VCF 9) has officially launched, introducing a next-generation Cloud Management Platform — VCF Automation (VCFA). This new platform supersedes both Aria Automation and VMware Cloud Director (VCD). This blog is specifically aimed at those familiar with VCD and looking to understand how VCFA compares — what remains familiar, what’s changed, and how to navigate the shift.
It’s important to note that VCFA is not a simple rebranding of existing tools. It is a new solution built with purpose, though it incorporates core components from its predecessors. The provider-facing layer, known as Tenant Manager, is built on the VCD codebase, so the UI and APIs will feel familiar to seasoned VCD administrators. On the other hand, the tenant experience draws heavily from Aria Automation, introducing a modernized interface and capabilities that will appear significantly different — especially for users coming from a traditional VCD background.
Why VCFA?
Modern enterprises and service providers are navigating increasingly complex environments — hybrid, multi-cloud, containerized, and AI-driven workloads are the new normal. VMware has responded with VCFA: a cloud automation solution tightly integrated with VCF 9 that provides:
Unified multi-tenant management
Seamless integration across compute, storage, and networking
Robust self-service capabilities for both providers and tenants
Compliance-ready, policy-driven automation
This is not just an incremental upgrade. VCFA is a next-generation platform, built to be extensible, resilient, and future-proof.
How VCFA Differs from VCD and Aria Automation
Let’s break it down into provider and tenant perspectives:
Provider Experience – Tenant Manager
The provider-facing component of VCFA is called Tenant Manager.
It leverages the codebase from VCD, meaning administrators familiar with VCD will find the UI and APIs instantly recognizable.
Tasks such as creating tenants, managing quotas, assigning resources, and configuring networks follow a some what similar structure to VCD.
However, Tenant Manager is fully integrated with VCF’s architecture, eliminating dependency on external orchestration layers.
In essence, Tenant Manager modernizes VCD’s core capabilities while maintaining continuity for service providers.
Tenant Experience – VCFA UI and APIs
For tenants, the VCFA experience is heavily influenced by Aria Automation but redesigned for simplicity and control:
New self-service portal tailored for tenant-level resource provisioning
Integrated access to IaaS, network services, Kubernetes (via VKS), and more
Native support for day 2 operations, approvals, cost visibility, and policy governance
UI/UX reflects a cloud-native mindset, empowering developers and app teams
If you’re a tenant used to the VCD interface, the VCFA UI may initially seem unfamiliar — but it brings greater power, flexibility, and visibility.
Provider Management
The VCF Automation Provider Management Portal is a dedicated interface for Provider Administrators and to access it, type https://vcfa.example.com/provider and to log in for the first time, you must use default administrator/admin account with local user and password which you set up during the installation.
You can use the Quick Start wizard in VCF Automation to quickly create an organization with predefined settings, streamlining the initial setup process. This is a convenient alternative to manually configuring each component and is especially useful for setting up a test or evaluation environment to explore the platform’s capabilities.
NOTE – VCF Automation 9.0, only active-standby mode is supported for NSX Tier-0 Gateways. In active-standby mode, an elected active member processes the traffic. If the active member fails, a new member becomes active.
Alternatively, you can use the manual wizard in VCF Automation to set up each component individually—Region, Organization, IP Space, Provider Gateway, and Tenant Networking—giving you full control and customization over your environment. In this blog post, I’ll walk you through that step-by-step process to help you understand how to configure a tenant from the ground up.
Region
In VCFA, a region represents a logical grouping of compute, storage and networking resources, typically associated with one or more vCenter Server instances and a shared NSX instance.
NSX Local Manager – provides software define networking for the region, select the NSX Manager instance that integrates with the vCenter instances you want to use for the region
Note: A single NSX Manager instance must be integrated with all vCenter instances within a region.
Supervisor(s) – Inside a Region we have one or more Supervisors and provides compute infrastructure for the region, list shows all available Supervisors for NSX Manager instance that you choose in above step.
Storage Class(es) – shows all storage classes across the selected Supervisors.
Organisations
In VMware Cloud Foundation Automation (VCFA), Organizations are foundational constructs used to separate and manage tenants and providers in a multi-tenant private cloud environment. These organizations define the boundaries for resource allocation, identity management, policies, and service consumption.
VCFA introduces two main types of organizations:
Provider Consumption Organization
A PCO ( Provider consumption organization ) is created which the provider can use to share blueprint catalog, workflows with other tenant organizations , this must be enabled by going to Administration > Feature flags and enable PCO Organization feature flag
Tenant Organization
Each tenant/customer is onboarded into VCFA as a separate organization, Tenants get:
Isolated access to their own VMs, networks, storage, Kubernetes clusters, etc.
Self-service portal and/or API access
Resource limits defined by the provider
Option to integrate with their own identity providers (IdP) (e.g., SAML, LDAP)
Custom catalogs or services if published by the provider
When onboarding a new customer in VCFA:
You (the provider) create a Tenant Organization.
Allocate region, supervisor and zones (resources – e.g., 10 GHz, 10 GB RAM).
Assign VM classes and storage classes
Configure access control (create local users)
Let the customer use VCFA UI or API to deploy/manage their workloads.
VCFA Organizations are essential to enabling multi-tenancy, isolation, and governance in VCFA.They help service providers manage multiple customers securely and efficiently. Each org has its own identity, resource limits, users, services, and policies.
IP Space
IP spaces offer a structured approach for providers to allocate IP addresses to different organizations, enabling connectivity to external networks. You can use quotas to control usage. For internal organization communications, organizations can self-manage their own IP address blocks.
Go to Networking > IP spaces to create a new IP Space and set quotas. IP Blocks are created in NSX. IP Blocks represent IPs used in this local datacenter, south of the Provider Gateway. IPs within this scope are used for configuring services and networks.
External Reachability represents the IPs used outside the datacenter, north of the Provider Gateway.
Provider Gateway
A Provider Gateway in VCFA is the logical network boundary between the provider-managed infrastructure and external environments. It serves as the entry/exit point for all traffic coming in and going out of tenant environments.
A provider gateway leverages VCF Networking T0s or T0 VRFs, and associates them with IP addresses from IP spaces that can be advertised from those gateways. A provider gateway can be assigned to one or more organizations.
To add a provider gateway, first you must create an Active Standby tier-0 gateway in the NSX Manager associated with the region to back it. You can create the tier-0 gateway in the NSX Manager UI or by using the NSX Policy API.
If you want to add a tier-0 gateway that is backed by a VRF gateway in NSX, you must also create a VRF gateway that is linked to the tier-0 gateway.
Enter a name and, optionally, a description for the new provider gateway.
From the drop-down menu, select the region of the tier-0 gateway, and click Next.
Select a tier-0 gateway from the list, and click Next.
Select one or more IP spaces to associate with the provider gateway, and click Next.
Review the network settings and click Create.
Region Network Settings (Tenant Networking)
When you configure networking for a Region in VCFA, you’re defining how tenant workloads in that region will connect—both internally and externally. This includes:
Click on “START” will take to Organization page, there select Organization for which you want to configure Networking and click on CONFIGURE
Select the Region – choose the appropriate region where this organization’s resources will be provisioned, then click Next.
Choose a Provider Gateway – select a provider gateway to connect the organization’s virtual network to external networks (e.g., internet or upstream services), then click Next.
Assign an Edge Cluster – Pick the Edge cluster where the VPC services for this organization will operate. (You may choose the same cluster associated with the Tier-0 provider gateway, or a different Edge cluster depending on your resource planning)
Review and Confirm – Review all configured network settings. Once validated, click Create to complete the network setup for the organization.Select a region, and click Next
This blog post provides a comprehensive, step-by-step walkthrough of how to manually onboard a tenant in VMware Cloud Foundation Automation (VCFA) by configuring key components such as Regions, Organizations, IP Spaces, Provider Gateways, and Tenant Networking, offering cloud providers and administrators deeper control and customization compared to the Quick Start option—ultimately enabling a flexible, scalable, and secure multi-tenant private cloud environment built on VCF 9.