Multi-Tenancy was introduced in NSX UI starting from VMware NSX 4.1 and now commencing with version 10.5.1, VMware Cloud Director introduces support for NSX multi-tenancy, facilitating direct alignment of vcd organizations with NSX projects.
What are NSX Projects ?
A project in NSX functions akin to a tenant. Creating projects enables the separation of security and networking configurations among different tenants within a single NSX setup.
Multi-tenancy in NSX is achieved by creating NSX projects, where each project represents a logical container of network and security resources (a tenant). Each project can have its set of users, assigned privileges, and quotas. Multi-tenancy serves various purposes, such as providing Networking as a Service, Firewall as a Service, and more.
How NSX Projects relate to Cloud Director Organizations?
Within the VCD platform, the tenancy is established via Organizations. Each tenant receives its exclusive organization, ensuring a distinct and isolated virtual infrastructure tailored to their tasks. This organizational setup grants precise control over tenant access to resources, empowering them to oversee Users, Virtual Data Centers (VDCs), Catalogs, Policies, and other essentials within their domain.
To clearly outline the tenant structure, VMware NSX introduced a feature known as Projects. These Projects allocate NSX users to distinct environments housing their specific objects, configurations, and monitoring mechanisms based on alarms and logs.
With VCD 10.5.1, management functionalities tied to NSX Tenancy fall within the exclusive purview of the Provider. NSX Tenancy operates on an Organization-specific level within VCD. When activated, a VCD Organization aligns directly with an NSX Project.
VCD drives and manages the creation of the associated NSX project, allowing the User to configure the project identifier. The NSX project is actually created during the creation of the first VDC in the organization for which you activated NSX tenancy. The name of the NSX project is the same as the name of the organization to which it is mapped.
How to enable?
The Cloud Provider can enable the NSX Tenancy for a specific Organization by going into the Cloud Director Organization section, choosing an organization, and selecting “NSX Tenancy”, he/she can also define a Log Name, which will be the Organization’s unique identifier in the backing NSX Manager logs.
The name of the NSX project will be the same as the name of the organization to which it is mapped.
Once NSX tenancy has been activated on the Org level, the Cloud provider can create a new Org VDC and choose to enable “NSX Tenancy”, this is when The NSX project is actually get createdin NSX.
NOTE: Network Pool selection is disabled. This is because NSX supports Project creation only in the default overlay Transport Zone. Also, make sure the default overlay Transport zone already exists.
Note: If you choose not to activate NSX tenancy during the creation of an organization VDC, you cannot change this setting later.
When not to choose to enable tenancy?
Some use cases do not require organization VDC participation in NSX tenancy, for example, if the VDC only needs VLAN networks. Additionally, organization VDCs using NSX tenancy are restricted to using the network pool that is backed by the default overlay transport zone, so, in order to be able to use a different network pool, you might wish to opt out of NSX tenancy.
also there are a few features that NSX projects do not support today, like NSX Federation deployments as well as not all Edge Gateway features are available for Networking Tenancy-enabled VDCs like VPNs (IPsec/L2) and sharing segment profile templates, etc.. so work in progress and will see more and more features coming in future.
Conclusion
Aligning NSX Projects with VCD’s Tenancy ensures customers access an extensive array of networking capabilities offered by the NSX Multi-tenancy solution. Among these crucial functionalities is tenant-centric logging for core VCD networking services like Edge Services and Distributed firewalls. Additionally, integrating NSX Projects paves the way to investigate potential enhancements, facilitating tenant self-service login capabilities within VCD features. Below, you can find more information and capabilities.
In today’s fast-paced digital landscape, businesses require agile and scalable solutions to deploy and manage their applications efficiently. VMware Cloud Director Content Hub (VDCH) introduced in VMware Cloud Director 10.5, offers a robust platform for a simplified and automated way to deploy, run, and manage a wide range of applications. In this blog, we’ll explore the key features and benefits of VMware Cloud Director Content Hub and how it streamlines the application deployment process.
What is Content Hub ?
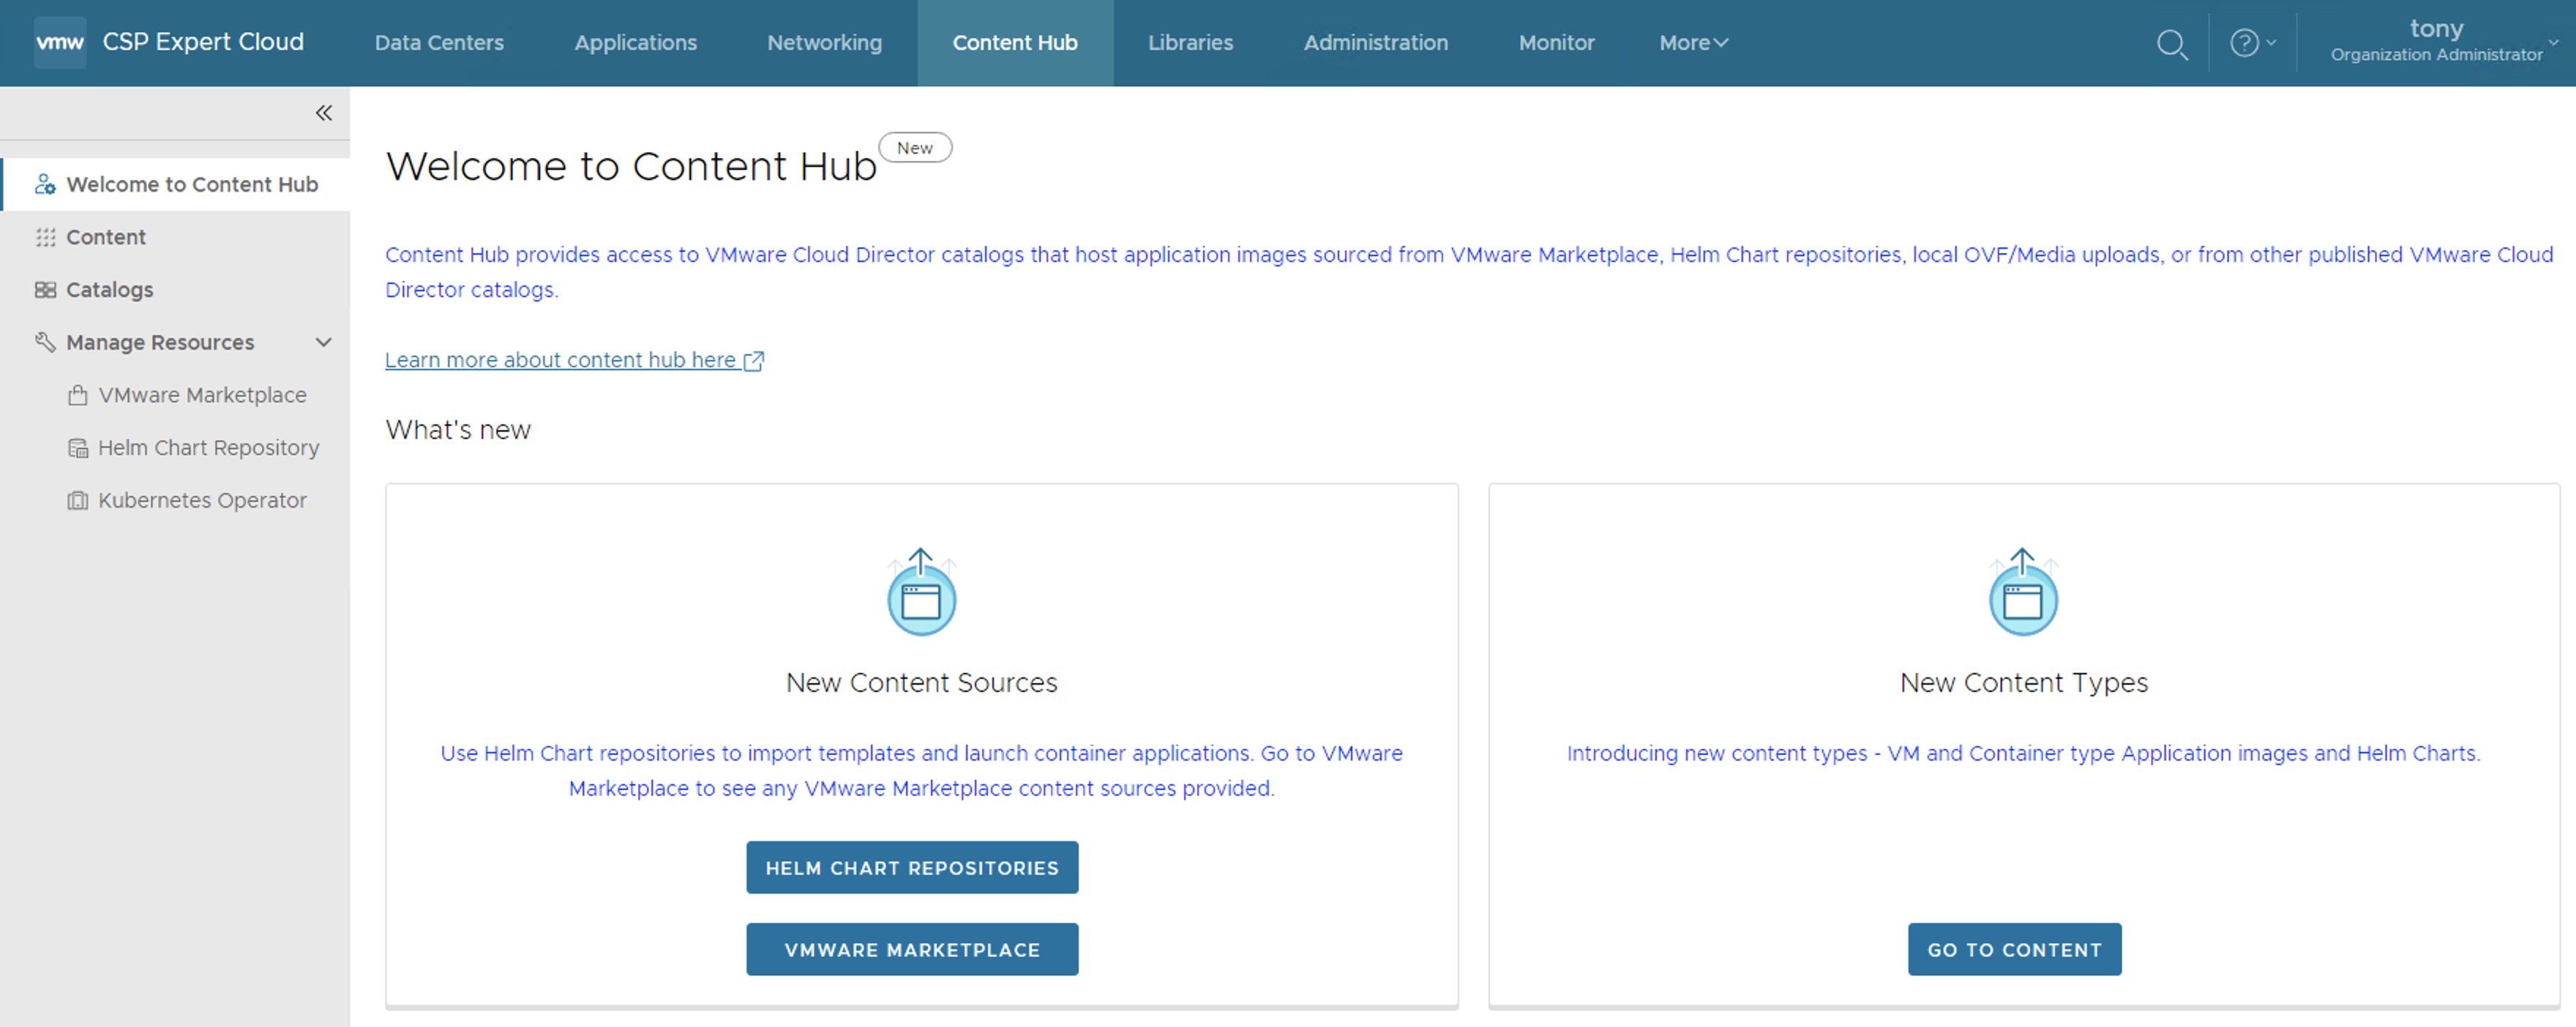
Content Hub, introduced in VMware Cloud Director 10.5, serves as a convenient tool that unifies the interface for accessing both VM and container-based content. This feature seamlessly integrates external content sources, such as VMware Marketplace and Helmchart Repositories, into the VMware Cloud Director environment.
By incorporating external sources, content can be seamlessly brought into the catalogs of VMware Cloud Director, ensuring its immediate availability for users. With the integration of Content Hub, VMware Cloud Director introduces an interface oriented towards applications, enabling users to effortlessly visualize and retrieve catalog content, thus elevating the overall content management experience.
As a result of these enhancements, catalog items are presented as “Application Images,” highlighting crucial application information like the application’s name, version, logo, screenshots, and other pertinent details necessary for the consumption of the application
Integration with VMware Marketplace
To integrate Marketplace with VMware Cloud Director, a Cloud Provider needs to create a Marketplace Connection and then share it with one or more tenant organisations. Here is the procedure:
Cloud Provider must be logged in as a system administrator.
Cloud Provider must have access to VMware Marketplace and there generated an API token. (see Generate API Tokens in the VMware Cloud Services Product Documentation)
From the left panel, select VMware Marketplace & Click New.
The New VMware Marketplace dialog opens, and there enter the following values:
The API token ID of a valid VMware Marketplace token.
Integration with Helm Chart Repository
A Helm chart repository is a named resource that stores all the information required to establish a connection with a Helm chart repository, allows users to browse contents from a remote repository, and imports applications from the repository.
Cloud Providers and tenants both can create Helm chart repository content connections. Tenants need special RIGHTs that providers can assign to specific tenants based on requirements.
From the left panel, select Helm Chart Repository& Click New.
The New Helm Chart Repository dialog opens, and there enter the following values:
Name
Some Meaning Full Name
URL
URL of Helm chart repository
Authentication Type
Anonymous Basic
Password-protected Helm chart repositories are also supported.
You can create multiple Helm chart repository resources in VMware Cloud Director.
Share a VMware Marketplace/Helm Chart Repository Resource with tenants
As a service provider administrator, you can share the configured VMware Marketplace resources with other tenant organizations.
Inside VMware Marketplace/Helm Chat Repository, on the left of the name of the connection that you want to share, click the vertical ellipsis and select Share.
Share the resource.
Select the tenant organizations you want to share the resource with.
You can set the individual access level for the respective tenant organization only as Read Only.
Click Save.
NOTE: Since vCD does a DB caching of the helm chart repository items in vCD DB, you can click on Sync which will ensure the latest from the remote repository is cached in vCD DB.
Roles Required
A new set of User Roles has been introduced to facilitate users in accessing and managing the Content Hub. Assigning the appropriate user roles to individuals within the organization to grant them access and utilize the Content Hub feature effectively is crucial.
Right Bundles: A Rights Bundle is a collection of rights for the tenant organization and A Rights Bundle defines what a tenant organization has access to. Rights Bundles are always defined globally, and they can be applied to zero or more tenants.
Roles: A Role is a collection of rights for a user. A Role defines what an individual user has access to. Roles can either be tenant-specific–defined within a single organization and only visible to that organization, or global–defined globally and applied to zero or more tenants.
Putting all the pieces together looks something like this:
Following are the new RIGHTs introduced to manage CatalogContentSource entities:
View the Content Hub External Source
view “CatalogContentSource” entities
View Content Hub External SourceACL
view ACLs on “CatalogContentSource” entity
Change the Owner of the Content Hub External Source
change ownership of “CatalogContentSource” entity
Delete the External Source from Content Hub
To allow deletion of “CatalogContentSource” entity
Edit the External Source in Content Hub
To allow the creation/edit of “CatalogContentSource” entity NOTE – Tenants will not be allowed to create Marketplace type even with this RIGHT
Share the Content Hub External Source
To allow sharing of CatalogContentSource. NOTE – Only Cloud Provider can share across tenants. Tenants can only share among users.
Apply the Above Rights for organizations as well as the user, so that they have enough rights to add and deploy applications.
Content Hub Operator for Kubernetes Container Service Extention
To perform this operation, First, you need full control of the Kubernetes cluster, where you are deploying the container applications, and additionally the following VMware Cloud Director rights:
You must install a Kubernetes operator to allow tenant users to deploy container applications from external content sources. From the top navigation bar, select Content Hub, from the left panel, select Kubernetes Operator, and on the Kubernetes Operator page, select the Kubernetes cluster on which you want to install the Kubernetes operator, and click Install Operator.
The Install operator oncluster-name dialog opens, on this page Configure the source location of the Kubernetes operator package.
Select the type of source location for the Kubernetes operator package. VMware Registry location with anonymous access is selected by default.
(Optional) To configure a custom registry, first, you must clone the Content Hub Kubernetes operator package from the VMware container registry to your custom registry. The Content Hub Kubernetes operator package is in Carvel format and you must use the Carvel imgpkg tool for cloning the package.
Click Install Operator.
After a Few minutes it shows “Not Reachable”
And then finally it turns to “ready”, basically After the installation of the operator completes successfully, the system creates two namespaces under the Kubernetes cluster. In the first namespace, “vcd-contenthub-system”, the Content Hub Operator manager is installed. The second namespace, “vcd-contenthub-workloads”, is empty. This namespace is used to deploy container applications at a later stage.
Catalog Versioning
In the previous version of VMware Cloud Director, there was no concept of versioning in catalogs. For instance, when a user imports multiple versions of the same application from external sources into the catalog, each version of the VM or container will be stored and represented (listed) as an individual resource, but from VMware Cloud Director 10.5 onwards, a Virtual Machine application or Container application that was imported with multiple versions either at the same time or at different intervals, Content Hub is capable of managing and structure the versioning of that resource.
Let’s Deploy a Container Application
Upon launching an application image that has multiple versions, you will be prompted to choose the specific version of the image you wish to deploy.
If the Container application is launched, then the Container Application launcher window will open and then you need to provide the application Name, select the version to deploy and select the TKG Cluster.
(Optional) To customize the application parameters, click Show Advanced Settings.
Click Launch Application.
The system deploys the container application. After the deploy operation completes, on the card for the application, the status appears as Deployed. VMware Cloud Director deploys the container application as a Helm release under the vcd-contenthub-workloads namespace to the Kubernetes cluster.
Either clicking on Application Name or DETAILS, it takes user to details of the application, like Status, Pods Status, Access URLs etc..
User can use the access URL details to access the application easily
Deploy an Stateful Container Application
In this section we will deploy Casandra database using Cloud Director Content Hub, process is simple as we followed in above section, once deployed the application, check the details, here details are different like no access URL, it also created required Persistent Volumes automatically
it also give visibility to Stateful Set and its status, secrets if any, services and its type as well as other resources. this allow end user to not to check in K8s clusters vs this info is available in vCD GUI.
Deploy an Virtual Machine Application
A vApp consists of one or more virtual machines that communicate over a network and use resources and services in a deployed environment. A vApp can contain multiple virtual machines.If you have access to a catalog, you can use the vApp templates in the catalog to create vApps.
A vApp template can be based on an OVF file with properties for customizing the virtual machines of the vApp. The vApp inherits these properties. If any of those properties are user-configurable, you can specify their values.
Enter a name and, optionally, a description for the vApp.
Enter a runtime lease and a storage lease for the vApp, and click Next.
From the Storage Policy drop-down menu, select a storage policy for each of the virtual machines in the vApp, and click Next.
If the placement policies and the sizing policies for the virtual machines in the vApp are configurable, select a policy for each virtual machine from the drop-down menu.
If the hardware properties of the virtual machines in the vApp are configurable, customize the size of the virtual machine hard disks and click Next.
If the networking properties of the virtual machines in the vApp are configurable, customize them and click Next.
On the Configure Networking page, select the networks to which you want each virtual machine to connect.
(Optional) Select the check box to switch to the advanced networking workflow and configure additional network settings for the virtual machines in the vApp.
Review the vApp settings and click Finish.
You can see under Applications -> Virtual Applications, VM is getting deployed.
With Content Hub feature provide can offers centralized content management for application images, vApp and VM templates, and media. VMware Cloud Director now has full control over the deployed and listed images, storing all pertinent information in its database. Unlike the application images imported from App Launchpad, where VMware Cloud Director only listed the imported images and App Launchpad stored all the details and information in its own database as well as It offers ease of use since you won’t have to set up and configure App Launchpad, which would otherwise be an additional task.
In today’s fast-paced digital landscape, organizations are constantly seeking ways to optimize their IT operations and streamline infrastructure management. One approach that has gained significant traction is Infrastructure as Code (IaC). By treating infrastructure provisioning and management as code, IaC enables organizations to automate and standardize their processes, resulting in increased efficiency, scalability, and consistency.
In this blog article, we will explore the concept of Infrastructure as Code and its practical implementation using VMware Cloud Director. We will delve into the benefits and challenges of adopting IaC, highlight the features of VMware Cloud Director, and showcase how the integration of Terraform with VMware Cloud Director can revolutionize IT operations for Cloud Providers as well as customers.
What is Infrastructure as Code?
Infrastructure as Code (IaC) is a methodology that involves defining and managing infrastructure resources programmatically using code. It allows organizations to provision, configure, and manage their infrastructure resources, such as compute, network, and storage, through automated processes. By treating infrastructure as code, organizations can leverage the same software development practices, such as version control and continuous integration, to manage their infrastructure.
Benefits of Infrastructure as Code
The adoption of Infrastructure as Code brings numerous benefits to cloud providers as well as customers:
Consistency and repeatability: With IaC, infrastructure deployments become consistent and repeatable, ensuring that the same configuration is applied across different environments. This eliminates configuration drift and minimizes the risk of errors caused by manual configurations.
Efficiency and scalability: IaC enables organizations to automate their infrastructure provisioning and management processes, reducing the time and effort required for manual tasks. This allows IT teams to focus on more strategic initiatives and scale their infrastructure easily as the business demands.
Version control and collaboration: By using code repositories and version control systems, organizations can track changes made to their infrastructure configurations, roll back to previous versions if needed, and collaborate effectively across teams.
Documentation and auditability: IaC provides a clear and documented view of the infrastructure configuration, making it easier to understand the current state and history of the infrastructure. This improves auditability and compliance with regulatory requirements.
Flexibility and portability: With IaC, organizations can define their infrastructure configurations in a platform-agnostic manner, making it easier to switch between different cloud providers or on-premises environments. This provides flexibility and avoids vendor lock-in.
Challenges of Infrastructure as Code
While Infrastructure as Code offers numerous advantages, it also presents some challenges that organizations should be aware of:
Learning curve: Adopting IaC requires IT teams to acquire new skills and learn programming languages or specific tools. This initial learning curve may slow down the adoption process and require investment in training and upskilling.
Code complexity: Infrastructure code can become complex, especially for large-scale deployments. Managing and troubleshooting complex codebases can be challenging and may require additional expertise or code review processes.
Continuous maintenance: Infrastructure code needs to be continuously maintained and updated to keep up with evolving business requirements, security patches, and technology advancements. This requires ongoing investment in code management and testing processes.
Infrastructure as Code Tools
There are various tools available in the market to implement Infrastructure as Code. Some of the popular ones include:
Terraform: Terraform is an open-source tool that allows you to define and provision infrastructure resources using declarative configuration files. It supports a wide range of cloud providers, including VMware Cloud Director, and provides a consistent workflow for infrastructure management.
Chef: Chef is a powerful automation platform that enables you to define and manage infrastructure as code. It focuses on configuration management and provides a scalable solution for infrastructure provisioning and application deployment.
Puppet: Puppet is a configuration management tool that helps you define and automate infrastructure configurations. It provides a declarative language to describe the desired state of your infrastructure and ensures that the actual state matches the desired state.
Ansible: Ansible is an open-source automation tool that allows you to define and orchestrate infrastructure configurations using simple, human-readable YAML files. It emphasizes simplicity and ease of use, making it a popular choice for infrastructure automation.
VMware Cloud Service Provider Program
The VMware Cloud Service Provider Program (CSP) allows service providers to build and operate their own cloud environments using VMware’s virtualization and cloud infrastructure technologies like VMware Cloud Director, Cloud Director availability etc… This program enables service providers to offer a wide range of cloud services, including infrastructure-as-a-service (IaaS), disaster recovery, Application as a Service, Kubernetes as a Service, DBaaS and many other managed services.
Integrating Terraform with VMware Cloud Director
To leverage the power of Infrastructure as Code in VMware Cloud Director, you can integrate it with Terraform. Terraform provides a declarative language for defining infrastructure configurations and a consistent workflow for provisioning and managing resources across different cloud providers, including VMware Cloud Director. By combining Terraform with VMware Cloud Director, Cloud Providers/Customers can:
Automate infrastructure provisioning: With Terraform, Cloud providers can define Tenant virtual data center, virtual machines, networks, and other resources as code. This allows for automated and consistent provisioning of infrastructure resources, eliminating manual configuration. I wrote a blog article on how to start with Cloud Director & Terraform which can be found here:
Ensure consistency and repeatability: Infrastructure configurations defined in Terraform files can be version controlled, allowing for easy tracking of changes and ensuring consistency across different environments.
Collaborate effectively: Terraform code can be shared and collaboratively developed within teams, enabling better collaboration and knowledge sharing among IT professionals.
Enable infrastructure as self-service: By integrating Terraform with VMware Cloud Director, organizations can provide a self-service portal for users to provision and manage their own infrastructure resources, reducing dependency on IT support.
Implementing Infrastructure as Code with VMware Cloud Director and Terraform
To begin with the Terraform configuration, create a main.tf file and specify the version of the VMware Cloud Director Terraform provider
In the above configuration, replace the url, user, password, org, and vdc values with your own VMware Cloud Director details.Now, let’s define the infrastructure resources using Terraform code. Here’s an example of creating a organization in VMware Cloud Director:
#Create a new org name "tfcloud"
resource "vcd_org" "tfcloud" {
  name              = "terraform_cloud"
  full_name         = "Org created by Terraform"
  is_enabled        = "true"
  stored_vm_quota   = 50
  deployed_vm_quota = 50
  delete_force      = "true"
  delete_recursive  = "true"
  vapp_lease {
    maximum_runtime_lease_in_sec          = 0
    power_off_on_runtime_lease_expiration = false
    maximum_storage_lease_in_sec          = 0
    delete_on_storage_lease_expiration    = false
  }
  vapp_template_lease {
    maximum_storage_lease_in_sec       = 0
    delete_on_storage_lease_expiration = false
  }
}
Best Practices for Infrastructure as Code with VMware Cloud Director
Implementing Infrastructure as Code with VMware Cloud Director and Terraform requires adherence to best practices to ensure efficient and reliable deployments. Here are some key best practices to consider:
Use version control: Store your Terraform code in a version control system such as Git to track changes, collaborate with teammates, and easily roll back to previous configurations if needed.
Leverage modules: Use Terraform modules to modularize your infrastructure code and promote reusability. Modules allow you to encapsulate and share common configurations, making it easier to manage and scale your infrastructure.
Implement testing and validation: Create automated tests and validations for your infrastructure code to catch any potential errors or misconfigurations before deployment. This helps ensure the reliability and stability of your infrastructure.
Implement a CI/CD pipeline: Integrate your Terraform code with a continuous integration and continuous deployment (CI/CD) pipeline to automate the testing, deployment, and management of your infrastructure. This helps in maintaining consistency and enables faster and more reliable deployments.
Use variables and parameterization: Leverage Terraform variables and parameterization techniques to make your infrastructure code more flexible and reusable. This allows you to easily customize your deployments for different environments or configurations.
Implement security best practices: Follow security best practices when defining your infrastructure code. This includes managing access controls, encrypting sensitive data, and regularly updating your infrastructure to address any security vulnerabilities.
Conclusion
Infrastructure as Code offers a transformative approach to managing infrastructure resources, enabling organizations to automate and streamline their IT operations. By integrating Terraform with VMware Cloud Director, organizations can leverage the power of Infrastructure as Code to provision, manage, and scale their infrastructure efficiently and consistently.
In this blog post, we explored the concept of Infrastructure as Code, the benefits and challenges associated with its adoption. We also provided a step-by-step guide on implementing Infrastructure as Code with VMware Cloud Director using Terraform, along with best practices.
By embracing Infrastructure as Code, Cloud providers and their Tenants can unlock the full potential of their infrastructure resources, accelerate their digital transformation journey, and ensure agility, scalability, and reliability in their IT operations.
In the ever-evolving landscape of cloud technology, Cloud Service Providers (CSPs) play a crucial role in helping businesses unlock the potential of their data. Database as a Service (DBaaS) offerings have become essential tools for organizations looking to streamline their data management processes. This article will explore how our CSP is revolutionizing DBaaS with Cloud Director Data Solutions, powered by VMware SQL with MySQL. Discover how this powerful combination can transform CSP and customers’ data management experience.
VMware Cloud Director Extension for Data Solutions: An Introduction
The VMware Cloud Director Extension for Data Solutions is a game-changing plug-in for the VMware Cloud Director. By incorporating data and messaging services into the VMware Cloud Director portfolio, it enables cloud providers and their tenants to access and manage services such as VMware SQL with MySQL, VMware SQL with PostgreSQL, and the efficient messaging system, RabbitMQ.
The extension operates in conjunction with Container Service Extension 4.0 or later, facilitating the publication of popular data and messaging services to tenants. These services are deployed in a Tanzu Kubernetes Grid Cluster, which is managed by Container Service Extension 4.0 or later. This powerful combination simplifies the process of deploying and managing these services, while also offering data analytics and monitoring through Grafana and Prometheus.
How the VMware Cloud Director Extension for Data Solutions Functions
The VMware Cloud Director Extension for Data Solutions works hand-in-hand with the Container Service Extension 4.x to provide cloud providers with the ability to publish data and messaging services to their tenants. In turn, tenants can utilize these services for building new applications or maintaining existing ones.
Services are deployed within a Tanzu Kubernetes Grid Cluster, which is managed by the Container Service Extension 4.0 or later. This plays a crucial role in the deployment of services, with a service operator installed in a selected tenant Tanzu Kubernetes Cluster responsible for managing the entire lifecycle of a service, from inception to dissolution.
To better understand the architecture of the VMware Cloud Director Extension for Data Solutions, consider the high-level diagram provided below.
Use Cases for the VMware Cloud Director Extension for Data Solutions
Tenants can utilize the VMware Cloud Director Extension for Data Solutions for various purposes, such as creating database and messaging services at scale. Once these services are available in a tenant organization, authorized tenant users can create, upgrade, or delete PostgreSQL, MySQL, or RabbitMQ services. Advanced settings, such as enabling High Availability for VMware SQL with MySQL and VMware SQL with PostgreSQL, can be applied during the creation of a service.
In addition to creating database and messaging services, tenants can effortlessly manage their upgrades. When a newer version becomes available, the VMware Cloud Director Extension for Data Solutions interface will notify the user and prompt them to take action. Tenant administrators or users can then upgrade the chosen service with a single click, safeguarding the service against vulnerabilities and ensuring its stability.
Tenant self-service UI for the lifecycle management of VMware SQL with MySQL
Step:1 – Installing VMware Cloud Director Data Solutions operator
To run VMware SQL with MySQL in a Kubernetes cluster using the VMware Cloud Director extension for Data Solutions, you must install a VMware Cloud Director extension for the Data Solutions operator to a Kubernetes cluster. The VMware Cloud Director Data Solutions operator (DSO) is a backend service running within each tenant Kubernetes cluster. DSO manages the lifecycle of user resources in Kubernetes clusters upon user requests, sent through VMware Cloud Director Resource Defined Entities. The resources include both data solution operators like VMware RabbitMQ operators for Kubernetes and data solution instances like VMware RabbitMQ for Kubernetes. It deploys, upgrades, and updates various data solutions in Kubernetes clusters on behalf of the user.
Log in to VMware Cloud Director extension for Data Solutions from VMware Cloud Director.
Click Settings > Kubernetes Clusters.
Select the Kubernetes cluster where you want to run VMware Cloud Director extension for Data Solutions, and click Install Operator.
It takes a few minutes for the Operator Status of the cluster to change to Active.
Step:2 – Installing VMware SQL with MySQL
Log in to VMware Cloud Director extension for Data Solutions from VMware Cloud Director.
Click Instances > New Instance.
Enter the necessary details.
Enter the instance name.
Select the solution, for which you want to create an instance.
Select the Kubernetes cluster for this instance.
you must enter only a default passwordSelect a sizing template for this instance.
To customize more details click Show Advanced Settings
To connect to a MySQL instance from outside of your Kubernetes cluster, we must configure the Kubernetes service for the instance to be of type “Load Balancer”. Select “Expose Service by Load Balancer”
Click Create.
You can also track the progress of the deployment by running:
#kubectl get pods -n vcd-ds-workloads
After a few minutes, you should see MySQL status is “Running” in vCD GUI as well
You can continue to see progress in the vCD taskbar as well as the Monitor section of vCD GUI, it is automatically creating required persistent volumes as well as Network services like Load Balancer and NAT rules
Kubernetes will request and Cloud Director then allocate an external IP address (load balancer IP) to the service, which we can use to connect to the MySQL service from outside the cluster. You can view the Load Balancer IP by running:
#kubectl get svc -A
Take note of the External IP, which in this case is 172.16.2.6, we will use this IP to connect to the MySQL cluster from outside
Step:3 – Connecting to VMware SQL with MySQL
To connect to a MySQL service using Workbench, you can follow these steps:
Download and install MySQL Workbench from the official MySQL website if you haven’t already.
Launch MySQL Workbench on your computer.
In the Workbench home screen, click on the “+” icon next to “MySQL Connections” to create a new connection.
In the “Setup New Connection” dialog, enter a connection name of your choice.
Configure the following settings:
1-Connection Method: Standard TCP/IP
2-MySQL Hostname: External IP address of the MySQL server.in this case is 172.16.2.6
3-MySQL Server Port: Enter the port number(default is 3306).
4-Username: Enter the MySQL username as “mysqlappuser”
5-Password: Enter the MySQL password as you entered while deploying MySQL
Click on the “Test Connection” button to check if the connection is successful. If the test is successful, you should see a success message.
Click on the “OK” button to save the connection settings.
After following these steps, you should be connected to your MySQL service using MySQL Workbench. You can then use the Workbench interface to view this newly deployed instance, run queries, and perform various read-only database-related tasks, because:
When Tenant creates a MySQL deployment through VMware Cloud Director for Data Solutions extension, the MySQL instance gets a default DB user named “mysqlappuser”, This “mysqlappuser” user’s privilege is limited to the default DB instance.“mysqlappuser” user does not have enough permission to create a database, we need to create a new user which has enough permissions to create a database.
Step:4 – Enable a full-privileged DB user for your MySQL instance provisioned by the VMware Cloud Director Extension for Data Solutions
MySQL by default has a built-in “root” user with administrator privilege in every MySQL deployment, but it doesn’t support external access. We will use this user to create another full-privileged DB user.
Find DB root user’s password by using below commands:
# kubectl get secret -n vcd-ds-workloads
#kubectl get secret mysqldb01-credentials -n vcd-ds-workloads -o jsonpath='{.data}'
Take note of “rootPassword” from the output of the above command and copy the full encrypted password, which in this case starts with “RE1n**********”
Decode the above “rootPassword” using below command
Now run the below command to connect to the MySQL instance:
1 - Login to SQL
      #mysql -u root -p$ADMIN_PASSWORD -h 127.0.0.1 -P 3306
2 - Enter decoded password, once you successfully connected to the MySQL
3 - Create a local MySQL user using:
      #CREATE USER 'user01'@'%' IDENTIFIED BY 'password';
      #GRANT ALL PRIVILEGES ON * . * TO 'user01'@'%';
That’s it, now we can connect to this SQL Instance and can create a new database as you can see below screenshot
NOTE: Thanks to the writer of this blog, https://realpars.com/mysql/, I am using this database for this blog article.
In Summary, by leveraging VMware Cloud Director Extension for Data Solutions, CSPs can unlock the power of DBaaS using VMware SQL with MySQL, offering customers a comprehensive and efficient platform for their data management needs. With simplified deployment and management, seamless scalability, enhanced performance optimization, high availability, and robust security and compliance features, CSPs can provide businesses with a reliable and scalable DBaaS solution. Embrace the potential of DBaaS with VMware Cloud Director Extension for Data Solutions and VMware SQL with MySQL, and empower your customers with streamlined data management capabilities in the cloud.
VMware vRealize (ARIA) Operations Compliance Pack for Sovereign Cloud is a management pack available in the VMware Marketplace. You can download and install this management pack on an instance of vRealize (ARIA) Operations to automatically assess a Sovereign Cloud stack for compliance.
VMware vRealize (ARIA) Operations Compliance Pack for Sovereign Cloud is intended to be used by the VMware Cloud Service Partners who are part of the Sovereign Cloud Initiative. The following products in the Sovereign Cloud stack are currently supported for compliance assessment:
vSphere
NSX-T
VMware Cloud Director
VMware Cloud Director Availability
For every Sovereign Cloud instance, providers need one instance of vRealize (ARIA) Operations with the VMware vRealize (ARIA) Operations Compliance Pack for Sovereign Cloud installed and configured. The compliance score card is available in the Optimize > Compliance screen of vRealize (ARIA) Operations.
Compliance Pack for Sovereign Cloud Controls Rules
The compliance rules are based on a checklist that VMware vRealize (ARIA) Operations Compliance Pack for Sovereign Cloud utilizes to monitor the products in the Sovereign Cloud stack. The checklist is based on the Sovereign Cloud Framework which takes into consideration the following key principles:
Data Sovereignty and Jurisdictional Control
Data should reside locally.
The cloud should be managed and governed locally, and all data processing including API calls should happen within the country/geography.
Data should be accessible only to residents of the same country, and the data should not be accessible under foreign laws or from any outside geography.
Data Access and Integrity
Two data center locations.
File, Block, and Object store options
Backup services, Disaster Recovery
Low-latency connectivity, Micro segmentation
Data Security and Compliance
Industry recognized Security Controls (minimum ISO/IEC 27001 or equivalent)
Additional relevant industry or governmental certifications
Third-party audits & Zero Trust Security & Encryption
Catalog of trusted images using the sovereign repository
Support for air gapped zones/regions
Operating personnel requirements and security clearance
Data Independence and Interoperability
Workload migration with bi-directional workload portability
Modern application architecture using containers
Support for hybrid cloud deployments
Control Rules and Product Control Set for vSphere
The vSphere control set is available for version 7, and 6.5/6.7 separately and details can be Here
Control Rules and product control set for nsx-t
Control rules and product control set for NSX-T and details can be found Here. The NSX-T version supported is greater than or equal to 3.2.x.
Controls Rules and Product Control Set for VMware Cloud Director
Control rules and product control set for VMware Cloud Director and details can be found Here. The supported version of the VMware Cloud Directory management pack is 8.10.2.
Control Rules and Product Control Set for VMware Cloud Director Availability
Controls rules and product control set for VMware Cloud Director Availability and details can be found Here. The version of the VMware Cloud Director Availability management pack supported is 1.2.1.
Install the VMware vRealize (ARIA) Operations Compliance Pack for Sovereign Cloud
The VMware vRealize (ARIA) Operations Compliance Pack for Sovereign Cloud consists of a PAK file that contains default contains views, reports, alerts and symptoms for the VMware software in the Sovereign Cloud stack.
Download the PAK file for VMware vRealize Operations Compliance Pack for Sovereign Cloud from the VMware Marketplace, and save the file to a temporary folder on your local system.
Log in to the vRealize (ARIA) Operations user interface with administrator privileges. Installation of this management pack is to be done by VMware Cloud Provider Program Partners.
In the left pane of vRealize (ARIA) Operations, click Integrations under Data Sources.
In the Repository tab, click the ADD button.
The Add Solution dialog box opens , Click BROWSE to locate the temporary folder on your system, and select the PAK file.
Read and select the checkboxes if required, Click Upload. The upload might take several minutes
Read and accept the EULA, and click Next. Installation details appear in the window during the process.
When the installation is completed, click Finish.
in the vROps instance, go to Optimize > Compliance. In the VMware Cloud tab, you can see the VMware Sovereign Cloud Compliance card in the VMware Sovereign Cloud Benchmarks section. Click Enable.
When you click Enable, a list of policies appears. You must select a policy that you want to apply. i am selecting default policy here
With the vRealize (ARIA) Operations reporting functions, you can generate a report to view the compliance status of your Sovereign Cloud. You can download the report in a PDF or CSV file format for future and offline needs.
Accessing Compliance Reports
In the VMware vRealize (ARIA) Operations Compliance Pack for Sovereign Cloud two kinds of reports are available:
At a VMware Cloud Provider Program Partner level – This report considers all the infrastructure level resources and generates a report at the org level, showing non-compliance. The compliance data is for the org and associated child hierarchy. Includes compliance details for org, org-vdc, virtual machines, logical switches, and logical routers as per the hierarchy.
From the left menu, click Visualize > Reports and run the report – [vCloud Director] – VMware Sovereign Cloud – Non-Compliance Report.
From the Reports panel, click Generated Reports, To select a generated report from the list, click the vertical ellipsis against the [vCloud Director] – VMware Sovereign Cloud – Non-Compliance Report report and select options such as run and delete.
At a tenant level – The VMware Cloud Provider Program Partner generates a filtered report that the tenant can access. This report is at an org-VDC level. The compliance data is for the child hierarchy only. Includes compliance details for virtual machines, logical switches, and logical routers as per the hierarchy and Tenants can view the generated reports in the VMware Chargeback console by logging in and navigating to Reports > Tenant Reports and clicking the Generated Reports tab.
Custom Benchmarks
In case the CSP partner/customer requires they can create a custom compliance benchmark to ensure that objects comply with compliance alerts available in vRealize (ARIA) Operations, or custom compliance alert definitions. When a compliance alert is triggered on your vCenter instance, hosts, virtual machines, distributed port groups, or distributed switches, you investigate the compliance violation. You can add up to five custom compliance scorecards
This is the first version of the sovereign cloud compliance pack for ARIA Operations for our Cloud Providers brings a comprehensive compliance checklist that encompasses the sovereign framework as a benchmark and continuously validates applications and infrastructure to help partners maintain their sovereignty posture. This brings extended capabilities to ARIA Operations, which, now addition to the capacity, cost, and performance monitoring, will monitor and report compliance drifts to the right stakeholders to better manage their compliance structure.
Cloud Director VDCs come with all the features you’d expect from a public cloud, Virtual Data Center is a logical representation of a physical data center, created using virtualization technologies and a virtual data center allows IT administrators to create, provision, and manage virtualized resources such as servers, storage, and networking in a flexible and efficient manner. Recently released new version of VMware Cloud Director 10.4.1 released quite a lot of new features. In this article I want to double click on to external networking…
External Networks
An external network is a network that is external to the VCD infrastructure, such as a physical network or a virtual network, external networks are used to connect virtual machines in VCD with the external world, allowing them to communicate with the Internet or with other networks that are not part of the VCD infrastructure
New Features in Cloud Director 10.4.1 External Networks
With the release of Cloud Director 10.4.1, External networks that are NSX-T Segment backed (VLAN or overlay) can now be connected directly to Org VDC Edge and does not require routed through Tier-0 or VRF the Org VDC Gateway is connected to. This connection is done via the service interface on the service node of the Tier-1 GW that is backing the Org VDC Edge GW. The Org VDC Edge GW still needs a parent Tier-0/VRF although it can be disconnected from it. here are some of the use cases some of the use cases of the external network we are going to discusses…
Transit connectivity across multiple Org VDC Edge Gateways to route between different Org VDCs
Routed connectivity via dedicated VLAN to tenant’s co-location physical servers
Connectivity towards Partner Service Networks
MPLS connectivity to direct connect while internet is accessible via shared provider gateway
Security VDC Architecture using External Networks (transit connectivity across two Org VDC Edge Gateways)
A Security VDC is a common strategy for connecting multiple VDCs and security VDC become single egress and ingress points as well as can deploy additional firewall etc, in below section i am showing how that can be achieved using new external network feature:
This is using Overlay (Geneve) backed external network
This Overlay network must be prepared by provider in NSX as well as in Cloud Director
NSX Tier-1 GW does not provide any dynamic routing capabilities, so routing to such network can be configured only via static routes
Tier-1 GW has default route (0.0.0.0/0) always pointing towards its parent Tier-0/VRF GW
Set default route to the segment backed external network you need to use two more specific routes. For example:
Ø0.0.0.0/1 next hop <IP> scope <network>
Ø128.0.0.0/1 next hop <IP> scope <network>
Security VDC Architecture using External Networks – Multi-VDC
Log in to the VMware Cloud Director Service Provider Admin Portal.
From the top navigation bar, select Resources and click Cloud Resources.
In the left pane, click External Networks and click New.
On the Backing Type page, select NSX-T Segments and a registered NSX Manager instance to back the network, and click Next.
Enter a name and a description for the new external network
Select an NSX segment from the list to import and click Next. An NSX segment can be backed either by a VLAN transport zone or by an overlay transport zone
Configure at least one subnet and click Next.
To add a subnet, click New.
Enter a gateway CIDR.
To enable, select the State checkbox.
Configure a static IP pool by adding at least one IP range or IP address.
Click Save.
(Optional) To add another subnet, repeat steps Step A to Step E.
Review the network settings and click Finish.
Now provider will need to go to tenant org/vdc and add above configured external network in to tenant tier1 edge and offer net new networking configuration and options.
Other Patterns
Routed connectivity via dedicated VLAN to tenant’s co-location physical servers or MPLS
This is using vLAN backed external network
This vLAN backed network must be prepared by provider in NSX as well as in Cloud Director
NSX Tier-1 GW does not provide any dynamic routing capabilities, so routing to such network can be configured only via static routes
One VLAN segment, it can be connected to only one Org VDC Edge GW
Tier-1 GW has default route (0.0.0.0/0) always pointing towards its parent Tier-0/VRF GW
Set default route to the segment backed external network. For example:
Ø172.16.50.0/24 next hop <10.10.10.1> scope <external network>
Connectivity towards Partner Service Networks
This is using vLAN backed external network
This vLAN backed network must be prepared by provider in NSX as well as in Cloud Director
NSX Tier-1 GW does not provide any dynamic routing capabilities, so routing to such network can be configured only via static routes
One VLAN segment, it can be connected to only one Org VDC Edge GW
Tier-1 GW has default route (0.0.0.0/0) always pointing towards its parent Tier-0/VRF GW
Set static route to the segment backed external network you need to use two more specific routes. For example:
Ø<Service Network> next hop <Service Network Router IP> scope <External Network>
VMware Cloud Director Container Service Extension brings Kubernetes as a service to VMware Cloud Director, offering multi-tenant, VMware supported, production ready, and compatible Kubernetes services with Tanzu Kubernetes Grid. As a service provider administrator, you can add the service to your existing VMware Cloud Director tenants. By using VMware Cloud Director Container Service Extension, customers can also use Tanzu products and services such as Tanzu® Mission Control to manage their clusters.
Pre-requisite for Container Service Extension 4.0
Provider Specific Organization – Before you can configure VMware Cloud Director Container Service Extension server, it is must to create an organization to hosts VMware Cloud Director Container Service Extension server
Organization VDC within Organization – Container Service extension Appliance will be deployed in this organization virtual data center
Network connectivity – Network connectivity between the machine where VMware Cloud Director Container Service Extension is installed, and the VMware Cloud Director server. VMware Cloud Director Container Service Extension communicates with VMware Cloud Director using VMware Cloud Director public API endpoint
CSE 4.0 CPI automatically creates Load balancer, you must ensure that you have configured NSX Advanced Load Balancer, NSX Cloud, and NSX Advanced Load Balancer Service Engine Group for tenants who need to create Tanzu Kubernetes Cluster.
Provider Configuration
With the release of VMware Cloud Director Container Service Extension 4.0, service providers can use the CSE Management tab in the Kubernetes Container Clusters UI plug-in, which demonstrate step by step process to configure the VMware Cloud Director Container Service Extension server.
Install Kubernetes Container Clusters UI plug-in for VMware Cloud Director
You can download the Kubernetes Container Clusters UI plug-in for the VMware Cloud Director Download Page and upload the plug-in to VMware Cloud Director.
NOTE: If you have previously used the Kubernetes Container Clusters plug-in with VMware Cloud Director, it is necessary to deactivate it before you can activate a newer version, as only one version of the plug-in can operate at one time in VMware Cloud Director. Once you activate a new plug-in, it is necessary to refresh your Internet browser to begin using it.
Once partner has installed plugin, The Getting Started section with in CSE Management page help providers to learn and set up VMware Cloud Director Container Service Extension in VMware Cloud Director through the Kubernetes Container Clusters UI plug-in 4.0. At very High Level this is Six Step process:
Lets start following these steps and deploy
Step:1 – This section links to the locations where providers can download the following two types of OVA files that are necessary for VMware Cloud Director Container Service Extension configuration:
Step:2 – Create a catalog in VMware Cloud Director and upload VMware Cloud Director Container Service Extension OVA files that you downloaded in the step:1 into this catalog
Step:3 – This section initiates the VMware Cloud Director Container Service Extension server configuration process. In this process, you can enter details such as software versions, proxy information, and syslog location. This workflow automatically creates a Kubernetes Clusters rights bundle, CSE Admin Role role, Kubernetes Cluster Author role, and VM sizing policies. In this process, the Kubernetes Clusters rights bundle and Kubernetes Cluster Author role are automatically published to all tenants as well as following Kubernetes resource versions will be deployed
Kubernetes Resources
Supported Versions
Cloud Provider Interface (CPI)
1.2.0
Container Storage Interface (CSI)
1.3.0
CAPVCD
1.0.0
Step:4 – This section links to the Organization VDCs section in VMware Cloud Director, where you can assign VM sizing policies to customer organization VDCs. To avoid resource limit errors in clusters, it is necessary to add Tanzu Kubernetes Grid VM sizing policies to organization virtual data centers.The Tanzu Kubernetes Grid VM sizing policies are automatically created in the previous step. Policies created are as below:
Sizing Policy
Description
Values
TKG small
Small VM sizing policy
2 CPU, 4 GB memory
TKG medium
Medium VM sizing policy
2 CPU, 8 GB memory
TKG large
Large VM sizing policy
4 CPU, 16 GB memory
TKG extra-large
X-large VM sizing policy
8 CPU, 32 GB memory
NOTE: Providers can create more policies manually based on requirement and publish to tenants
In VMware Cloud Director UI, select an organization VDC, and from the left panel, under Policies, select VM Sizing and Click Add and then from the data grid, select the Tanzu Kubernetes Grid sizing policy you want to add to the organization, and click OK.
Step:5 – This section links to the Users section in VMware Cloud Director, where you can create a user with the CSE Admin Role role. This role grants administration privileges to the user for VMware Cloud Director Container Service Extension administrative purposes. You can use this user account as OVA deployment parameters when you start the VMware Cloud Director Container Service Extension server.
Step:6 – This section links to the vApps section in VMware Cloud Director where you can create a vApp from the uploaded VMware Cloud Director Container Service Extension server OVA file to start the VMware Cloud Director Container Service Extension server.
Create a vApp from VMware Cloud Director Container Service Extension server OVA file.
Configure the VMware Cloud Director Container Service Extension server vApp deployment lease
Power on the VMware Cloud Director Container Service Extension server.
Container Service Extension OVA deployment
Enter a vApp name, optionally a description, runtime lease and storage lease (should be no lease so that it does not suspend automatically), and click Next.
Select a virtual data center and review the default configuration for resources, compute policies, hardware, networking, and edit details where necessary.
In the Custom Properties window, configure the following settings:
VCD host: VMware Cloud Director URL
CSE service account’s username The username: CSE Admin user in the organization
CSE service account’s API Token: to generate API Token, login to provider session with CSE user which you created in Step:5 and then go to “User Preferences” and click on “NEW” in “ACCESS Tokens” section (When you generate an API Access Token, you must copy the token, because it appears only once. After you click OK, you cannot retrieve this token again, you can only revoke it. )
CSE service account’s org: The organization that the user with the CSE Admin role belongs to, and that the VMware Cloud Director Container Service Extension server deploys to.
CSE service vApp’s org: Name of the provider org where CSE app will be deployed
In the Virtual Applications tab, in the bottom left of the vApp, click Actions > Power > Start. this completes the vApp creation from the VMware Cloud Director Container Service Extension server OVA file. This task is the final step for service providers to perform before the VMware Cloud Director Container Service Extension server can operate and start provisioning Tanzu Kubernetes Clusters.
CSE 4.0 is packed with capabilities that address and attract developer personas with an improved feature set and simplified cluster lifecycle management. Users can now build and upgrade versions, resize, and delete K8s clusters directly from the UI making it simpler and faster to accomplish tasks than before. This completes provider section of Container Service extension in next blog post i will write about Tenant workflow.
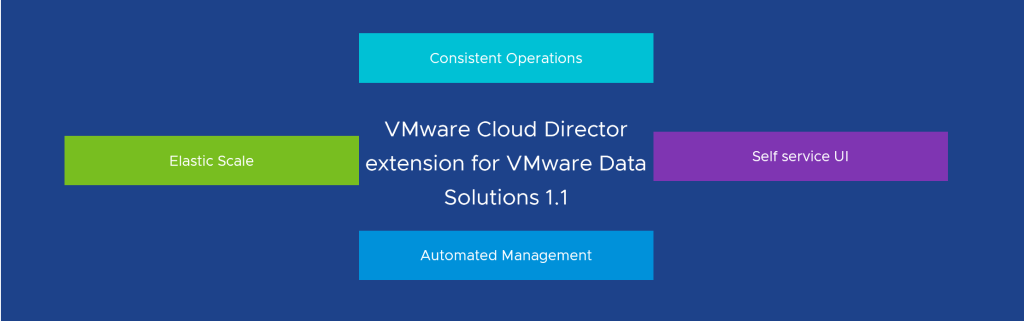
VMware Cloud Directorextension forVMware Data Solutions is a plug-in for VMware Cloud Director (VCD) that enables cloud providers expand their multi-tenant cloud infrastructure platform to deliver a portfolio of on-demand caching, messaging and database software services at massive scale. This brings in new opportunity for our Cloud Providers to offer additional cloud native developer services in addition to the VCD powered Infrastructure-as-a-Service (IaaS).
VMware Cloud Director extension for Data Solutions offers a simple tenant-facing self-service UI for the lifecycle management of below Tanzu data services with a single view across multiple instances, and with URL to individual instances for service specific management.
Tenant Self-Service Access to Data Solutions
Tenant users can access VMware Cloud Director extension for Data Solutions from VMware Cloud Director tenant portal
before tenant user can deploy any of the above solution, he/she must need to prepare their Tanzu K8s clusters deployed by CSE, basically when you click on Install Operator for a Kubernetes cluster for VMware Cloud Director extension for Data Solutions, Data Solutions operator is automatically installed to this cluster and this Data Solution Operator is for life cycle management of data services, to install operator simple log in to VMware Cloud Director extension for Data Solutions from VMware Cloud Director and then:
Click Settings > Kubernetes Clusters
Select the Kubernetes cluster on which you want to deploy Data Services
and click Install Operator.
It takes a few minutes for the status of the cluster to change to Active.
Deploy a Tanzu Data Services instance
Go to Solutions and choose your required solution and click on “Launch”
This will take you to “Instances” page there , enter the necessary details.
Enter the instance name.
Solution should have RabbitMQ selected
Select the Kubernetes cluster ( You can only select cluster which has Data Solutions Operator successfully installed
Select a solution template (T-Shirt sizes)
To customize, for example, to configure the instance RabbitMQ Management Console or Expose Load Balancer for AMQP click Show Advanced Settings and select appropriate option.
Monitor Instance Health using Grafana
Tanzu Kubernetes Grid provides cluster monitoring services by implementing the open source Prometheus and Grafana projects. Tenant can use the Grafana Portal to get insights about the state of the RabbitMQ nodes and runtime. For this to work, Grafana must be installed on CSE 4 Tanzu Cluster.
NOTE: Follow this link for Prometheus and Grafana installation on CSE Tanzu K8s clusters.
Connecting to RabbitMQ
Since during the deployment, i have exposed RMQ as “Expose Load Balancer for AMQP”, if you take a look in vcd load balancer configuration CSE automatically exposed RMQ as load balancer VIP and a NAT rule get created, so that you can access it from outside.
Provider Configuration
Before you start using VMware Cloud Director extension for Data Solutions, you must meet certain prerequisites:
VMware Cloud Director version 10.3.1 or later.
Container Service Extension version 4.0 or later to your VMware Cloud Director.
A client machine with MacOS or Linux, which has a network connectivity to VMware Cloud Director REST endpoint.
Verify that you have obtained a VMware Data Solutions account.
Detailed instruction of installing VMware Cloud Directorextension forVMware Data Solutions detailed Here.
VMware Cloud Director extension for VMware Data Solutions comes with zero additional cost to our cloud providers. Please note that the extension does not come with a cost, however, cloud providers need to report their service consumption of Data Services which do carry a cost.
VMware Chargeback not only enables metering and chargeback capabilities, but also provides visibility into infrastructure usage through performance and capacity dashboards for the Cloiud Providers as well as tenants.
To help Cloud Providers and tenants realise more value for every dollar they spend on infrastructure (ROI) (and in turn provide similar value to their tenants), our focus is to not only expand the coverage of services that can be priced in VMware Chargeback, but also to provide visibility into the cost of infrastructure to providers, and billing summary to organizations, clearly highlighting the cost incurred by various business units. but before we dive in further to know what’s new with this release, please note:
vRealize Operations Tenant App is now rebranded to VMware Chargeback.
VMware Chargeback is also now available as a SaaS offering, The Software-as-a-Service (SaaS) offering will be available as early access, with limited availability, with the purchase or trial of the VMware Cloud Director™ service. See, Announcing VMware Chargeback for Managed Service Providers Blog.
Creation of pricing policy based on chargeback strategy
Provider administrator can create one or more pricing policies based on how they want to chargeback their tenants. Based on the vCloud Director allocation models, each pricing policy is of the type, Allocation pool, Reservation pool, or Pay-As-You-Go
NOTE – The pricing policies apply to VMs at a minimum granularity of five minutes. The VMs that are created and deleted within the short span of five minutes will still be charged.
CPU Rate
Provider can charge the CPU rate based on GHz or vCPU Counts
Charge Period which indicates the frequency of charging and values are: Hourly, Daily Monthly
Charge Based on Power State indicates the pricing model based on which the charges are applied and values are: Always, Only when powered on, Powered on at least once
Default Base Rate any base rate that provider want to charge
Add Slab providers can optionally charge different rates depending on the number of vCPUs used
Fixed Cost Fixed costs do not depend on the units of charging
Memory Rate
Charge Period which indicates the frequency of charging and values are: Hourly, Daily Monthly
Charge Based on indicates the pricing model based on which the charge is applied, values are: Usage, Allocation and Maximum from usage and allocation
Charge Based on Power State indicates the pricing model based on which the charges are applied and values are: Always, Only when powered on, Powered on at least once
Default Base Rate any base rate that provider want to charge
Add Slab providers can optionally charge different rates depending on the memory allocated
Fixed Cost Fixed costs do not depend on the units of charging
Storage Rate
You can charge for storage either based on storage policies or independent of it.
This way of setting rates will be deprecated in the future release and it is advisable to instead use the Storage Policy option.
Select the Storage Policy Name from the drop-down menu.
Charge Period indicates the frequency of charging and values are: Hourly, Daily Monthly
Charge Based on indicates the pricing model based on which the charge is applied. You can charge for used storage or configured storage of the VMs
Charge Based on Power State This decides if the charge should be applied based on the power state of the VM and values are: Always, Only when powered on, Powered on at least once
Add Slab you can optionally charge different rates depending on the storage allocated
Network Rate
Enter the External Network Transmit and External Network Receive rates.
Note: If your network is backed by NSX-T, you will be charged only for the network data transmit and network data receive.
Network Transmit Rate select the Change Period and enter the Default Base Rate as well as using slabs, you can optionally charge different rates depending on the network data consumed
Network Receive Rate select the Change Period and enter the Default Base Rate. as well as using slabs, you can optionally charge different rates depending on the network data consumed. Enter valid numbers for Base Rate Slab and click Add Slab.
Advanced Network Rate
Under Edge Gateway Size, enter the base rates for the corresponding edge gateway sizes
Charge Period indicates the frequency of charging and values are: Hourly, Daily Monthly
Enter the Base Rate
Guest OS Rate
Use the Guest OS Rate to charge differently for different operating systems
Enter the Guest OS Name
Charge Period indicates the frequency of charging and values are: Hourly, Daily Monthly
Charge Based on Power State This decides if the charge should be applied based on the power state of the VM and values are: Always, Only when powered on, Powered on at least once
Enter the Base Rate
Cloud Director Availability
Cloud Director Availability is to set pricing for replications created from Cloud Director Availability
Replication SLA Profile – enter a replication policy name
Charge Period indicates the frequency of charging and values are: Hourly, Daily Monthly
Enter the Base Rate
You can also charge for the storage consumed by replication objects in the Storage Usage Charge section.This is used to set additional pricing for storage used by Cloud Director Availability replications in Cloud Director. Please note that the storage usage defined in this tab will be added additionally to the Storage Policy Base Rate
vCenter Tag Rate
This section is used for Any additional charges to be applied on the VMs based on their discovered Tags from vCenter. (Typical examples are Antivirus=true, SpecialSupport=true etc)
Enter the Tag Category and Tag Value
Charge based on Fixed Rate or
Charge based on Alternate Pricing Policy – Select the appropriate Pricing Policy
Charge Period indicates the frequency of charging and values are: Hourly, Daily Monthly
Charge Based on Power State This decides if the charge should be applied based on the power state of the VM and values are: Always, Only when powered on, Powered on at least once
Enter the Base Rate
VCD Metadata Rate
Use the VCD Metadata Rate to charge differently for different metadata set on vApps
NOTE- Metadata based prices are available in bills only if Enable Metadata option is enabled in vRealize Operations Management Pack for VMware Cloud Director.
Enter the Tag Category and Tag Value
Charge based on Fixed Rate or
Charge based on Alternate Pricing Policy – Select the appropriate Pricing Policy
Charge Period indicates the frequency of charging and values are: Hourly, Daily Monthly
Charge Based on Power State This decides if the charge should be applied based on the power state of the VM and values are: Always, Only when powered on, Powered on at least once
Enter the Base Rate
One Time Fixed Cost
One time fixed cost used to charge for One time incidental charges on Virtual machines, such as creation/Setup charges, or charges for one off incidents like installation of a patch. These costs do not repeat on a recurring basis.
For values follow VCD METADATA and vCenter Tag section.
RateFactors
Rate factors are used to either bump up or discount the prices either against individual resources consumed by the Virtual Machines, or whole charges against the Virtual Machine. Some examples are:
Increase CPU rate by 20% (Factor 1.2) for all VMs tagged with CPUOptimized=true
Discount overall charge on VM by 50% (Factor 0.5) for all Vms tagged with PromotionalVM=True
VCD Metadata
enter the Tag Key and Tag Value
Change the price of – Total, vCPU, Memory and Storage
By applying a factor of – increase or decrease the price by entering a valid number
vCenter Tag
enter the Tag Key and Tag Value
Change the price of – Total, vCPU, Memory and Storage
By applying a factor of – increase or decrease the price by entering a valid number
TanzuKubernetesClusters
This section will be used to charge for Tanzu K8s clusters and objects.
Cluster Fixed Cost
Charge Period indicates the frequency of charging and values are: Hourly, Daily Monthly
Fixed Cost Fixed costs do not depend on the units of charging
Cluster CPU Rate
Charge Period indicates the frequency of charging and values are: Hourly, Daily Monthly
Charge Based on this decides if the charge should be applied based on Usage or Allocation
Default Base Rate(per ghz)
Cluster Memory Rate
Charge Period indicates the frequency of charging and values are: Hourly, Daily Monthly
Charge Based on this decides if the charge should be applied based on Usage or Allocation
Default Base Rate(per gb)
Additional Fixed Cost
You can use Additional Fixed Cost section to charge at the Org-VDC level. You can use this for charges such as overall tax, overall discounts, and so on. The charges can be applied to selective Org-VDCs based on Org-VDC metadata.
Fixed Cost
Charge Period indicates the frequency of charging and values are: Hourly, Daily Monthly
Fixed Cost
VCD Metadata – enter the Tag Key and Tag Value
VCD Metadata One Time – enter the Tag Key and Tag Value
Apply Policy
Cloud Director Charge Back provides flexibility to the Service Providers to map the created pricing policies with specific organization vDC. By doing this, the service provider can holistically define how each of their customers can be charged based on resource types.
Bills
Every tenant/customer of service provider can see/review their bills using the Cloud Director Charge Back app. Service Provider administrator can generate bills for a tenant by selecting a specific resource and a pricing policy that must be applied for a defined period and can also log in to review the bill details.
This completes the feature demonstration available with Cloud Director Charge back. Go ahead and deploy and add native charge back power to your Cloud.
AI/ML—short for artificial intelligence (AI) and machine learning (ML)—represents an important evolution in computer science and data processing that is quickly transforming a vast array of industries.
Why is AI/ML important?
it’s no secret that data is an increasingly important business asset, with the amount of data generated and stored globally growing at an exponential rate. Of course, collecting data is pointless if you don’t do anything with it, but these enormous floods of data are simply unmanageable without automated systems to help.
Artificial intelligence, machine learning and deep learning give organizations a way to extract value out of the troves of data they collect, delivering business insights, automating tasks and advancing system capabilities. AI/ML has the potential to transform all aspects of a business by helping them achieve measurable outcomes including:
Increasing customer satisfaction
Offering differentiated digital services
Optimizing existing business services
Automating business operations
Increasing revenue
Reducing costs
As modern applications become more prolific, Cloud Providers need to address the increasing customer demand for accelerated computing that typically requires large volumes of multiple, simultaneous computation that can be met with GPU capability.
Cloud Providers can now leverage vSphere support for NVIDIA GPUs and NVIDIA AI Enterprise (a cloud-native software suite for the development and deployment of AI and has been optimized and certified for VMware vSphere), This enables vSphere capabilities like vMotion from within Cloud Director to now deliver multi-tenancy GPU services which are key to maximizing GPU resource utilization. With Cloud Director support for the NVIDIA AI Enterprise software suite, customers now have access to best-in-class, GPU optimized AI frameworks and tools and to deliver compute intensive workloads including artificial intelligence (AI) or machine learning (ML) applications within their datacenters.
This solution with NVIDIA takes advantage of NVIDIA MIG (Multi-instance GPU) which supports spatial segmentation between workloads at the physical level inside a single device and is a big deal for multi-tenant environments driving better optimization of hardware and increased margins. Cloud Director is reliant on host pre-configuration for GPU services included in NVIDIA AI Enterprise which contains vGPU technology to enable deployment/configuration on hosts and GPU profiles.
Customers can self serve, manage and monitor their GPU accelerated hosts and virtual machines within Cloud Director. Cloud Providers are able to monitor (through vCloud API and UI dashboard) NVIDIA vGPU allocation, usage per VDC and per VM to optimize utilization and meter/bill (through vCloud API) NVIDIA vGPU usage averaged over a unit of time per tenant for tenant billing.
Provider Workflow
Add GPU devices to ESXi hosts in vCenter and install required drivers.
Verify vGPU profiles are visible by going in to vCD provider portal → Resources → Infrastructure Resources → vGPU Profiles
Edit vGPU profiles to provide necessary tenant facing instructions and a tenant facing name to each vGPU profile. (Optional)
Create a PVDC backed by one or more clusters having GPU hosts in vCenter.
In provider portal → Cloud Resources → vGPU Policies → Create a new vGPU policy by following the wizards steps.
Tenant Workflow
When you create a vGPU policy, it is not visible to tenants. You can publish a vGPU policy to an organization VDC to make it available to tenants.
Publishing a vGPU policy to an organization VDC makes the policy visible to tenants. The tenant can select the policy when they create a new standalone VM or a VM from a template, edit a VM, add a VM to a vApp, and create a vApp from a vApp template. You cannot delete a vGPU policy that is available to tenants.
Publish the vGPU policy to one or more tenant VDCs similar to the way we publish sizing and placement policies.
Create a new VM or instantiate a VM from template. In vGPU enabled VDCs, tenants can now select a vGPU policy
Cloud Director not only allows for VMs but providers can also leverage cloud director’s Container Service Extension to offer GPU enabled Tanzu Kubernetes Clusters.
Step-by-Step Configuration
Below video covers step-by-step process of configuring provider and tenant side of configuration as well as deploying Tensor flow GPU in to a VM.